Fall Ideas

Fall starts on Saturday.  And while it's not terribly cool here in the Lone Star State, it's almost 20 degrees cooler than it was two weeks ago.  Sometimes you just have to be thankful for the little things!

So I've been contemplating my fall decorating, which I plan to do this weekend.  Here's a quick recap of how it looked here.  I've made SO many changes to this room.  The sofa's been moved.  We added a media cabinet.  And some color.  All good changes.  But I'm thinking about to work these in with my existing decor.  Because admittedly, after spending the last month buying new Christmas ornaments (more on that in another post!), I'm feeling more than a little thrifty at the thought of having to invest a significant amount more  in fall decor.  Particularly since some of my ooh's and ahh's are way more than what I spend even if I had the money.  Case in point, take a look at this (and forgive the overly wide photo, but I wanted you to actually be able to see the runner!):
Source: horchow.com via Elona on Pinterest
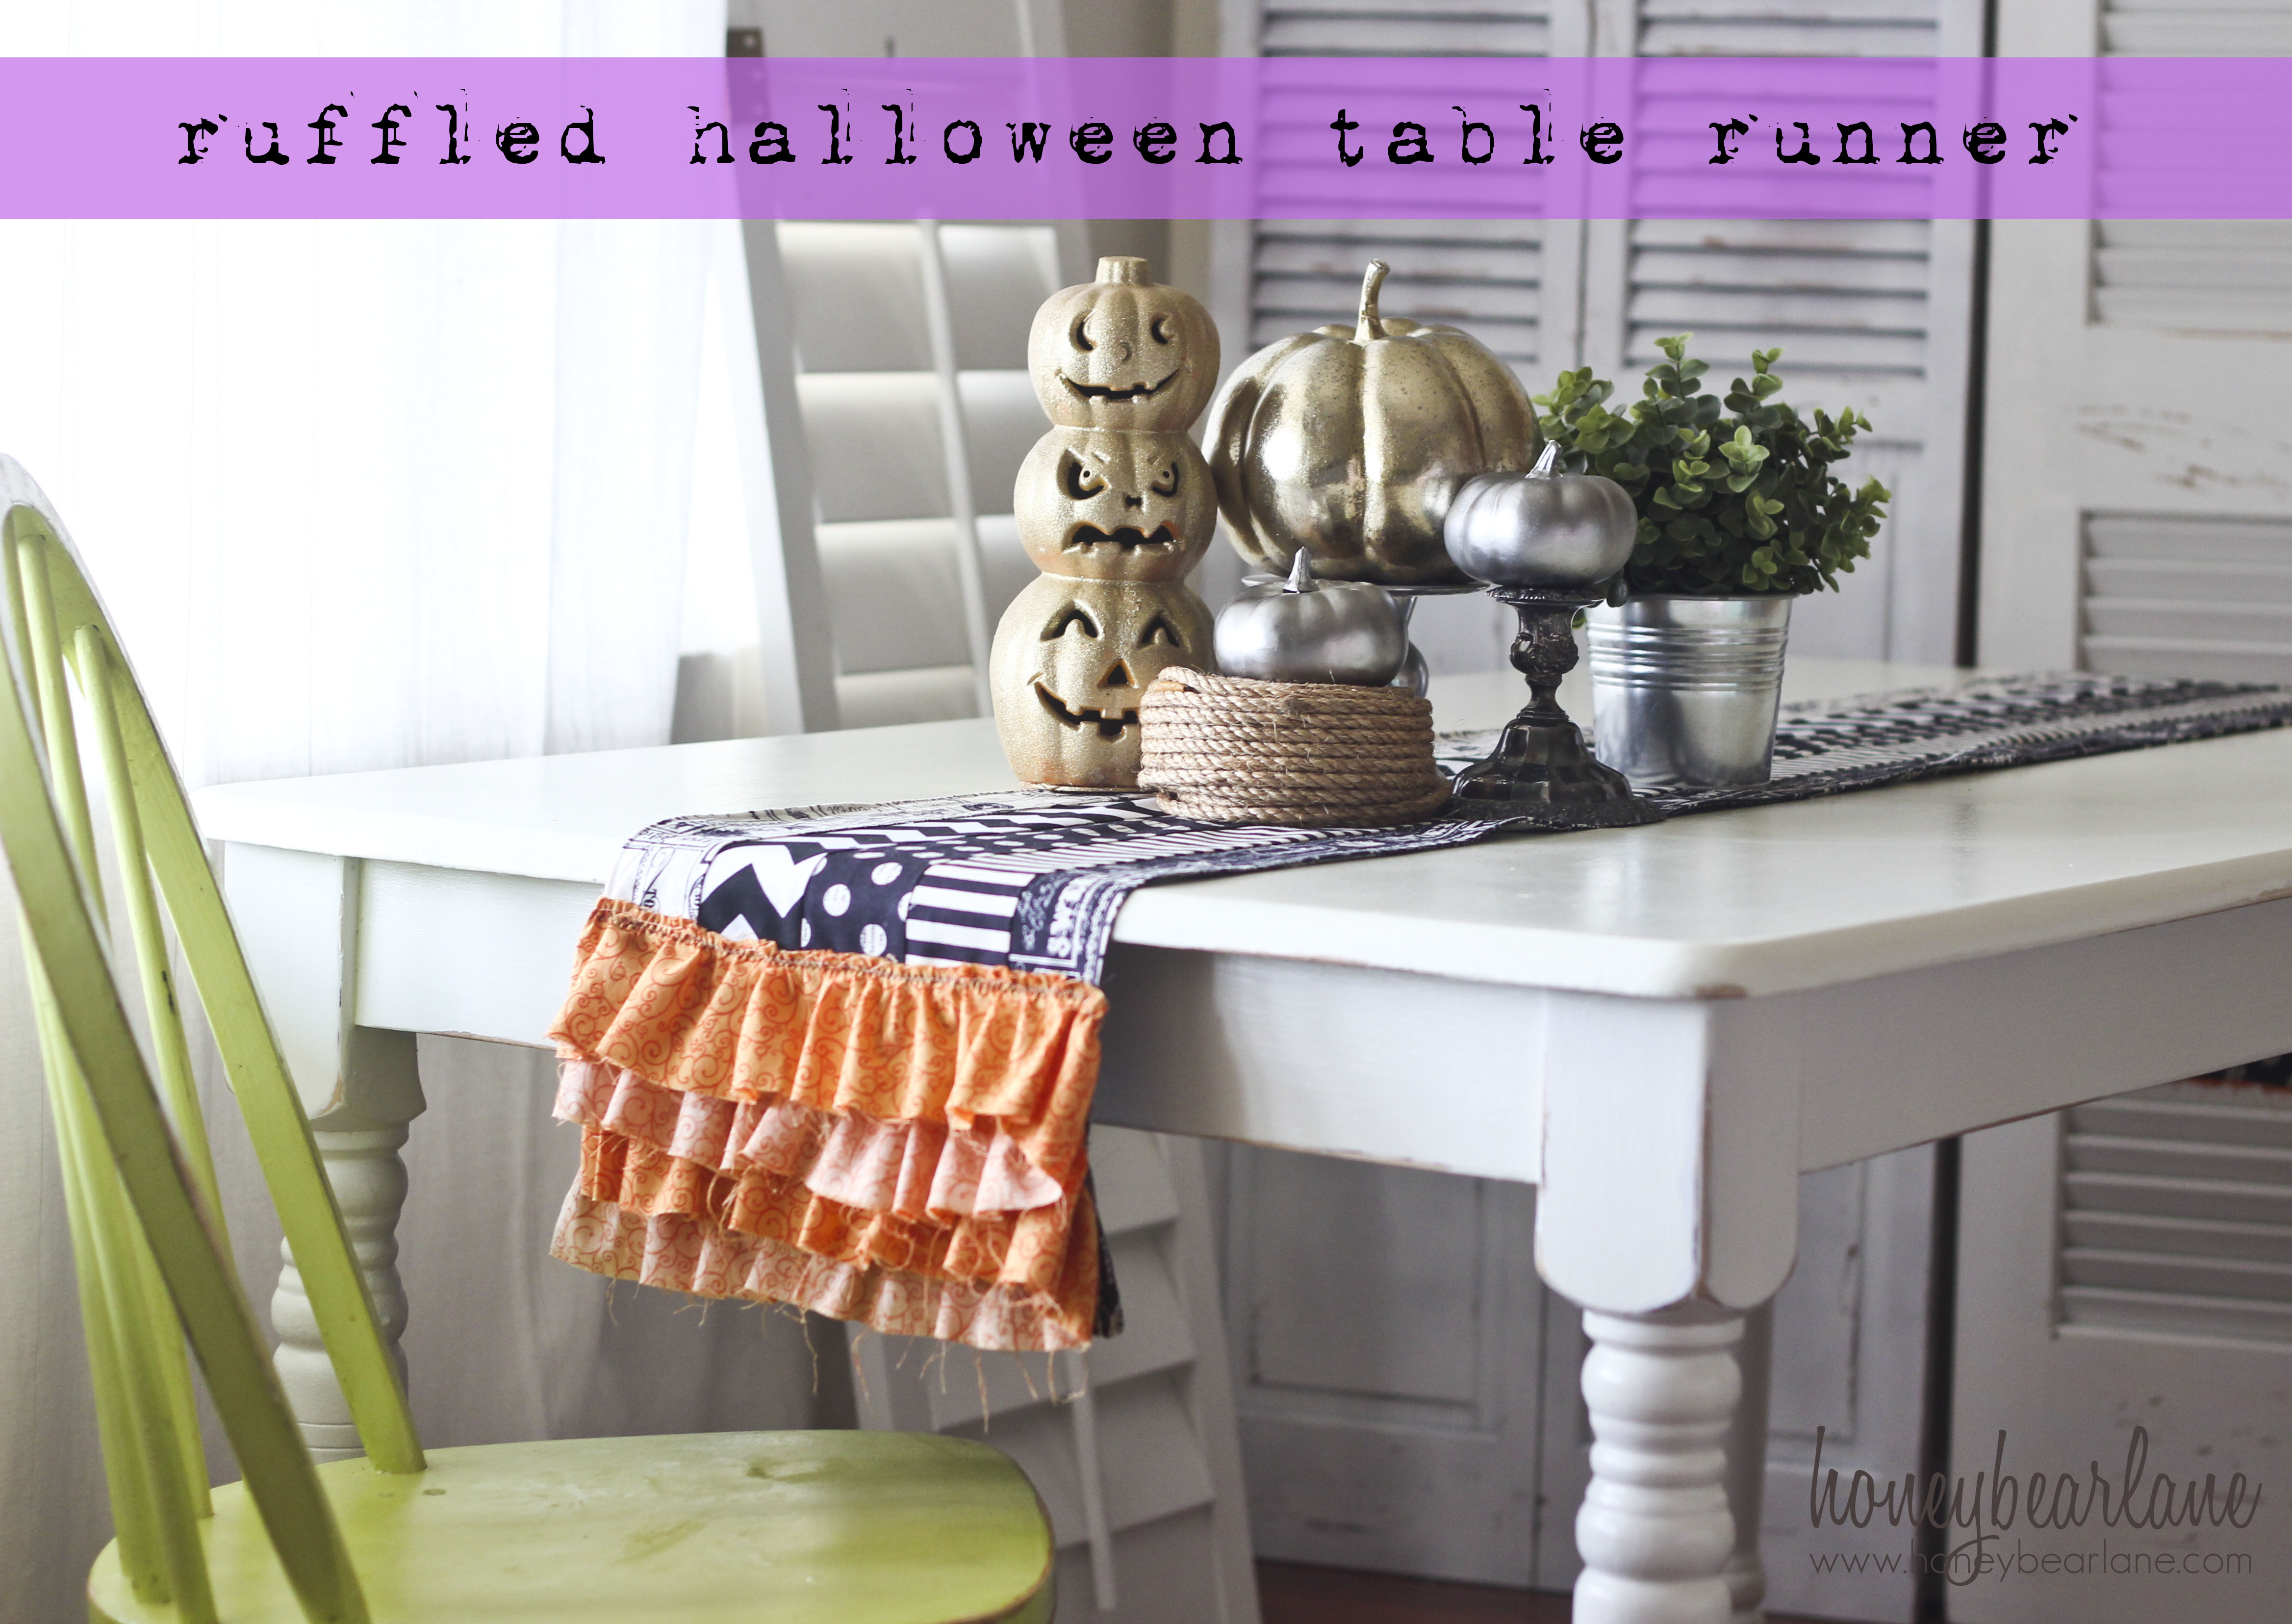
So pretty, right?!  So are the prices.  The 17x72 table runner is $190.  The place mats are $170 each!  So I was surfing some of my favorite blogs (that you can always scroll through as well, just click on the links on the right side of the page) and came across this post
The ruffle on this runner really reminds me of the one on the Horchow site.  And while I would want mine finished and not colorful, lol, it was a great inspiration for me to do what I do best sometimes - copy!!  So that's what my goal is this weekend.  I know I can make this table runner for a fraction of the cost.  But I'll be skipping the place mats.  Totally impractical for my family.  I think this is going to look great in my dining room!


Here's a peak at pumpkin I found that I had to have.  I did purchase it, but it was on sale at Hobby Lobby, and it really matches my living room well!  This is a glass pumpkin, and more than likely, it's going to go in my new media cabinet (and looking at this fireplace really makes me want to paint the mantle the same white I used on my media cabinet...since it's a rental though, I guess I'll refrain...)  You can also see the white cord keeper in the background.  Ahem.  Another project that's not quite done.  The Builder has promised to have it painted the same color as the wall by Christmas so that it will blend into the wall.  While I'm sure you'll still technically be able to see it, it's still way better than all the chords that were dangling down from behind the TV.  So I'll take the lesser of the two evils.


Here are a couple of other pictures I've pinned on Pinterest that I'm using for inspiration:


I'm really looking forward to setting up my living and dining room for Fall!

The Media Cabinet

We got rid of our particle board media cabinet after we moved out of our apartment that we had rented when we first moved here.  I had originally bought it at Target when it was on sale, and we'd had it for about 5 years.  It wasn't in horrible shape, but it was black, and didn't fit the 36" TV we had purchased afterwards.  The house we were moving into had no space for it and the only place for the huge TV was the fireplace hearth (not my first choice since it mean we couldn't use it!). Then we upgraded to a flat screen TV that went above the fireplace, and since the room was really overcrowded with my large sectional sofa, we didn't even contemplate another media cabinet

When we move to this house last year, the TV went back above the fireplace because it made the most sense.  But I've been really tired of cords and junk surrounding my fireplace.  Also, there is no storage in the living room.  So we started looking at media cabinets to store the electronics and our 'stuff'.  I saw this media cabinet at Pottery Barn and knew it was what I was looking for:

Pretty, right?  Well, it should be.  Just the tower is $949!!  Don't forget the $75 shipping and sales tax - 8.25%  in my county.  Add insult to injury, I realistically need 2 of the towers.  My calculator puts that at $2204.60 for the total cost.  YIKES!

Of course, I knew The Builder could make it for a fraction of the cost.  And to seal the deal, Ana White came out with the plans for it!!  How could we not make this?
Source: ana-white.com via Elona on Pinterest

The total cost of my supplies was $190 - for TWO!!.  That's the lumber, hardware, supplies and paint.  We used oak plywood, which technically wasn't necessary because we're painting ours.  I would have adored to have stained it to let the beautiful wood grain come through, but my sofa is large and brown and it swallows up the room. It wouldn't have saved us much to have downgraded either.  We chose a high gloss so it will clean easily.  I have no doubt it will get much use from our little people and so it needed to be a kid friendly finish.  The Euro hinges that the plans suggested are great.  I didn't want a lot of hardware showing.  The handles are something I found at Pier 1 last spring (when we first started talking about building a media cabinet) and are absolutely perfect for this room.


A few tips we discovered:  Home Depot has better prices on Euro hinges than Lowe's - Lowe's sold them per piece at the same cost we bought a pair for at Home Depot.  However, Lowe's had better quality lumber for some of the sizes we needed.  I'm lucky enough to have both stores nearby.  Also, we wanted to combine the two towers into one media cabinet.  Since our TV is mounted to the wall, there was no need for the other media piece and I felt two separate towers would look funny side by side.  Thankfully, The Builder is...well, the builder!!  So he was able to easily modify Ana's plans to join the two together.  He also put in vents in the back so the electronics can breath and not overheat.  We've had this problem in the past with the other media cabinet we used.

I love how this turned out!  There's one more shelf that needs to go in, and of course, accessories, but I think it turned out just beautiful!

Pillows, Pillows, and More Pillows


Throw pillows that is!  This weekend The Builder got started on our new media cabinet (which is almost done!) for our living room and I knew that the pillows I bought last year to go on the sofa were all wrong for the room.  I think they became wrong the minute I put up the aqua drapes I got at Ikea.  The pillows themselves are only about a year old and it good condition.  I really didn't want to have to go out and try to find pillows to coordinate.  First of all, throw pillows are EXPENSIVE!  Seriously, retailers have a very high opinion of throw pillows when they run $30+ for a single pillow (and why are the ones I always really like closer to the $45 price?!).  The original 3 came from Garden Ridge last year for about $15 a piece, which is about where I top out for throw pillows.  So this go around, I decided to make pillow covers in fabric of my choosing.  I also like the idea of being able to to unzip them and throw them in the laundry when they start getting dingy.  And with kids, this is a common occurrence in my house.  I inserted invisible zippers to make them easy to pull off and throw in the laundry.  I also decided to mix up the fabrics a little bit.  The fabric was on sale at fabric.com which was an added bonus.  I bought a yard of each and had enough to do two 16 inch throw pillows in the floral fabric and one of geometric print for the large pillows.  I estimate the large pillow was close to 20 inches.  If you look at the picture at the top of the page, you can see the piping I inserted on all the pillows.  I almost left it off.  I didn't have any on hand when I started sewing up the pillows on Sunday, and it started pouring rain Saturday afternoon.  I don't like driving out in the rain with all the crazy people, so I seriously debated leaving the piping off.  Ultimately, I was also short a large zipper for the geometric print, which necessitated a trip to Joann's and thus I bought the piping too.  Yes, I could have just made coordinating piping, but it's one of those tedious projects that I really don't like to do.  I'm happy with the purchased piping and The Builder likes it too.  I'm actually thinking I would like several more throw pillows on the sofa, but I didn't buy extra fabric, so I'll have to give that some thought.  I could do solid pillows.  But that would be later on down the road.  Right now I'm happy with this just as it is.

I didn't just finish the throw pillows though, I also made another pillow for our bed.  Unfortunately, I'm not sure I like it :-/  This is the Euro Pillow sham I made for our bed.  I love the quilted fabric and how it turned out.  I'm not thrilled with the color.  It's more of a yellow based white than a grey based white.  None of the white toned fabrics in the bedroom have a yellow tone to them, so I'm not sure this really works.  I'm going to finish the other pillows that go on the bed (I seem to be having a pillow fetish for our bed these days!) before I make my final decision.  I have the pillow form and fabric to make one more, and this one wasn't difficult by any stretch of the imagination, but I'm not sure it's worth the time if it really won't work in this room.  I'm working on my Vera Wang pillow inspiration next.  This was a $45 pillow that was sold at Kohl's.  That was the sale price.  Seriously, WHO buys a throw pillow on sale at that price?!  I have the pillow form already.  The fabric was $6 from fabric.com (I really got my money's worth on that fabric order!).  I bought the coordinating felt at Joann's for 34 cents.  Altogether, my copy cat pillow will cost $7.  When it's ready, I'll let you be the judge!

Ok, sneak peak of the media cabinet The Builder has been working on this weekend!