Showing posts with label Living Room. Show all posts

Living Room Updated

Merry Christmas! This post is a little late, but I wanted to get it in before the new year. 

Our new sofa actually arrived the first week of November, far ahead of the December arrival date they originally estimated. But once we got the sofa in, we realized how empty the living room really looked. The old sofa didn't allow for end tables, a coffee table, or any type of media console. So the room looked big and empty. 

We decided to do the media console first since we needed to move the furniture around and the TV was no longer going up on the wall. We found plans on Rogue Engineer for a corner media center. Only I don't have any corners that it would work on. Thankfully The Builder was able to modify the plans to meet our needs, including extending the length. 

I originally wanted to build it all in walnut. We've got a fabulous local lumber yard where I can get just about anything I can dream of, including exotic woods. But solid walnut would have run us well over $600, which wasn't in the budget. Ultimately we did the frame out of pine, but the top from walnut veneer and used a 2x10 piece of walnut for the trim.  The veneer and one walnut board still cost around $100. The remaining pine was about $135. I still feel that for a solid piece of furniture, the price is excellent.  I need to get a better picture of the cross braces, which turned out beautiful. The Builder mitered the cross section together and it turned out perfect.

One thing we learned after I did the desk for my sons' room is that wood conditioner is really a necessity when you plan to stain. It comes out much more smooth and even, with no weird blotchy patches (even when you're being super careful!). The grain on this walnut is absolutely stunning and the photo doesn't do it justice.

So the media center being completed at least allowed us to the furniture around and set up the room. But it still left a dance floor in the middle of the room (my kids made sure to prove this point, lol). Also, with the linen colored sofa, I didn't want anyone eating or drinking on the sofa. We really needed a place to set food down and eat at while we're watching football TV.  It was a given that this would be another build for The Builder. We had recently priced coffee tables made from MDF and not only were we disappointed in the materials, but the MDF didn't seem to have any cost saving purposes. And again, we plan to load our coffee table with snacks to watch football TV and MDF is not family friendly.  We'd just finished the media console when Shanty 2 Chic  came out with a YouTube video for a new coffee table. Ironically, they scaled it down to be a smaller coffee table, but we needed something longer. So again, The Builder took the plans from their website and customized them to our needs. They call this the DIY 8 Board Farmhouse Coffee Table but we ended up using about 10 since we made it longer and ultimately a little wider. But again, I LOVE this coffee table.  It's solid and really compliments the media console. 
This is also made from pine as the budget didn't allow for more walnut, but surprisingly, they coordinate together beautifully. For now, I don't have any plans to add baskets or storage on the shelf. I don't like a lot of clutter and my kids will pile baskets sky high with junk. I love the clean lines, so this is how I plan to keep it. Altogether, we spent about $70 on the lumber. Another great investment for a solid piece of furniture. 

So let's talk about the elephant in the room. The wonky end tables on either side of the sofa. The one on the right was built to match the high arms on the old sofa. This is after The Builder cut it down. The table on the left is a LACK table from Ikea that we were sort of using as a coffee table over the summer. I say kind of because it was a pain to walk around, didn't match the room, and held next to nothing. I bought the lamps last year when Home Goods opened near me. They match our new living room PERFECTLY as if I had bought them to go with this furniture. So we've tucked the LACK table between the armchair and sofa temporarily so the lamps can be used for task lighting. 

Ultimately, we have one more build for this room, and that's the end tables. We plan to go with the Lybrook Side Tables from Rogue Engineer to coordinate with the media console and coffee table.  These side tables have the same X braces that I like for the rustic charm. We've got enough of the walnut veneer left to do both tops from so they'll really coordinate with the other pieces. I don't want large side tables because I know my kids will pile stuff on them. I like that each table should cost about $20.

If you've been adding up the numbers along the way, we're roughly at $345 for ALL four pieces. My favorite inspiration store, Pottery Barn, has some similarly styled pieces (although this time, the inspiration started with the plans for the media console and I only took a peek at Pottery Barn's website to see what overpriced items they might compare to!). 
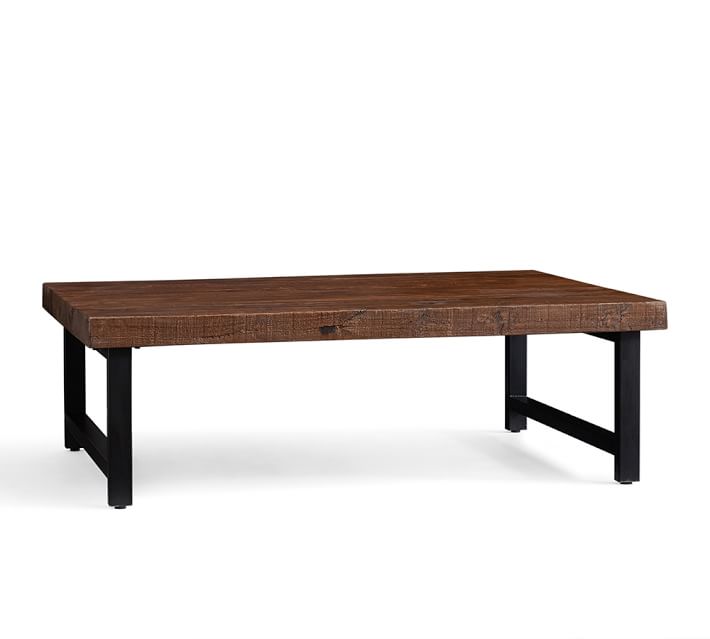
So this is not a duplicate. There are no cross braces. There isn't a bottom shelf. But it's reclaimed pine and solid wood.  On sale, it can be yours - for $824. Seriously.  And this isn't something I would actually buy. It's almost too plain and I don't like that it's missing the shelf. I'm not sure if they make coordinating end tables to go with this but the price of this alone is outside of my budget. They actually have some others that I like better, but the cost is even higher. 

So I feel very fortunate that The Builder was able to build something I that I really love.

I'm not sure when we'll get the side tables started, but they're on the top of the list for our spring projects. Our spring list of things to do is quickly getting long. Our oldest son is graduating in June and we have family coming out again. This go around we don't have any major projects, like master bathroom's or kitchens, but we do have some cosmetic things to get done.  And these end tables!


Fall Decor Updates


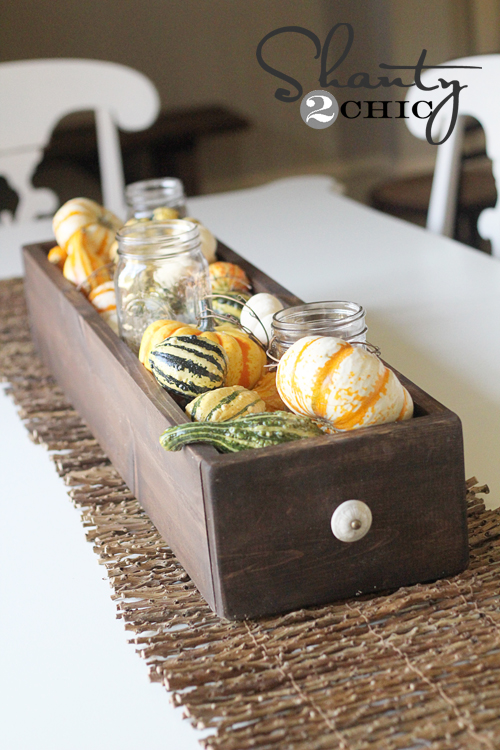
Shanty 2 Chic's Fall Table Scape
So even though fall in Texas is almost non-existent (I promise, my electric bill shows me summer is still going strong every September!) by mid-August, I'm ready for the cooler weather and a change of scenery.  I've been stalking browsing Pinterest this week, and it's clear I'm not the only one who feels this way!  I love my tiered cake stand for Spring and Summer, but I was ready to switch that out too.  Last year, I pinned this on my craft board:

So cute, right?!

My Version
I wanted to combine it with a candle votive idea I also found on Pinterest (which I thought I pinned but now can't find to share!) and then some cute Fall fill I found at Hobby Lobby.  I followed the directions on Shanty 2 Chic ...for the most part. When I stopped in to Lowes, I wasn't in my mini van. My car does NOT hold building supplies as easily as my mini van! Since I was already out running errands, I didn't want to go home and switch out cars.  So instead of the two wood pieces that the directions tell you to purchase, I bought some pre-cut pieces that would fit in my car easier.  This resulted in my table box being 36" instead of the 30" in the directions.  Because I'm too lazy to cut off the six inches.  I can live with that.

Since I was already at Lowe's for the wood, I went ahead and purchased some handles while I was there.  I might have gotten them slightly cheaper at Hobby Lobby, but I really liked the ones I found at Lowe's, and $2.97 per handle wasn't going to break my budget. The web site estimates the cost of the project to be $15.  I spent $21.  It would have been more if I hadn't had finishing nails, wood glue, and stain already in my supplies.  I don't know if those items were figured into the overall cost on Shanty 2 Chic either.  When I go to my favorite decor stores - Kirkland Home, Home Goods, Kohl's, or World Market, all of their decor items are significantly more.  I'm happy with my $21.


But my center piece wasn't the only project I've been working on.  My living room got a do-over this year too.
Last year, the wall color was darker, the TV was still over the fireplace, and my sofa was divided.  Do you remember this post? Last year was a step in the right direction, but looking back, it wasn't...done.  The brown vase is back on the mantle, but the pretty jewel toned one is the dining room. The TV is off of the wall above the fireplace, which lets me put real decor up, not some vines (although vines are what worked best last year). The flower vase on the hearth won't be staying, I just having figured out if it's staying in the room during fall or if it's going to be tucked away until after Christmas.  I really think I'm leaning towards put away until after Christmas, because it seems to spring like to me.

After many tries of re-arranging the sofa, this is the one that works best.  You notice there is no longer the big blank space above the sofa as there was in the last post!  It's not done yet though.  I have a lot more photo's I want to hang up.  Some of them need new frames, like my parents wedding photo (the frame is falling apart).  Some of them need new mats - like the picture of my son at the Long Beach Aquarium.  Some just need...frames!  So the 'holes' are left intentionally as I fill them in with photo's.  And I love that the TV is no longer the focal point. :)


I completed a fall wreath this weekend too, but the initial photo's were blurry, and it's too late to take new photo's.  So more for another day...


Project 2

more tan paint...
When we first looked at this home as a rental, one of the things that stuck out to me, in a good way, was the paint colors.  There was a monochromatic pallet of tan, beige, and cream on the walls that I could make work with my existing furniture (a far, far cry from the pink marble, carpet, tile and light fixtures in one of our rental homes in CA).  And really, moving into a home with a real color pallet and not renters white is a huge plus.

Fast forward three years.  We are now the home owners (YEAH!!) and I am far, far less in love with the paint scheme.  Particularly the tan.  With my chocolate brown sofa, it made the living room look smaller than it really was and cave-ish.  It's actually been a very hard color to work with since my sofa is huge and dark.  

But not anymore!!

The Builder and I spent out first two days of a our three day weekend scraping down the heavily textured walls (a huge pet peeve for us both!) and toning down those tan walls.  With the vaulted ceiling, this was no little project.  It also meant taking down all the decor and electronics.  A chore all in it's own.
left - old paint
right - new paint

With the walls freshly painted, we also decided it was time to change up the layout of our furniture.  We had put our flat screen TV over the fireplace when we moved because, well, we thought it would look best there.  And then we tried to maneuver our large, u-shaped sectional every way imaginable to make it work with the TV placement.  Eventually we put the chase lounge in the corner and lived with it like that for the past year or so.  

We've never been happy with it.

So last weekend we finally decided it was time to look at some other placement options for the TV.  At first I thought I wanted it on the big blank wall on the left side of the living room.  But again, that didn't work well with the sofa for how it's built (and getting rid of the sofa is just not an option at this point).  After much deliberation, we've determined The Builder is going to have make the matching media console that goes with the cabinet that he built last year.  No more TV on the wall.  But once we arranged the sofa and end tables based on where the TV will eventually (because it's temporarily back up on the wall over the media cabinet) the room flows beautifully now and seems so spacious.  

Ready for the update?
So we're not quite done in here.  As you can see, we haven't put any of the artwork back up the wall behind the sofa.  That's because I want a gallery wall, and I'm still working on the layout.  However I did get the artwork over the fireplace, so we have a start!  It's so nice to see my sofa back together they way it was designed to be.  This seating really works best with our large family.

I still love this rug I bought at Country Door a year or so ago.  I only wish I had bought the next size up.  The colors are so pretty in this room though.  And since we're not changing the tile (which is crazy cold in the winter months!) a rug is really a necessity.

I've been contemplating paining the bricks on my fireplace.  I don't know, I'm still on the fence about that.
Right now you can see the TV is back on the wall. This is the media cabinet that The Builder made last spring, which I LOVE. The plans came from Anna White's site, and there are plans for a matching media console, so it's one of the next building project we plan to tackle.  For now, the TV works here.  It's no higher than it was when it was above the fireplace.  I did hang the curtains higher to take advantage of the vaulted ceilings. I'm clearly going to have to buy new sheers because they are ridiculously short now that I've raised the curtain rod!  I'm fairly certain Ikea sells sheers this long as well, so I need to stop by after work.  I want to modify the turquoise colored curtain panel to have a decorative border.  The solid just looks blah to me.  Again, another project.
Loving this big blank wall!  I won't be putting the shelf back up.  It's too short now that the sofa is using all of the space.  It also collected an enormous amount of dust bunnies.  I've got lots of gallery wall layouts pinned on my Pinterest board, so I'm confident I can get this wall looking how I want.
Sorry for the dark photo on this one.  I didn't realize I had turned off the overhead light!  If you're sitting on the sofa, this is the view.  When we take the TV down, the cabinet will get moved back over to the left.  But for now, this is the best spot for the TV, and I don't want the cabinet not centered under the TV, so this is where it is for now.  My basket tower is crying out for an update!!  The dark colors just don't work anymore.  Yep, another project...

I'm also contemplating track lighting in here, since task lighting is next to impossible.  The Builder isn't thrilled about this, but this room gets dark in the late afternoon, even with the lighter color, and I would like more directional lighting than the ceiling fan offers.  Houston is HOT in the summer, so there's no way the ceiling fan light is coming down.  But additional light is really needed.

New Years Updates

So I've started off the new year with some small updates!  The first one is the rug.  I LOVE this rug.  I loved it when I saw it hanging on the wall in the The Country Door Catalog, I loved it on their web site.  Just plain loved it.  You know, except for the price...not such a fan of the price.

A few days after Christmas, the medium sized rug went on sale!  I really would have love the larger one but I'm just too practical. This is the same sized rug it's replacing, so I decided to go for it.  No regrets, I love love it even more in person.

I also added the grate above the cabinet.  This room has a vaulted ceiling which is great, because it opens up the whole room.  But it makes the cabinet look short, which has been bothering me.  The picture and the lanterns to the left hung higher, and I needed something to balance it out.  And texture.  I needed some more texture in the room.  The grate is a perfect addition!

Yes, I know, the cabinet isn't styled yet.  Baby steps.  The grate though.  It's perfect!  It's exactly what was needed to visually heighten the space.  I'm not sure yet if I'm going to put anything on top of the cabinet yet.  I was originally thinking some greenery would be nice...but now I'm not so sure.

I think accessorizing the cabinet will be next on the list of things to accomplish.  I think I'll go peruse Pinterest for a bit for ideas :)

Fall Ideas

Fall starts on Saturday.  And while it's not terribly cool here in the Lone Star State, it's almost 20 degrees cooler than it was two weeks ago.  Sometimes you just have to be thankful for the little things!

So I've been contemplating my fall decorating, which I plan to do this weekend.  Here's a quick recap of how it looked here.  I've made SO many changes to this room.  The sofa's been moved.  We added a media cabinet.  And some color.  All good changes.  But I'm thinking about to work these in with my existing decor.  Because admittedly, after spending the last month buying new Christmas ornaments (more on that in another post!), I'm feeling more than a little thrifty at the thought of having to invest a significant amount more  in fall decor.  Particularly since some of my ooh's and ahh's are way more than what I spend even if I had the money.  Case in point, take a look at this (and forgive the overly wide photo, but I wanted you to actually be able to see the runner!):
Source: horchow.com via Elona on Pinterest
So pretty, right?!  So are the prices.  The 17x72 table runner is $190.  The place mats are $170 each!  So I was surfing some of my favorite blogs (that you can always scroll through as well, just click on the links on the right side of the page) and came across this post
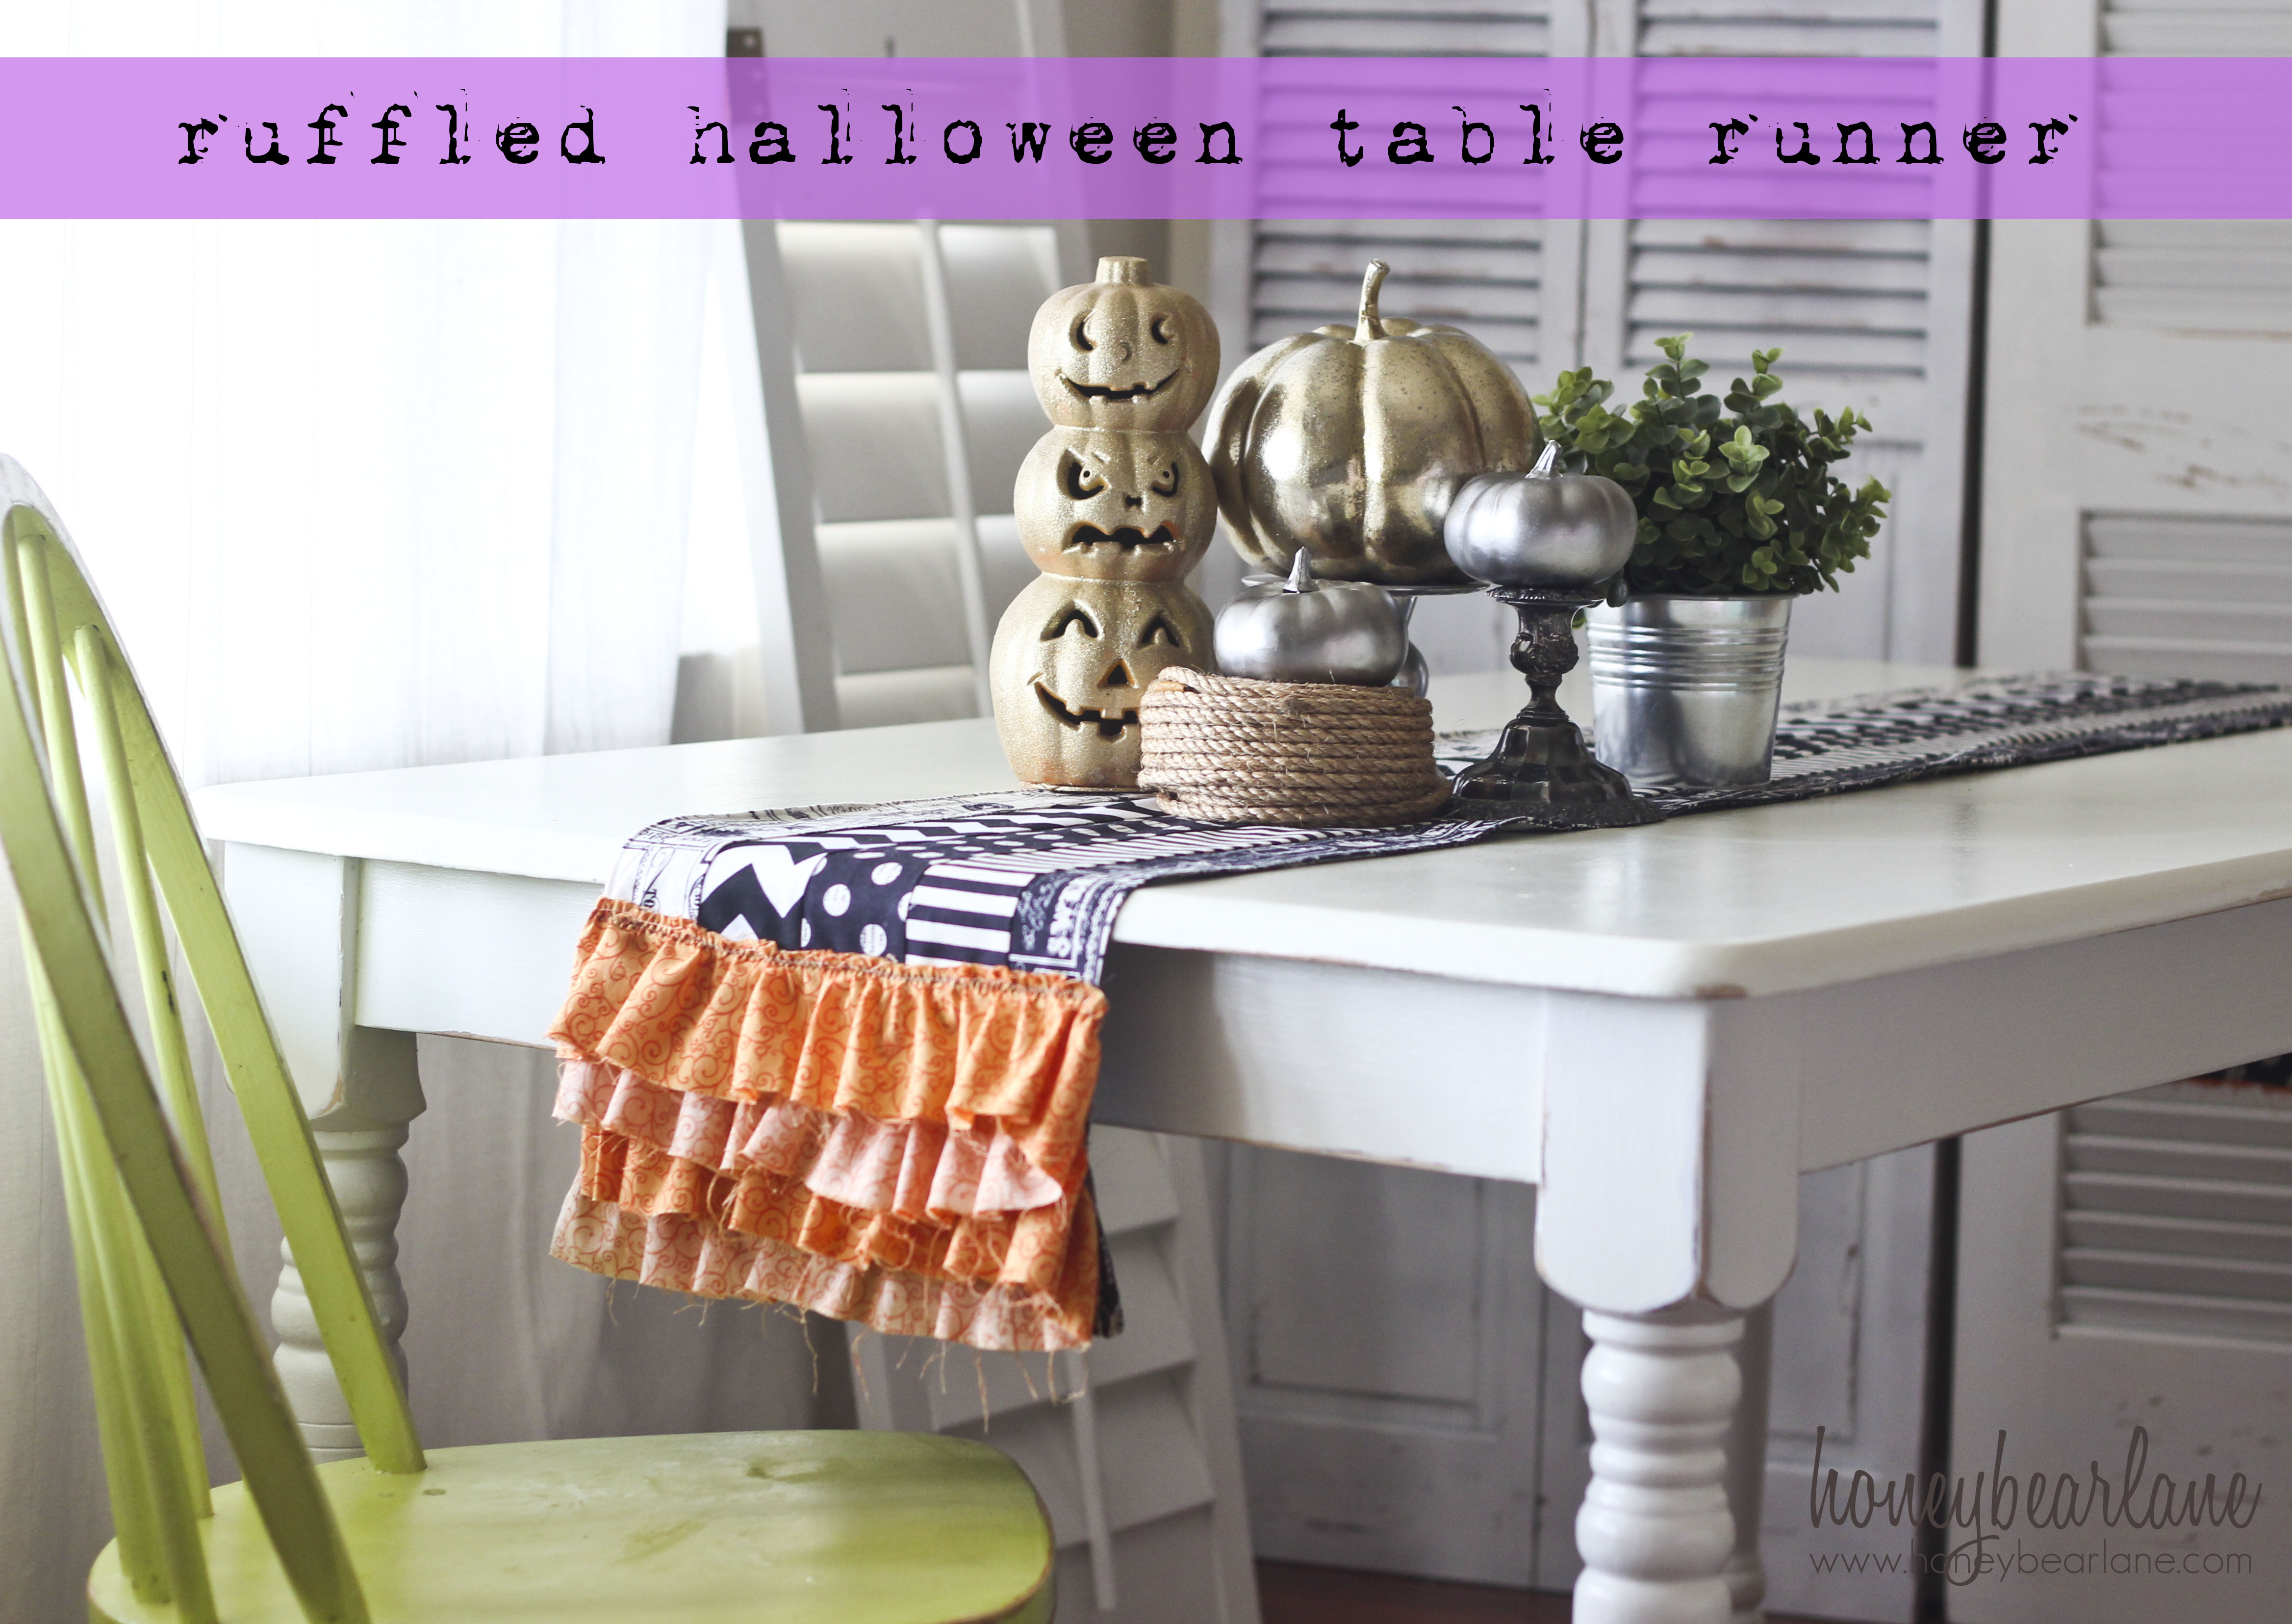
The ruffle on this runner really reminds me of the one on the Horchow site.  And while I would want mine finished and not colorful, lol, it was a great inspiration for me to do what I do best sometimes - copy!!  So that's what my goal is this weekend.  I know I can make this table runner for a fraction of the cost.  But I'll be skipping the place mats.  Totally impractical for my family.  I think this is going to look great in my dining room!


Here's a peak at pumpkin I found that I had to have.  I did purchase it, but it was on sale at Hobby Lobby, and it really matches my living room well!  This is a glass pumpkin, and more than likely, it's going to go in my new media cabinet (and looking at this fireplace really makes me want to paint the mantle the same white I used on my media cabinet...since it's a rental though, I guess I'll refrain...)  You can also see the white cord keeper in the background.  Ahem.  Another project that's not quite done.  The Builder has promised to have it painted the same color as the wall by Christmas so that it will blend into the wall.  While I'm sure you'll still technically be able to see it, it's still way better than all the chords that were dangling down from behind the TV.  So I'll take the lesser of the two evils.


Here are a couple of other pictures I've pinned on Pinterest that I'm using for inspiration:


I'm really looking forward to setting up my living and dining room for Fall!

The Media Cabinet

We got rid of our particle board media cabinet after we moved out of our apartment that we had rented when we first moved here.  I had originally bought it at Target when it was on sale, and we'd had it for about 5 years.  It wasn't in horrible shape, but it was black, and didn't fit the 36" TV we had purchased afterwards.  The house we were moving into had no space for it and the only place for the huge TV was the fireplace hearth (not my first choice since it mean we couldn't use it!). Then we upgraded to a flat screen TV that went above the fireplace, and since the room was really overcrowded with my large sectional sofa, we didn't even contemplate another media cabinet

When we move to this house last year, the TV went back above the fireplace because it made the most sense.  But I've been really tired of cords and junk surrounding my fireplace.  Also, there is no storage in the living room.  So we started looking at media cabinets to store the electronics and our 'stuff'.  I saw this media cabinet at Pottery Barn and knew it was what I was looking for:

Pretty, right?  Well, it should be.  Just the tower is $949!!  Don't forget the $75 shipping and sales tax - 8.25%  in my county.  Add insult to injury, I realistically need 2 of the towers.  My calculator puts that at $2204.60 for the total cost.  YIKES!

Of course, I knew The Builder could make it for a fraction of the cost.  And to seal the deal, Ana White came out with the plans for it!!  How could we not make this?
Source: ana-white.com via Elona on Pinterest

The total cost of my supplies was $190 - for TWO!!.  That's the lumber, hardware, supplies and paint.  We used oak plywood, which technically wasn't necessary because we're painting ours.  I would have adored to have stained it to let the beautiful wood grain come through, but my sofa is large and brown and it swallows up the room. It wouldn't have saved us much to have downgraded either.  We chose a high gloss so it will clean easily.  I have no doubt it will get much use from our little people and so it needed to be a kid friendly finish.  The Euro hinges that the plans suggested are great.  I didn't want a lot of hardware showing.  The handles are something I found at Pier 1 last spring (when we first started talking about building a media cabinet) and are absolutely perfect for this room.


A few tips we discovered:  Home Depot has better prices on Euro hinges than Lowe's - Lowe's sold them per piece at the same cost we bought a pair for at Home Depot.  However, Lowe's had better quality lumber for some of the sizes we needed.  I'm lucky enough to have both stores nearby.  Also, we wanted to combine the two towers into one media cabinet.  Since our TV is mounted to the wall, there was no need for the other media piece and I felt two separate towers would look funny side by side.  Thankfully, The Builder is...well, the builder!!  So he was able to easily modify Ana's plans to join the two together.  He also put in vents in the back so the electronics can breath and not overheat.  We've had this problem in the past with the other media cabinet we used.

I love how this turned out!  There's one more shelf that needs to go in, and of course, accessories, but I think it turned out just beautiful!

Pillows, Pillows, and More Pillows


Throw pillows that is!  This weekend The Builder got started on our new media cabinet (which is almost done!) for our living room and I knew that the pillows I bought last year to go on the sofa were all wrong for the room.  I think they became wrong the minute I put up the aqua drapes I got at Ikea.  The pillows themselves are only about a year old and it good condition.  I really didn't want to have to go out and try to find pillows to coordinate.  First of all, throw pillows are EXPENSIVE!  Seriously, retailers have a very high opinion of throw pillows when they run $30+ for a single pillow (and why are the ones I always really like closer to the $45 price?!).  The original 3 came from Garden Ridge last year for about $15 a piece, which is about where I top out for throw pillows.  So this go around, I decided to make pillow covers in fabric of my choosing.  I also like the idea of being able to to unzip them and throw them in the laundry when they start getting dingy.  And with kids, this is a common occurrence in my house.  I inserted invisible zippers to make them easy to pull off and throw in the laundry.  I also decided to mix up the fabrics a little bit.  The fabric was on sale at fabric.com which was an added bonus.  I bought a yard of each and had enough to do two 16 inch throw pillows in the floral fabric and one of geometric print for the large pillows.  I estimate the large pillow was close to 20 inches.  If you look at the picture at the top of the page, you can see the piping I inserted on all the pillows.  I almost left it off.  I didn't have any on hand when I started sewing up the pillows on Sunday, and it started pouring rain Saturday afternoon.  I don't like driving out in the rain with all the crazy people, so I seriously debated leaving the piping off.  Ultimately, I was also short a large zipper for the geometric print, which necessitated a trip to Joann's and thus I bought the piping too.  Yes, I could have just made coordinating piping, but it's one of those tedious projects that I really don't like to do.  I'm happy with the purchased piping and The Builder likes it too.  I'm actually thinking I would like several more throw pillows on the sofa, but I didn't buy extra fabric, so I'll have to give that some thought.  I could do solid pillows.  But that would be later on down the road.  Right now I'm happy with this just as it is.

I didn't just finish the throw pillows though, I also made another pillow for our bed.  Unfortunately, I'm not sure I like it :-/  This is the Euro Pillow sham I made for our bed.  I love the quilted fabric and how it turned out.  I'm not thrilled with the color.  It's more of a yellow based white than a grey based white.  None of the white toned fabrics in the bedroom have a yellow tone to them, so I'm not sure this really works.  I'm going to finish the other pillows that go on the bed (I seem to be having a pillow fetish for our bed these days!) before I make my final decision.  I have the pillow form and fabric to make one more, and this one wasn't difficult by any stretch of the imagination, but I'm not sure it's worth the time if it really won't work in this room.  I'm working on my Vera Wang pillow inspiration next.  This was a $45 pillow that was sold at Kohl's.  That was the sale price.  Seriously, WHO buys a throw pillow on sale at that price?!  I have the pillow form already.  The fabric was $6 from fabric.com (I really got my money's worth on that fabric order!).  I bought the coordinating felt at Joann's for 34 cents.  Altogether, my copy cat pillow will cost $7.  When it's ready, I'll let you be the judge!

Ok, sneak peak of the media cabinet The Builder has been working on this weekend!

MIA...

Not really!  One thing I don't often mention is that I have an actual job that I am required to be at Monday - Friday (and I really like my job, so this isn't a bad thing).  Between So I'm here in spirit during the week.

I got a lot done during the long holiday weekend two weeks ago, but I didn't get around to posting it.  My fireplace is finally looking put together.  I decided the mantel needed some further updating.  What I really need is my hubby builder to get hot on the media unit so I can get rid of all the junk on my mantel!  I really like the change from the hurricane lamp, which was finished in a brushed bronze, the etched glass vase.  I think the addition of the new accessories helps too.  What do you think so far?

My other project was the lanterns.  I did end up buying them because I seriously doubt I would have been able to make anything that was even as close to being as perfect.  And the price was right!!  I'm having a hard time getting them to photograph correctly.  They keep coming out a grey color, which couldn't be further from the color.  They're a pale aqua, with a hint of a gold undercoat.  And while gold isn't really a color that matches my living room, it's so light, you almost miss it, so I'm good with that.  I like how the soft color in them frames the artwork.  I've only got a few accessories on the now white shelf, so that still looks more than a little bare.  I love the owl!  I love unexpected accessories, and I think an owl next to a beach (what the print looks like to me) is unexpected, lol....


Inspiration Shade
Then there's the lamp.  This is a lamp that I got at a great clearance price at Wally-World last summer for my living room.  Am I the only person who feels the need to spruce up the place when the in-laws are scheduled for a visit?!  But I digress...At the time, it was a great fit to my formal living room.  Now, it's way too dark.  After seeing some of the great re-finishes from fellow bloggers and Pinterest, I knew that this lamp could be re-done to better match my new color palette.  I started with a basic grey primer, which is what I had on hand.I did two coats only because I needed it to be kid friendly, but one coat seemed like it would have worked.  Then it was time to make some paint choices.  Did I want color?  Did I want a shiny finish or a matte finish?  And what about the rather funky shape of the shade?  Should I used a patterned fabric or stick with solid?  I started with my inspiration piece, this lamp here:  Now the size is MUCH smaller, so this particular lamp never would have worked in my room.  But I love the lamp shade.  I decided a ruffle of some sort might be much easier to add rather than completely remaking the existing shade.  But since it's a shade, I knew I had to have a finished edge to avoid little pieces of string everywhere. This was a lot more work, but I think it was really worth it in the end.  I finally settled on a hammered metal finish, and I really like the base.  Now to finish that ridiculous shade....


I found this great shelf idea from Shanty 2 Chic, who is one of my favorite DIY blogger's!  I've been contemplating shelves like this in several of my rooms.  But the short ones, even on sale, tend to start at $20 and up. Not horrible, but in some rooms, I need a much longer shelf (and as it was pointed out, the actual shelf at Pottery Barn is $85!!). Now I can have my hubby builder customize them to the size I need! The plan's come from Anna White's web site (yep, same one that I got the amazing nightstand plans from - such a talented woman!!) so I knew they'd work well.  I bought my daughter a great canvas print for her room, and I knew I wanted to put it on a ledge shelf.  Looking at Anna's site, I see that some people even attached molding to give a more formal look as well (LOVE that idea!).

I was busy updating the picture frames as well.  My wooden frames just didn't work well with this lighter color palette, so they had to be updated.  I painted them all white the first go around, which was...OK.  But I wanted better than OK!  So these will be updated to aqua and silver very soon!

Stay tuned for more updates!

Weekend Updates

This weekend, I'm going to go out and start looking for some pieces to accessorize my living room.  I have some great inspirational ideas from the new Pier 1 catalog I got in the mail.  I really wish their prices were more family friendly, but since they're not, I'm going to re-create!  Here are some of the pieces I'm using for inspiration:

Ruffle Pillow

Turquoise & Green Ceramic Vases

Allover Leaves

Aqua Ceramic Vases
I think the best thing about these pieces, is that I already have pillows that I bought in the fall.  They're  VERY similar to the Allover Leaves pillow!  It looks like the inspiration pillow has some beaded detail my pillows don't have, but I think I could easily update that by hand stitching some on while I watch football this weekend (Go TEXANS!!!!).  I'm going to check out Pier 1 Saturday morning to get a better idea.  I like the ruffle pillow as well, but there are a plethora of instructions on the web to create one so the cost of this at $30 a pillow is a bit excessive.  I'm thinking dupioni would be really nice for the ruffle...

Then there's the Turquoise and Green vases. Love the colors.  LOVE THEM.  I think they might be too dark for my room though.  I'm trying to go with a lighter color palette to balance out the room, since my solid chocolate brown sofa is really too large for the overall scale (and getting rid of it is simply not an option).  I'm going to see if I can find some metallic papers in a lighter tone and maybe mod podge them on to a glass vase.  I'll probably pick up a plain glass one at the Dollar Tree this weekend if I can find the right paper to test it out, then I can search some discount and thrift stores for some ones if I like it.

Ah, that leaves us with the Aqua Ceramic Vases.  I'm not remotely interested in the egg shaped one.  But the tall one with what looks like a Dahlia?  Oh so pretty!!!  I could see it paired with a pretty frame and maybe a candle in mercury glass.  

Now there are a couple of pieces I may invest in.  New sconces are the top of my list. I have a beautiful set that I spent too much on from Party Lite that I got several years ago, with a matching hurricane lamp.  But my changing to a lighter color palette, they don't coordinate well with my pillows.  However, I think I'll be able to move them into my master bedroom and make them work, so I don't mind buying new pieces for the family room.  While I'm open to re-doing something that may be a bargain, I'm leaning strongly towards just purchasing these pieces:

Jeweled Lantern

Blue Crackle MOP Mirror

Blue Sea Glass Lamp
The Blue Sea Glass lamp is on sale right now.  $40 for what I think is the perfect lamp is a great deal (I say think because I need to check the size in person - picture can be misleading!).  I like clean and simple lines in a lamp and the color is perfect for me.  The Jeweled lanterns have more of the aqua tones in them in the catalog, so I want to look at these too. The 13" lanterns are only $15 each, and I don't think I could find anything that I would like better for less, so I may need to purchase two of them.  Also, I've got a coupon for $10 off a $50 purchase, so I could get all three pieces for $60.  That's cost effective in my book!

The mirror.  Ahh the mirror.  It is NOT cost effective.  $130 on sale.  For a mirror.  Ugh.  I have a couple of options here though.  I could have my husband cut me a mirror to the size I want (how much do I love having a Glazier for a husband who can get his hands on mirror for free!?!!).  Then I can either buy a frame and finish it myself (lots of options for finishing it!) or find a mirror at a thrift store and update to what will work for my room.  So that will be part of  my weekend shopping as well!

Still Inching Along...

Living Room
Today we finally got some more things done around the house.  I don't have a lot of photo's to post of what was done, because it was miscellaneous things in each room.  Again.   But there's not much I can do as we continue to clear out boxes from the garage and put stuff up as we find it.  Did I mention I may never move again after this?!

Here's a photo of my living room.  I put a lot of the fall decor today.  It was raining all day, and it was lovely to have the windows open to the cool air while putting up fall decorations.  It almost felt like fall.  Fall for Houston anyway!

So this is a floral arrangement that I did for the mantle.  It looks prettier in person, but this was the best photograph of it I could get.  I have quite a few more pumpkins to put up.
Fall Flor

We made a decision on the pillow choices!!  This is the one that was the closest to the Pier 1 pillow we found that hubby loved. It's the greens and blues that appeal to him.  Of course, it doesn't actually match my fall decor, but fall won't last forever (I'm already planning Christmas decorating!) and it feels good when you walk in the room - or so my kids say!  Usually the cornucopia goes on the dining room table, but I have another floral piece there, and I was to lazy to move things around.  So I didn't...

Another shot of the mantle.  Notice the glass vase on the left?  I got it at Kirkland's today on sale!  Even my husband noticed that the one on the right really left the mantel feeling off balanced (note to self, less HGTV for hubby...).  This one doesn't match perfectly - the other one is a hurricane lamp from Party Lite that matches the sconces by the shelf - but the shape is similar, and I think they work well together.  Mike has promised we will get some type of audio pier "soon" so that I don't have them cluttering the mantle.  There are other things I want more though, like a bistro set for the kitchen, so it may be awhile before they come down.  Again, I can live with these for awhile longer.
The final photo, with the cat sitting on the sofa.  Because no home is complete without a kitty lounging around!

Choices

Choice 1
I had posted a lovely pillow I found at Pier 1 Imports on Pinterest a couple of weeks ago.  I had picked out a nice paprika and copper color scheme for our family room and was really excited about it.  I took Mike with me to Pier 1 to look at some curtains in person (because they always look different online!) that we ultimately didn't like, when he found the pillow in question.  

Now you have to know.  My husband has made only one decorating request of me in the past 14 years.  When it came time to buy new sofas four years ago - the first new sofa's we'd ever purchased together since we'd been married - he asked me to NOT buy a brown sofa.  Any other color was fine.

Ahem.  I'm sure you're noticing the brown sofa in these photo's.  Yes, the very same one I purchased knowing that he asked for anything but brown.  Oops.  In my defense, the sofa I really coveted was aqua.  Which would have been lovely for all of a year
Choice 2
and then I would have been ridiculously tired of it.  So I really did make a much better choice.  He really does love this sofa now and how versatile it is.  So ultimately, it worked out very well.

Back to the pillows.  When he saw this other pillow and said he really liked the colors - that were completely different than what I had been envisioning - I felt that I needed to let him have some say!

Ultimately, we're not buying the Pier 1 pillows.  I need at least 3 (and I'd really like to have closer to 5) for the sofa due to the size, and at $35 a pillow, that is a steep investment for throw pillows.  So we were at Garden Ridge last week, and we found these two pillows that we both really liked.  The color schemes are similar, except for the coppery orange in the second pillow.  But it's the blues and greens that Mike is drawn to, so they both really work.  Now we need to decide which pillow will actually look best, because it will be the foundation of the color scheme for the rest of the room.

More to come...