Showing posts with label Kitchen. Show all posts

Pantry Updates & Storage Organization


Look at this pantry space!! This space is SO open now. I was super excited to wake up to this on Saturday morning. The Builder spent his evenings this past week taping, mudding, sanding, and texturing the walls of our new pantry and the wall behind it where the closet door once was. Our kitchen feels so much bigger now that this is opened up. I'm sure we'll lose some of that open feel when we build in the lower cabinet, but this really lets you see the space that we're going to have to work with.

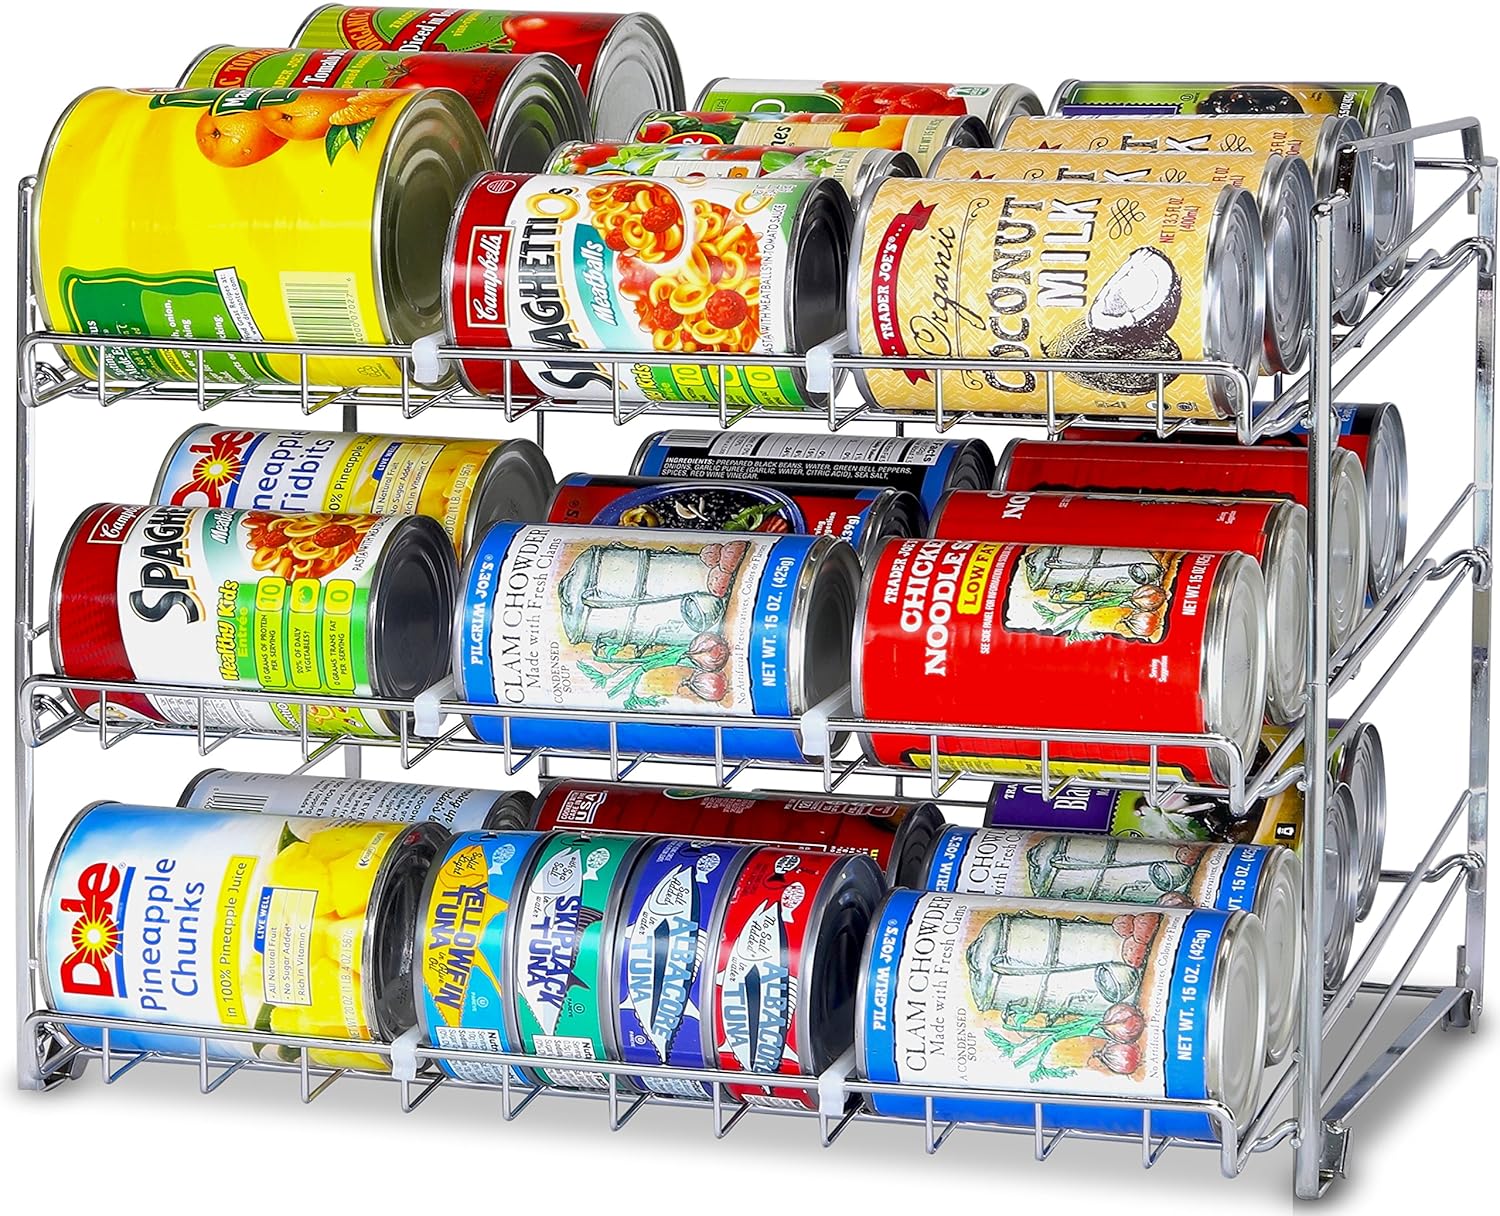
Speaking of space, we're going to have open shelving above the cabinet. I have to say, I've never really been a fan of open shelving. I don't like things to look cluttered and I can't imagine my boys family stacking things neatly. So I've been looking at ways to help the pantry stay better organized and I came across this from Amazon:


I'm not sure if one is enough or I'll need to get two, but I really like the way all the cans are easy to pull out. Our previous pantry, we stacked the cans on top of one another because there wasn't enough space, but many times, the cans fall over. Apparently, I was the only one capable of stacking them back neatly and I'd start finding cans on shelves where they didn't belong or knocked down on the floor. 

The other thing I've started stocking up on at Target are these baskets:


And then also at Amazon, I'm going to pick up these baskets for our onions and potatoes:
These will probably be on the lowest shelf so they'll be easy to grab. We used to keep the bags of onions and potatoes on the floor in the pantry. I can't tell you how many times we'd 'loose' them under packages of chips for school or behind the cookie sheets that were also stored there, then we'd smell find an unpleasant mess. I hate wasting food like that. 

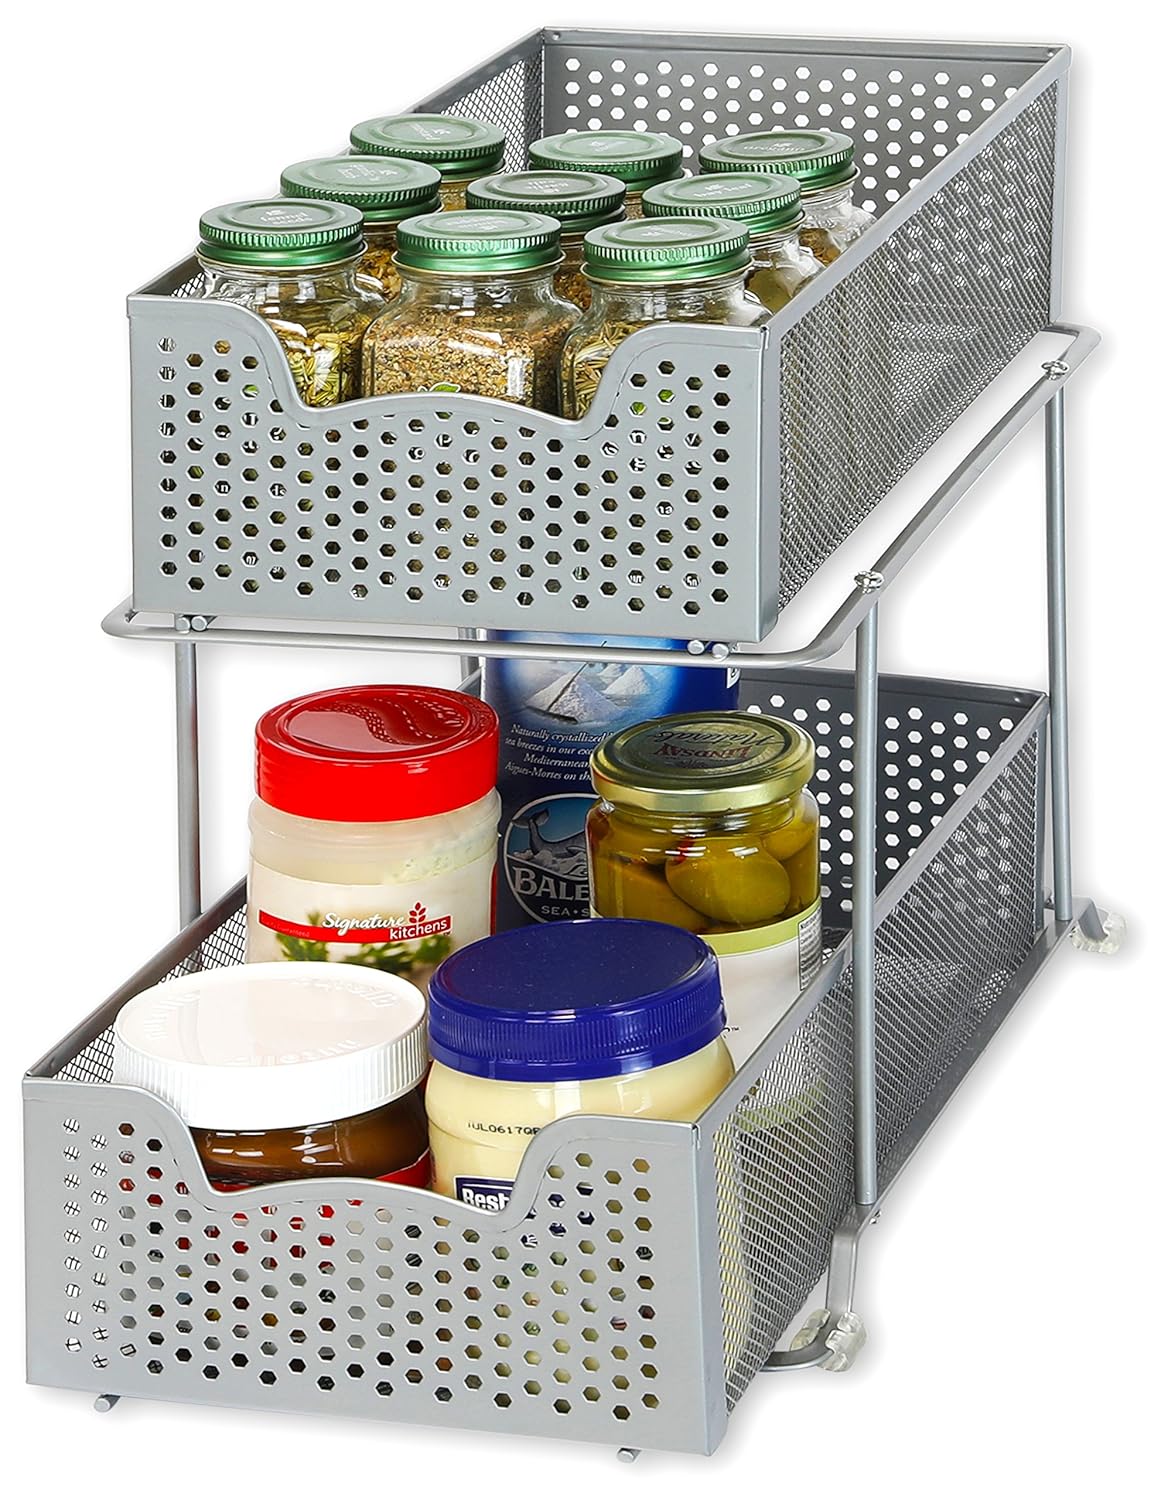
I also like the look of these:
I'm not thrilled about the color, but I like the functionality of these. Again, I want my open shelving to be VERY organized. Things that fall off the shelf easily will frustrate me. I like the idea of these holding all my bottles of vinegar (yes, I probably have close to a half a dozen different kinds of vinegar that I cook with...maybe more). And maybe a second one to hold all my Asian seasonings. 

Target has some baskets I've been picking up for a while now:
These come in a variety of sizes.  This small one I use to hold my seasoning packets. It's been great for keeping them in one easy to find spot on the shelf. I just bought a few medium sized baskets this weekend to hold things like boxes of things like cereal, pancake mix, cornstarch, and those odds and ends that no one can ever seem to find in the pantry. 

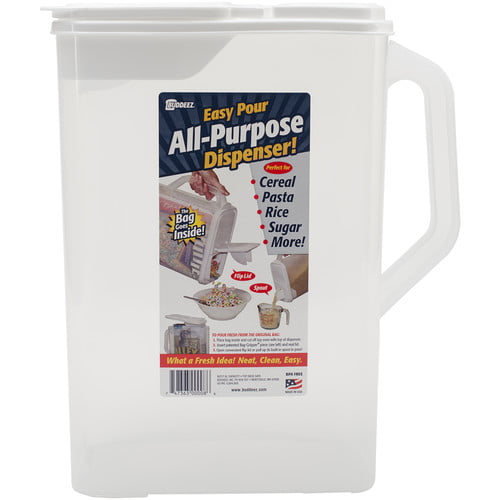
I also may pick up one more of these from Walmart:
These are fabulous for dropping a bag of sugar or flour in to store. The spout makes it easy to use while the plastic container keeps out bugs. I have several types of flour (self-rising, bread flour, cake flour, and all-purpose) so these really come in handy. They also do a fairly good job of keeping out moisture in our humid summers as well. 

And we have paint! We still need to touch up with another coat (this is still wet) but I am so excited! We headed out to Home Depot Saturday morning to get the materials for the cabinet and The Builder has been busy. Stay tuned!

Pantry Demolition Day

This spring has been very cold and wet. The cold is unusual. We typically break out shorts at the end of February and stay in them until Thanksgiving. But not this year! Of course, this is the spring we decided to get some outside stuff done before the summer heat kicks in. We managed to get the new fence installed, the ceiling up on our sunroom, and some patio chairs around our fire pit, but the rain has prevented much else from getting done. We didn't want to waste time though, so we started a new project.  

This was our coat closet. It was filled with jackets that are too small (literally, my 18 yr old son's jacket from when he was 10 was still in the closet!!), some odds and ends that we had stashed when we moved in that we didn't know what to do with, and the dog and cat food. So except for the pet food, it was completely wasted space. On the other side of the wall to the right is the pantry. I have yet to understand why home builders who build family-sized homes (we have a 4 bedroom, 2000 sq ft home) make kitchens that impractical! Our overall size is actually good in this kitchen, but the pantry was stupid small. We took the door off two years ago because things would spill out at us because it was over packed. In my defense, of my four kids, three are teenage boys.  They eat A LOT!!! And I love to cook. I like having a well stocked pantry. So I asked The Builder how he felt about closing off the wall to the coat closet and opening up the wall into the pantry to expand it out. He was completely on board!

You can see here that the drywall is going in where the closet door used to be. The two spaces are now open side by side, although the studs still need to come out. The left is the original pantry. I think if it hadn't been framed for a door, it might have felt more usable, even though there really wasn't any more space. But trying to get into the pantry through the narrow door was never good. The coat closet added about 36 inches to the overall width. The total width when we're done will be 84". The top will have open shelving but the bottom we're building a custom cabinet. It will have a butcher block top and three divided sections. 

One of them will be used to store the pet food that was in the coat closet.  We will use these recycling bins from Ikea:
One of them will be used to store the pet food that was in the coat closet.  We will use these recycling bins from Ikea. We bought one so we could properly size the shelves to put them on. This is the shorter one, but we actually bought the taller ones that will hold more food.  The 'door' that opens on the front of the recycling bin is perfect to be able to scoop out pet food. 

We'll also use some of the cabinet space to store my ever-growing collection of small kitchen appliances. Because you see, apparently I have a problem. I recently got a panini press to add to my collection.  Earlier this year I bought an Instantpot (LOVE this) and an air fryer (love this even MORE). We have a tabletop movie popcorn maker that my son got for Christmas, in addition to normal appliances, like a toaster. I also have an assortment of mixing bowls and other kitchen gadgets that aren't currently stored very well. My kitchen cabinets are awkward with a weird half shelf in them that doesn't let me store larger items. So this extra tall pantry cabinet is going to be a great addition to our kitchen.

You can see here we're filling in the wall with drywall. My goal is to put hooks on the wall so that we can still hang things like backpacks and purses here. I'd like to put in a storage bench as well. The Builder comes home with muddy boots from job sites and it might be nice to have a place to store them out of site (he currently drops them at the door). If not a bench, then perhaps a small table where can put a mail sorter and a key ring hook. My reality is that after next year, I'll only have one remaining child at home. So I want to keep this space practical


On the bright side of this demo, this is the first project that we've had at this house where when we opened a wall, there was NO water damage. I mean, there shouldn't be in a pantry and a coat closet. But with this house, we never actually know. We suspect most of the water damage is from Hurricane Ike. We know they put on a new roof after that. But this time, no water damage!
This demo did end up being more complicated than we expected. At one point in time, there was a security system in this house. The panel was still hanging in the coat closet but has been disconnected for some time. There was a power supply to the box that we thought we'd move to the outside wall since there was already a junction box in the pantry. Well surprise, that is a dedicated power line that is COMPLETELY SEPARATE from the rest of the power in the entire house. After we finally got it turned off at the box, The Builder went up to the attic to move the power line. Only to discover we'd have to remove the carpet in the closet of the boys' room to access the junction box in the ceiling to get to it! That is not a project we want to take on at this point so we're going to cap it at the wall and leave that as a project for another year day. 

This has all been over the last couple of weeks, but we've made a lot of progress this past week.  More to come!


99.9% Done...

It's been a month since my last post. You'd think my kitchen reno would be done.  And for the most part, it is. All the tile work is done, the cabinets have all been refinished, and we even managed to get everything back into the cupboards (how is it that it seemed like we had more stuff than was actually in there to begin with?!). 
For some reason, the cabinets look white in photo's. They're not.  They're two shades down on my color chart from the wall paint. In person, you can see the contrast between the trim and cabinets, but not so much in the photos. I am LOVING the tile back splash with the counters!

So why 99.9% done?

First the obvious. The cabinet door. I have to buy a new one. The one that was there cannot be replaced. Since the shipping is about the same cost as the door, I have been procrastinating, looking for a local source. So far, no luck. So I plan to order it this week. 

Second, the cabinet door knobs. You can see the drawer pulls, but there are no knobs on the cabinet doors. Because I haven't bought them yet. New hardware totaled at about $85. Not really a bad price, but I have a senior graduating from high school, prom, and the senior's 18th birthday around the corner. So, I've been buying hardware a bit at a time. All the drawer pulls are bought, so I'll do the same with the cabinet knobs. 

I didn't put the valance up in this photo either, but I have it. I kept the red one I was using before because it works perfectly. 
I love my pops of red! 

So this is the end of kitchen "refresh" that basically was a total makeover. I'm happy to say...

The End

Did You Say Tile?

My post yesterday may gave led you to conclude that the front door was all we got done this past weekend. In fact, the door was done two weekends ago, and we've been working on the slow and grueling task of painting cabinets. It's not the most fun part of the renovation.

Last week The Builder was being incredibly stubborn particular about the tile we need to replace in our master bedroom. You see when we ripped out the first vanity months ago, we discovered that when they re-tiled, they only retiled up to the vanity, not under it. And since we've had a change of plan on the bathroom vanities, this is a problem.

Let's go back a few weeks.  The Builder and I decided that do to time constraints, we're not going to build the vanities. I really wanted something custom, but by the time we build the vanity, order the doors with the over priced shipping! and order the granite top with the dual sinks, plus the hardware, it's a time consuming chore we don't have time for. We've decided on an alternative, which I will share in another post.  But we were at a local tile store looking for a match when we found a tile that would be perfect for a back splash in our kitchen.

A back splash that we hadn't any plans to do.

But it was perfect. And after a brief discussion, we decided we only needed to do small strip above the laminate back splash to extend it up. We were confident the additional six inches would be perfect. So we bought what we needed and ran a test strip today:

And...I hate it. The Builder wasn't to fond of it either. Looking through some of my favorite inspiration sites, I realized that modern kitchens have the tile going from the counter to the cabinet and behind the stove. Not a wimpy little strip like this.

So Sunday morning, we headed back to the tile store to get enough to do the back splash properly.

Here's where we went with:

Yeah, it's much better tiled all the way up. Of course, it added extra work to the scope of our project. We had bought new outlets because someone had painted over the ones that were there. But with the tile, we needed a different cover so they would be flush with the tile. And the tile has to be cut around the outlets. As do the light switches. So while these are on a sheet that make it easier to install, The Builder had to make a bunch of small cuts to get it all to look right.

So as the end of the weekend, here is where we are with the kitchen:

I can't even imagine why I thought a small strip of tile would look better than this! Even our kids were impressed. And impressing teenagers with another home renovation project is a hard thing to do! There are still a bunch of small cuts to do around the window, as well as one more strip of tile to go on the other side of the window, but once that's done, and we've grouted, all we'll have left to do is put the cabinet doors back on (that are all painted!), refresh the trim, and put everything back.

This project wasn't as fast, or as budget friendly, as I had planned it to be, but we're getting a lovely updated kitchen when it's done and we're super excited about it!

Better Late Than Never


This kitchen refresh has been s-l-o-w go. Really thought we'd be done by now. But we're not.

Thankfully, we are making progress! The repairs in the bay window are done, we've completed painting, the new blinds are in, and the curtains have been hung. It's really coming along now. You may notice that there are not baseboards. Those are still being repainted. The little things that take forever drive me crazy sometimes.

The counter tops are in and we're really very happy with them. You can see the new sink cabinet that we bought (and the small cabinet to the right, which still needs to the drawer front to be painted). Again, you can see that we're not done. We're not done painting and the upper cabinets are still white. See the vanilla colored paint we're paining over? It does make for a bright kitchen, but we are just not vanilla paint colored people!

The new sink. I LOVE it. It is amazing that we managed with the undersized sink as long as we did. I was hoping that for the final renovation, we'd install a farmhouse sink, but I may just end up keeping this one. I am that happy with! 

And the faucet. That faucet is worth every penny we paid for it. We have real water pressure again. Who knew?

The not so glamorous photo. You can really see here that we're not done paining. Also the doors are not on the lower cabinets and we haven't even started the upper cabinets. Sometimes there are really just not enough hours in the day.

The other side. Again, not good. This whole section is going to be expanded into more pantry. The hodge podge of stuff sitting out is driving me crazy. There is a coat closet behind this wall that just holds junk. We have to clean it out yearly and I'm always surprised at what we find. Because we don't use it! So we're going to enlarge the pantry, that you can catch a glimpse of to the left, so that we have more space in the kitchen where it's needed. Yes, the door is off the pantry. This whole section could pass for open concept, which I hate. I have big plans for updating and expanding this pantry!

So this weekend, the plan is to get the rest of the painting done, and at least paint the cabinet frames. The Builder has been sanding and priming the doors all week, so if I'm really lucky, we'll get cabinets closed up before the end of the weekend.

Because I really hate open concept cabinets and shelves!!

Wallpaper & Water

In every project we've taken on since buying this house, we've run into two problems. Water damage and wallpaper that was painted over. The kitchen, of course, is no exception.

The renovation has been very slow go since Christmas due to a sudden pick up in work for The Builder. While we appreciate the overtime monetarily, the timing is far from ideal. 

Today I asked The Builder (on his one day off) if would mind finishing up the painting in the bay window area so I could at least get the curtains up and feel like I'm making some progress. He reluctantly agreed, because painting would only take an hour or two, and then we could watch football playoffs. A win-win.

So he was prepping around the windows this morning, and discovered that the entire area around the windows was wallpapered and painted over


OK, a minor inconvenience, but not as bad as it could be, we've definitely had worse.

The original home builders wallpapered directly over the drywall. No primer, nothing. So most of this came out in big long strips, which made it very easy to peel off. For once. There were some small areas that someone did peel at one point in time, but gave up. Those sections were heavily textured (like in our master bathroom) but we've learned to make quick work of that with a sander. So not so bad.

Again, traces of the old, 80's wallpaper. You may recall that we've estimated that the kitchen has gone through at least four color rehabs since it was built.  Every single color was painted over the wallpaper. The Builder said he thinks it's probably at about 10 coats of paint. Ugh.

Still, just happy that this section doesn't involve any water damage, like the sink area.

Or so I thought....


So when pealing the last of the wallpaper from the baseboards, the drywall started crumbling. After removing the baseboard, this is what we came across.

It's not terrible. It's also all dry, so it's not recent. From what we can best guess, the window leaked at some point and water traced in and down wall into the baseboard. When the initial kitchen renovation was done, they filled a small hole, then painted over everything. But we didn't really want to do a patch job when there's a wide amount of damage. So The Builder spent the rest of the afternoon cutting out the drywall from under the middle and right windows, and replacing it, as well as sanding down the rough texture on the last wall.

We also decided to go ahead and replace the broken and stained faux wood blinds. We're replacing them with exactly what was there as the whole house has these blinds. The window over the sink will eventually have one as well. I like privacy the kitchen window not having any blinds has always bugged me. 

So we ended today with patching in the new drywall and the bay window area primed and ready for mud a texture. 

Counter Tops....

If there were any doubts about replacing our cabinets in the future, take a quick look at this:

All along I thought the wood grain was something similar to contact paper.  I was wrong.  It's more like rice paper, it is SO thin. 

Not that there was ever really a doubt. This kitchen has the worst cabinets of any kitchen I have ever been in. Clearly this wasn't an area the builder or the original home owners wanted to spend any money in. That's OK thought, it's my diamond in the rough and it's going to be lovely when I'm finished, even with just the soft reno.

This faux wood grain is on the outside of all the cabinets. You can see at the bottom of the panel that it's completely rotted out. Goodbye ugly and gross cabinet!

Yesterday we set the new counter on the replaced sink cabinet. We wanted an idea of how it was going to look with the wall and cabinet paint colors. I'm super excited as it looks as good in person as I was picturing it in my head.  This quick photo doesn't begin to do it justice. I think what I like best is the warm grey tones warmed up the kitchen. 

Today we did a dry fit with the new sink:
We haven't taken the protective shrink wrap off yet. Can you see how much deeper the new sink is? Even though it's not the farm sink I'm pining for, this is going to be much more practical for our family. 

At the moment The Builder is prepping the two corner pieces of the new counter tops:
K, not an exciting photo. But those bolts are key to getting the counter leveled properly, which is super important. Once the glue dries (we used Locktite Wood Liquid Nails) the counter will be ready to install. Since we're still living with the small two foot section the right of the stove as our only counter space, the whole family is now anxious for this counter to be installed. Also it means we can move on to fixing all the doors for the lower cabinets and get things put back in place. My house looks like a war zone between all the Christmas stuff that is still out and the boxes of kitchen stuff from the lower cabinets. Living in a reno zone is never fun, but I didn't contemplate reno zone AND Christmas stuff prior to demoing the kitchen. 

By the end of today, I figure we'll be 50% finished with the renovation project. We still need to fix a few of the lower cabinet doors, prime and paint them, install the new hinges, and then move on to the upper cabinets. But we're not expecting any water damage issues, so that portion should go fairly quick!

When the Bad Gets Worse...

The last two days, The Builder has been priming the cabinets for paint. I was willing to wait until the weekend, but we've got tickets to the football game on Sunday and we'll loose a solid day of work. So he didn't want to waste any time this week.

The worst cabinet in our kitchen by far was the sink cabinet:
Under the Sink
That board in the bottom was replaced when we bought the home in 2013. The prior bottom was rotted out and we couldn't really use the cabinet for storage. 

So you can imagine our surprise when we pulled out the bottom to repaint it and found this:

Umh.  Yuck!!


And let's not forget the other side:

Those pieces on the floor?  That's the rotted right side of the cabinet. It pulled right out when The Builder took the bottom out. And the smell. It's terrible. The kids even noticed. Gross is an understatement.

So we had a decision to make. 

Replacing all of the cabinets is still completely out of the budget.

But replacing one cabinet maybe wasn't such a bad idea.


Umh, two may not be a bad idea either! Thankfully they're on sale at the orange home improvement store so we headed out to pick them up. They'll get a coat of primer and then paint. You may have noticed that we're ditching the drawers on the smaller of the cabinets in favor of a door. When we bought our new stove, we lost the bottom drawer that we used to store our baking pans. We planned to find a place to store them once the kitchen reno was done - maybe in the new pantry we plan to build this spring. But now I'll use this cabinet space and it will be much more efficient for us. We never used all four drawers. We have drawers on the other side of the kitchen that were filled with junk. So we'll do some reorganizing and this cabinet will work much better for us. 

As to "The Plan" all but the new cabinets are primed and have the first coat of paint on. So all in all, not bad for the first two days of work!

The Plan

The Builder worked all Sunday afternoon on the kitchen. We have quite a hefty to do list on this "soft reno". The humidity is a huge issue because everything was so wet when we tore it out, that's adding to our time line as we have to allow for things to dry out.  The original four day estimate is out, but while the to do list looks extensive, most of it is all cosmetic and will go faster than many of our other projects.  So here is our basic timeline:
  • Prime all the bottom cabinets
  • Paint all the lower cabinets
    • humidity allowing, this could be done during the week when we get home from work.  But we need the humidity to go way down to allow things to dry out properly
  • level the counters properly and install the new counter tops - huge issue, we have sections that are as much as 3/8 out of level.
  • turn the water off and install the new sink and faucet
  • install all the new hinges - a total of 30 - and put the doors back on.
  • empty and prep the upper cabinets
  • prime and paint the upper cabinets
  • turn off the water and install the new sink and faucet
  • install the new base boards
  • repaint the kitchen
  • rehang the curtain rod in the bay window
Stay tuned!

The Bad, The Uh Oh, and The OMG!

Merry Christmas!  Most people are still enjoying the remnants of Christmas - the lights, leftover food, the last of the decorations. Me? I'm moving on to the next project.

So my master bath is on hold while we get ready to build a new vanity. Not ideal, but I need to order a new granite top and sinks for it and my budget is always tight this time of year. Our only sink and vanity is now not functioning (bad clog that we managed to work out of the  shower drain, but is now firmly logged in the pipe for the sink...sigh) so we're getting by using the sink in the powder room. Super fun, these renos!

Move In Day August 2011
This is a photo of my kitchen when we first moved in. The kitchen space was a selling point for me. It was BIG. Much bigger than the kitchen we'd had in the previous rental (I probably could fit three of that kitchen into this one). Lots of counter space, decent storage, and that bay window - lovely natural light!

This photo doesn't reveal what is hidden behind the doors and the counter top. The reality is, my kitchen is a soggy, bug attracting mess. What looks presentable in photos is actually a crumbling pile of particle board. With The Teen graduating this coming June, there is no way I am going to have all our family over with the sorry thing I call a kitchen. For the past two years, we slowly been replacing things as they give out. The garbage disposal. The fridge. The dishwasher. Just this past Black Friday, the stove. The only appliance we haven't replaced was the microwave - because the previous owner replaced it right before we bought it. It's just a hot mess, as they say here in the south.

So I've been gearing up for this soft reno. When I told my dad he said "what on earth is a soft reno?". Good question, right? Essentially, we're not replacing any cupboards or flooring, nor are we changing any of the footprint. It's just supposed to be a cosmetic update.

See, I desperately need to gut my entire kitchen - starting with the cabinets. They're half of the soggy mess. I've priced them and I'm fairly certain I know what I want. RTA cabinets - Ready To Assemble. Real wood, dove tailed, solid cabinets. They come unassembled which is a big portion of the savings. The Builder is more than capable of assembling and installing them. It's about $3000 for the entire kitchen. A huge saving if you've ever priced new cabinets.

But they're not in my budget this year.  Or next year.  I have this silly thing called an HVAC system that has to be replaced. No one can live in Texas without a good a/c system (we're not actually sure our heater will turn on this winter, yikes!!) and mine is on life support. So that's my budget buster this year (again, before the family arrives!).

Since new cabinets are out, I'm repainting mine. Paint is cheap and it will allow us to fix some drawers and doors that have seen better days, as well as refresh them.  Along with that, the vanilla, 1987 Formica counter tops are being swapped out for the granite looking, bull nosed laminate counter tops we found at the Blue home improvement store. We also discovered all the hinges have rusted out on the cabinet doors, so those are being replaced too. Sounds simple, right?

The Builder informed me my projects are never simple.

When we started taking off the doors to clean, sand, prime, and paint them, we discovered that everything is saturated. I have no idea how long my kitchen has been absorbing the humidity that is Houston, but saying it's a soggy mess is an understatement. We've added new base boards to the list of things that need to be replaced.

So how bad is this project?

Under the Kitchen Sink
The sink has had many water problems over year, even before we moved in. The bottom was completely rotted out, so we put a board in it about two  years ago. You can see, it's already warping again. It's just gross. We're going to pull that bottom out and replace it. Again. There's not much I can do about the warping cabinet wall, so we'll sand it, prime it, and hope the paint will hold up.

What are those marks in the cabinet? Is that were someone left food?  Nope. It's rust. The hinges are completely rusted through on the doors. Did I mention Houston is humid?! We bought all new hinges. Thankfully we had to take the old ones off to paint the doors anyway, so it was more the expense than a time factor. And yes, every single door has this rust when we took the doors and hinges off.


Yes, that shelf is bowing. We're going to shore it up with a brace since it's built into the cabinet. It's not the best shelf, and I'm looking at better storage solutions, but it's what I have to work with for now. This is the cabinet that stores my mixing bowls and baking supplies, so that shelf allows me to store without stacking everything on top of each other.

And when we pulled off the counter, this is what we found hiding in the corner:
Dead Corner
Dead space. Literally a big empty cavity. I don't know who did the space planning for this kitchen when the house was built, but this makes no sense to me at all. When we replace the cabinets eventually, this will be a cabinet with a lazy susan.

What are the other problem areas lurking in this kitchen?

Multi Colors
This is the area under the sink. The area isn't important. Take a look at the various colors of paint this kitchen has had over the years. There's a bit of Marigold peaking through. That appears to have been covered up by a minty pastel green, which then has a dull grey over that. I had no idea when I viewed it in it's vanilla splendor when we moved in that the vanilla color was probably the best paint color this kitchen has ever had.


To the Left of the Sink
The burnt breakfast counter? Yeah that was The Builder. We were deep frying some wings before a football game and apparently the fryer was a bit too close. Oops. The plan for the bar is to replace it with a wood top, since we don't have the option to replace it with laminate to match the new counters. Eventually, we plan to tear it out and drop it down to counter height. We'll be ordering quartz counter tops when the time comes, so it will be seamless. But that's several years off.

Finally, some photo's of the demo itself:
Removing a counter
The Builder is tearing out the counter. We left the small counter to the right of the stove (have to have a place to plug in the coffee pot!!!) but tore out the other two. The Builder also left the counter in place holding the sink. We weren't going to replace the sink with this soft reno because sinks are expensive and I would really like a farm house sink eventually. However, we had a change of heart on this and wound up at the orange home improvement store looking at sinks. And somehow one found its way into our cart, along with a new faucet (which we had actually planned to buy because the one we bought to replace the other broken one is now broken as well, sigh...)

Delta Lakeview Single-Handle Pull-Down Sprayer Kitchen Faucet in Stainless with Soap Dispenser
Delta Lakeview Single Handle Pull-Down Sprayer Faucet
So we went with a sink from Delta because of the Magna Tite docking. The sink we have right now doesn't have a magnet to hold in the faucet head and hose. It clicked in securely when we first bought it...for all of three months. Now it just sort of hangs loosely. Also, the neck was never tall enough. You couldn't get a pot under it comfortably. Probably because the sink is so shallows - more on that in a minute. But also because the neck wasn't tall enough. That will no longer be an issue with this faucet. Super excited about this faucet!

And then the sink that found it's way into our cart:

KOHLER Verse Top Mount Stainless Steel 33 in. 4-Hole Double Bowl Kitchen Sink
KOHLER Verse Stainless Steel Sink
We had quite the debate about our current sink. I was positive it was no deeper than seven inches, which appears to be a standard size carried at the orange box store. The Builder was convinced it was eight inches. I promptly told him he was crazy. I've washed my hair in that sink. There was no way it was eight inches deep. After some friendly banter back and forth about the depth of the sink, we took a serious look at this Kohler sink, that's nine inches deep. It's the same width as the current sink, 36", but we new the deeper sink would be better.

When we got home, The Builder was quick to break out the tape measure to show me he was right.  At which we saw that our sink is only six inches deep.  Not even the standard seven!! Up until that point, I was feeling slight guilty spending the money on a new sink, since ours mostly likely needed to be re-sealed properly so it wouldn't leak anymore, and then would work fine. I don't feel guilty anymore. Even if I end up keeping this sink when we do our full kitchen reno in a few years, I can live with that.

The Builder put our kids to good work as well.
The boys scrubbed down all the cabinets with TSP so that they'd be ready to prime. The Teen cleared and scrubbed all the counter before we removed them (I don't know why, but I can't put dirty counters out on the curb for trash day).  All of them helped box up all the cookware stored in the cabinets as well. It only took a couple of hours with them all helping - we had anticipated this being a full day to clean and clear it all out.

The Builder and Oldest DS1
Did I mention it's hot and HUMID here in TX right now? We've been in shorts all week and finally turned the barely working a/c on Christmas day. But the boys were looking forward to the demo portion. The Builder showed them how to use the hammer to knock a solid hole into the counter. The Teen and I don't quite get it, but if it helped the boys work better, then by all means, knock a hole in the counter! Of course, it might slightly be my fault as well.  I watch a lot of Property Brothers on HGTV. The homeowners always take great delight in punching holes in walls that are coming out. Since we're not taking out any walls at this point, this is the closest they could get.

Our original goal was to have this done in 4 days. That was before we realized the sink was a bigger mess than we thought, that the cabinets have been absorbing the humidity for a few years, and that some of the doors now need to be rebuilt. Thankfully we have another 3 day weekend next weekend, and that might allow us to get finished up.

Fingers crossed!


The Kitchen - Stage 1

The Builder has been working like crazy so we haven't had a lot going on in the renovation department.  I think we have the master bath plan almost completed. But The Builder had a three day weekend last weekend and decided he needed a project to do. So after forcing him to relax on the 4th of July, he was ready to tear something apart on Saturday. He asked me if I was ready to take down the pass through in the kitchen.  I think he purposefully picked something he know I couldn't say no to!

Let me refresh your memory on the pass through from my kitchen to the dining room:


Like all pass through's that I've seen, this one is a waist of space. The 'bar' isn't wide enough to really eat at. The small opening isn't conductive to ventilation - in fact we swelter in here in the summer if we turn on the oven, even when the rest of the house is cool and comfy with the a/c running. When we had the TV over the fireplace, it did at least allow you to stand there and duck down a bit to catch a favorite TV show while doing dishes. Aside from that, utterly useless. 

When the builder first asked me about a kitchen renovation, I wanted to take down the wall that has the arched opening. Unfortunately, that corner there is a load baring wall. It would cost thousands of dollars to put in a new beam to support the weight of the upstairs. That might happen on design shows, but I have to live in reality, so it was a no go for me. The same with widening that opening to the kitchen. There's no place to widen since we're stealing the hall closet to expand the pantry (more on that in another post!). So that wall and that narrow opening have to stay.  The pass through does not.  So demo went something like this:
We removed the trim someone installed as an afterthought. I already knew we had the cheapest of builder grade cabinets, but the white paint gave me a false sense of thinking they weren't as bad as I thought. Ha. What we discovered is that only the front of the cabinets are wood. We have 'plastic' wood veneer adhered to the side of the cabinets and cheap trim along the top to add...something. The cabinets have always been to small to hold anything other than rarely used items. I'm sure I can find another spot for my Christmas Nutcracker plates and my Christmas tea set (the only thing of value that was in them!).

Next The Builder we took down the cabinet and started cutting into the wall:


Disclaimer:  The Builder was quite horrified annoyed that I was including the photo's of him in all his sweaty glory. We live in Houston and it's humid here. There's not much I can do about it. This is part of home renovations!

I was surprised at the beam running through the middle of the wall. The Builder was not. Apparently this is standard when you need to make sure you have something to screw the cabinets into so they won't fall off the wall. Go figure. He said the pass through was clearly an after thought as it didn't tie into the wall as it should have and was done later. Really, an afterthought?! WHY!!?
He even has helpers...

We needed to add a wall switch for the pendent lights we knew we were going to put up. The only way to really see where the electricity was running and easily install a new box was to take the drywall down. So we did. And if I was hoping beyond home that this corner wasn't really a load baring wall, my hopes were quickly dashed. This was one of the walls that had really bad texturing on it, so taking down the drywall allows us to re-install it and correctly texture. We also will be able to switch out the old beige electrical outlets and wall switches for nice clean white ones. Win win!


Everything all opened up. There are weird 'steps' in the wall where the beam came out. That meant more patch work than what I was thinking but The Builder took it in stride. Already you can see how much more open it looks.  This was Saturday afternoon.  The demolition part didn't take much time at all, aside from two separate trips to Home Depot to pick up supplies (we never remember everything in one trip, even when we have a list!) and a third trip to Lowe's because I didn't like the pendent options available at Home Depot. More on that in a bit. You can see the new junction box he installed for the double light switch. The power was off in this photo so he could get everything wired in, but I think you get the idea.


Let's cut to the chase, shall we:
This almost looks done.  This was last Sunday evening. The drywall was done and the spray texture was up. I was really itching to see how the pendants I chose were going to look once installed. But the reality is I didn't want ceiling paint on them or one of the two shades of wall paint either.

And now you can see my 80's laminate counter tops in all their horrific glory. Yeah, we're not doing the counters this year. Nor are we ripping out the rest of the disgusting particle board cabinets that desperately need to be replaced. Those will most likely be done next year (we still have an a/c that really needs to be replaced next year). I'm contemplating some type of counter top cover up but we shall see.

Yes, that's my dining room table covered in junk.  The few things from the cabinet, my cook books that were on a shelf above the pass through, and an assortment of nicknacks that need to find new homes. 


And here we have it this afternoon after the last coat of ceiling paint and touch up paint was completed:

 Yes, the ceiling is striped in the photo. In person, you can see a slight difference, but the camera really picked it up. "Eventually" we're going to have to repaint the entire ceiling from kitchen to dining room.  Eventually is a really distant thought right now.  This counter height bar isn't remotely practical enough to allow for every day use (I can see dishes falling off that narrow bar...) and it quickly becomes a clutter magnet. I'm going to have to put this picture on my phone to remind myself what it's supposed to look like.

This is from Lowe's web site to give you an idea of what it looks like when the lights aren't on (it's not photographing well either way:

There's a white paper shade inside so it's not spakly (which was not a look I was going for) and it blends well with the nickel finishes that are already in the home.

Lowe's really has the best selection for pendant shades.  I was terribly disappointed at the choices at Home Depot.  And the prices! Two lights at Home Depot would have cost about $150. These two with the pendant kits were less than $100. I'm happy to take the savings, thank you.


Take a look at before and after!

Already, the finial photo is out of date, our new refrigerator arrived today! And with that, this particular project is done!! We're hoping to do the pantry expansion over Labor Day weekend, which will be Stage 2. After that though, we'll be in waiting mode until we purchase all new cabinets and determine what the counter tops are going to be. Baby steps...