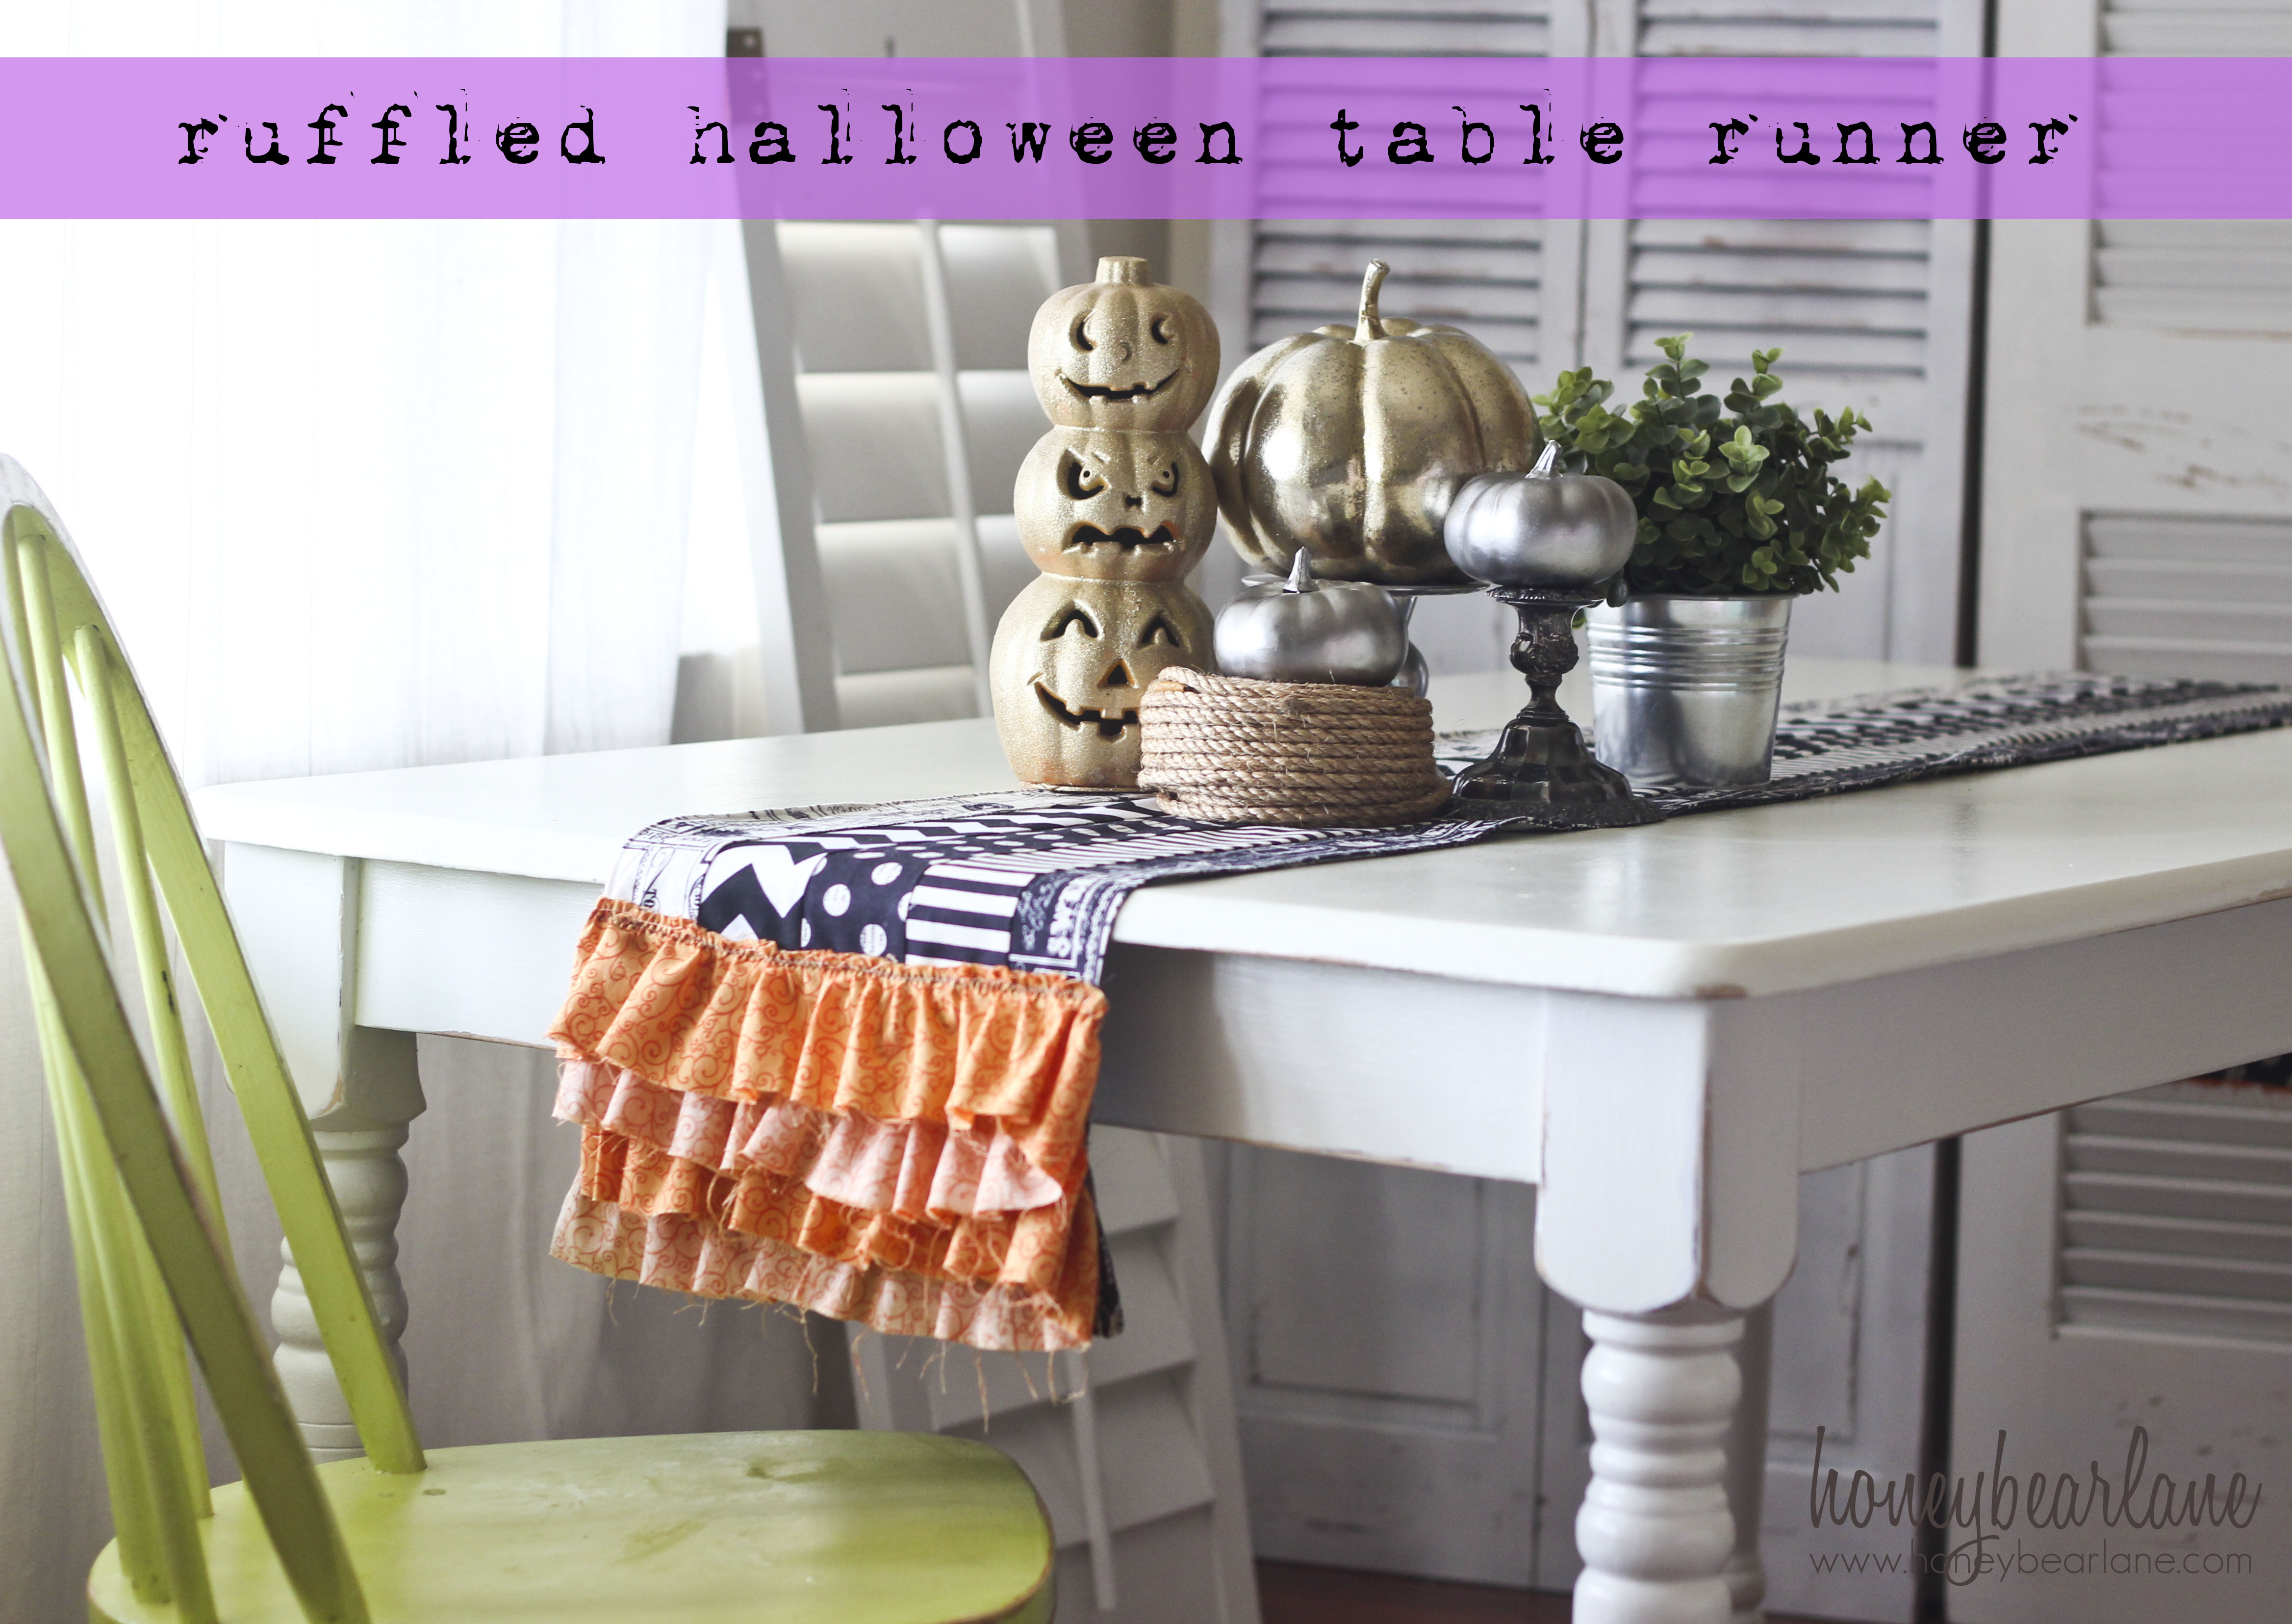
Fall Ideas

Fall starts on Saturday.  And while it's not terribly cool here in the Lone Star State, it's almost 20 degrees cooler than it was two weeks ago.  Sometimes you just have to be thankful for the little things!

So I've been contemplating my fall decorating, which I plan to do this weekend.  Here's a quick recap of how it looked here.  I've made SO many changes to this room.  The sofa's been moved.  We added a media cabinet.  And some color.  All good changes.  But I'm thinking about to work these in with my existing decor.  Because admittedly, after spending the last month buying new Christmas ornaments (more on that in another post!), I'm feeling more than a little thrifty at the thought of having to invest a significant amount more  in fall decor.  Particularly since some of my ooh's and ahh's are way more than what I spend even if I had the money.  Case in point, take a look at this (and forgive the overly wide photo, but I wanted you to actually be able to see the runner!):
Source: horchow.com via Elona on Pinterest
So pretty, right?!  So are the prices.  The 17x72 table runner is $190.  The place mats are $170 each!  So I was surfing some of my favorite blogs (that you can always scroll through as well, just click on the links on the right side of the page) and came across this post
The ruffle on this runner really reminds me of the one on the Horchow site.  And while I would want mine finished and not colorful, lol, it was a great inspiration for me to do what I do best sometimes - copy!!  So that's what my goal is this weekend.  I know I can make this table runner for a fraction of the cost.  But I'll be skipping the place mats.  Totally impractical for my family.  I think this is going to look great in my dining room!


Here's a peak at pumpkin I found that I had to have.  I did purchase it, but it was on sale at Hobby Lobby, and it really matches my living room well!  This is a glass pumpkin, and more than likely, it's going to go in my new media cabinet (and looking at this fireplace really makes me want to paint the mantle the same white I used on my media cabinet...since it's a rental though, I guess I'll refrain...)  You can also see the white cord keeper in the background.  Ahem.  Another project that's not quite done.  The Builder has promised to have it painted the same color as the wall by Christmas so that it will blend into the wall.  While I'm sure you'll still technically be able to see it, it's still way better than all the chords that were dangling down from behind the TV.  So I'll take the lesser of the two evils.


Here are a couple of other pictures I've pinned on Pinterest that I'm using for inspiration:


I'm really looking forward to setting up my living and dining room for Fall!

The Media Cabinet

We got rid of our particle board media cabinet after we moved out of our apartment that we had rented when we first moved here.  I had originally bought it at Target when it was on sale, and we'd had it for about 5 years.  It wasn't in horrible shape, but it was black, and didn't fit the 36" TV we had purchased afterwards.  The house we were moving into had no space for it and the only place for the huge TV was the fireplace hearth (not my first choice since it mean we couldn't use it!). Then we upgraded to a flat screen TV that went above the fireplace, and since the room was really overcrowded with my large sectional sofa, we didn't even contemplate another media cabinet

When we move to this house last year, the TV went back above the fireplace because it made the most sense.  But I've been really tired of cords and junk surrounding my fireplace.  Also, there is no storage in the living room.  So we started looking at media cabinets to store the electronics and our 'stuff'.  I saw this media cabinet at Pottery Barn and knew it was what I was looking for:

Pretty, right?  Well, it should be.  Just the tower is $949!!  Don't forget the $75 shipping and sales tax - 8.25%  in my county.  Add insult to injury, I realistically need 2 of the towers.  My calculator puts that at $2204.60 for the total cost.  YIKES!

Of course, I knew The Builder could make it for a fraction of the cost.  And to seal the deal, Ana White came out with the plans for it!!  How could we not make this?
Source: ana-white.com via Elona on Pinterest

The total cost of my supplies was $190 - for TWO!!.  That's the lumber, hardware, supplies and paint.  We used oak plywood, which technically wasn't necessary because we're painting ours.  I would have adored to have stained it to let the beautiful wood grain come through, but my sofa is large and brown and it swallows up the room. It wouldn't have saved us much to have downgraded either.  We chose a high gloss so it will clean easily.  I have no doubt it will get much use from our little people and so it needed to be a kid friendly finish.  The Euro hinges that the plans suggested are great.  I didn't want a lot of hardware showing.  The handles are something I found at Pier 1 last spring (when we first started talking about building a media cabinet) and are absolutely perfect for this room.


A few tips we discovered:  Home Depot has better prices on Euro hinges than Lowe's - Lowe's sold them per piece at the same cost we bought a pair for at Home Depot.  However, Lowe's had better quality lumber for some of the sizes we needed.  I'm lucky enough to have both stores nearby.  Also, we wanted to combine the two towers into one media cabinet.  Since our TV is mounted to the wall, there was no need for the other media piece and I felt two separate towers would look funny side by side.  Thankfully, The Builder is...well, the builder!!  So he was able to easily modify Ana's plans to join the two together.  He also put in vents in the back so the electronics can breath and not overheat.  We've had this problem in the past with the other media cabinet we used.

I love how this turned out!  There's one more shelf that needs to go in, and of course, accessories, but I think it turned out just beautiful!

Pillows, Pillows, and More Pillows


Throw pillows that is!  This weekend The Builder got started on our new media cabinet (which is almost done!) for our living room and I knew that the pillows I bought last year to go on the sofa were all wrong for the room.  I think they became wrong the minute I put up the aqua drapes I got at Ikea.  The pillows themselves are only about a year old and it good condition.  I really didn't want to have to go out and try to find pillows to coordinate.  First of all, throw pillows are EXPENSIVE!  Seriously, retailers have a very high opinion of throw pillows when they run $30+ for a single pillow (and why are the ones I always really like closer to the $45 price?!).  The original 3 came from Garden Ridge last year for about $15 a piece, which is about where I top out for throw pillows.  So this go around, I decided to make pillow covers in fabric of my choosing.  I also like the idea of being able to to unzip them and throw them in the laundry when they start getting dingy.  And with kids, this is a common occurrence in my house.  I inserted invisible zippers to make them easy to pull off and throw in the laundry.  I also decided to mix up the fabrics a little bit.  The fabric was on sale at fabric.com which was an added bonus.  I bought a yard of each and had enough to do two 16 inch throw pillows in the floral fabric and one of geometric print for the large pillows.  I estimate the large pillow was close to 20 inches.  If you look at the picture at the top of the page, you can see the piping I inserted on all the pillows.  I almost left it off.  I didn't have any on hand when I started sewing up the pillows on Sunday, and it started pouring rain Saturday afternoon.  I don't like driving out in the rain with all the crazy people, so I seriously debated leaving the piping off.  Ultimately, I was also short a large zipper for the geometric print, which necessitated a trip to Joann's and thus I bought the piping too.  Yes, I could have just made coordinating piping, but it's one of those tedious projects that I really don't like to do.  I'm happy with the purchased piping and The Builder likes it too.  I'm actually thinking I would like several more throw pillows on the sofa, but I didn't buy extra fabric, so I'll have to give that some thought.  I could do solid pillows.  But that would be later on down the road.  Right now I'm happy with this just as it is.

I didn't just finish the throw pillows though, I also made another pillow for our bed.  Unfortunately, I'm not sure I like it :-/  This is the Euro Pillow sham I made for our bed.  I love the quilted fabric and how it turned out.  I'm not thrilled with the color.  It's more of a yellow based white than a grey based white.  None of the white toned fabrics in the bedroom have a yellow tone to them, so I'm not sure this really works.  I'm going to finish the other pillows that go on the bed (I seem to be having a pillow fetish for our bed these days!) before I make my final decision.  I have the pillow form and fabric to make one more, and this one wasn't difficult by any stretch of the imagination, but I'm not sure it's worth the time if it really won't work in this room.  I'm working on my Vera Wang pillow inspiration next.  This was a $45 pillow that was sold at Kohl's.  That was the sale price.  Seriously, WHO buys a throw pillow on sale at that price?!  I have the pillow form already.  The fabric was $6 from fabric.com (I really got my money's worth on that fabric order!).  I bought the coordinating felt at Joann's for 34 cents.  Altogether, my copy cat pillow will cost $7.  When it's ready, I'll let you be the judge!

Ok, sneak peak of the media cabinet The Builder has been working on this weekend!

Progress


So this weekend, I finally worked on our master bedroom!!  It's not, by any stretch of the imagination, done.  But I'm at about the half way point at the end of this weekend.  When you consider none of it was in place when the weekend started, this is good progress.

In the photo to the left, you can see the rugs that I got from Overstock.com.  As I mentioned, I'm thrilled with these rugs.  They're cushy when you step out of bed in the morning.  In the winter, I won't be stepping on icy cold floors either.  The rugs anchor nicely on each side of the bed and I really like the pattern.  

Can you see the owl on my chest of drawers?!  I LOVE this owl!  He was a treasure that was staring at me in a store window as I was waiting in a drive through line for lunch one day.  I'm not quite done with the floral arrangement that he's holding, so I'll save that for another day, but he's really darling.  


This photo is a little dark, but you can see the correlation between the bed and the TV.  The Builder and I love to watch TV in bed.  Our kids love to come pile in bed with us to watch TV.  It was the reason we upgraded to the king size recently.  There is a large blank space to the left of the TV that we haven't decided what to do with yet.  Currently, my luggage and extra pillows are sitting in the space.  Yeah, so I need to think about that space.  You might be noticing the...TV console...under the TV.  I use that word loosely.  It's a small TV stand that's stacked on top of a box and covered with a black curtain.  It houses are U-verse box, DVD player, a Wii, and the few DVD's we own that are not cartoons, lol.  We have it mounted to the wall and that's where it will be staying (because U-verse will charge me a fortune to move it!).  The Builder has a set of plans to make a real console.  But we have other building projects to complete first.  Ultimately, I'd like it done by Christmas.  We shall see.  Oh, and the fountain.  LOVE the fountain.  Hate that it's copper now and doesn't match.  I'm thinking about how to re-work that.  Our goal is to have a reading nook there, so the fountain may be headed back into the sun room.  But that's a project for next summer, so I'm not even ready to think that far ahead yet!

Ah.  Something I'm really please with.  This pillow.  The pillow form and fabric are from Ikea.  You may or may not be aware that you can get throw pillows dirt cheap at Ikea.  I swear I think I only paid $4 each for each pillow form. They were down in the curtain and fabric section at my Ikea.  They're listed as cushions but they're not something I would think of as cushy enough to want to sit on.  I bought the fabric my drapes are made of, which they sell by the yard.  This was a simple 20" square that I added a 5/8 seam allowance. I bought a yard of the fabric and I've only done the one cushion so far. I still have plenty for a second if I choose.  I did put a zipper on my pillow cover because I wanted to be able to launder it easily.  If you're not comfortable with inserting a zipper into your pillow cover, you could really skip it without issue.  I have cats and I get a lot of cat hair in my bedroom, so I wanted to be able to launder them regularly.  

So that's it for this weekend.  I still have more to do in the room and I have all the 'stuff' to do it, I just need to find the time!  The throw pillows look wimpy on the bed right now.  I still have several more to make including the pretty purple satin pillow.  I also have the crushed satin bed skirt to make (again, super easy project!) and I need to paint the bases on the lamp.  Right now they're a brushed bronze.  I love that finish, I really do.  Except nothing is my bedroom is a brushed bronze now .  It needs to be a brushed nickel to match all the other fixtures in the room.  A coat of spray paint should fix that and will be an easy fix.  I have a feeling that the room won't really looked finished to me until The Builder gets the TV console done.  But we have a big project coming up in the living room over Labor Day weekend, and I can't plan anything else until that one is done!


The Home Stretch

So.  I got a box of fabric in this week (and if you know me, this is really nothing new, but keep reading) and it has the fabrics for my throw pillows.  And my bed skirt.  I am THRILLED.  Seeing all the fabrics together, along with the duvet that is now on my bed and the curtains has me chomping at the bit to get the room DONE. Take a look at some of these divine pillows I grabbed from my Pinterest board:
Source: kohls.com via Elona on Pinterest
 
Isn't it lovely?!  This one I plan to duplicate exactly.  I just need to stop at Joann's to get some felt (what those circles look like they are made from to me).  Hmm, or Hobby Lobby, which is right next door to my work...isn't that a scary thought!  And now that I look at it, maybe it's actually linen circles...but those would unravel easily...have to give this one a little more thought.  But, I have the gray fabric and this pillow cover itself will be simple to duplicate (and it won't cost $45!!!!) I'm making them all removable for ease of laundering.


  And let's not forget about this darling pillow I found on Etsy: 
Source: etsy.com via Elona on Pinterest
  I was originally going to buy it because I love to support Etsy and independent vendors, but I really think the purple is the wrong shade for my room :(  It has more gray undertones than what I'm looking for.  All my purples have more of a blue undertone in my room.  I think I can duplicate this pillow.  I have a luscious, purple satin fabric I got in my shipment from fabric.com that I can use, it will just take some figuring out that pretty twist in the center that might be a bit challenging.

I would love to say I will be completing these updates this weekend.  I would really love to say that.  But I won't.  I'm going to the ASG Conference here in Houston this weekend (hooray!!!) and I have to get the rest of the shopping done for my kids for back to school.  We have a free sales tax weekend here in TX this weekend, and I will happily take the savings on the backpacks and additional items the kids still need for school :)  My goal though is to be completely done by the end of Labor Day Weekend....D.O.N.E.

STUCK!

So, I currently have 3.5 projects going, NONE of them done, and all driving me crazy.

My guest bathroom.  My goal was to have it done last month.  I finally got the frames up and the wall sconces and am VERY happy about this.  However, there is no artwork in the frames and the sconces are lacking candles.  I also need a rug around the toilet to help cut down on the hollow sound of the small room. Ugh.

The second unfinished room is my laundry room.  This one has a lot of work left to do.  We had another leak in the upstairs bathroom and the ceiling seam split again.  Double ugh!  So that has to be patched and fixed (at least we don't need all new drywall this time!).  We were meaning to buy a longer dryer cord so that we could put a longer folding counter in there.  This was necessitated last week when a power surge fried my outlet and dryer chord.  That is done (because a family of six can not go without a dryer!) but we haven't actually moved the stacked units over yet.  Which means we can't put up the counter our build the sorting units that are going underneath.  There's also no artwork or storage of any type in there right now. Sigh....

Then there's my master bedroom.  I'm actually making progress in this room!  
This is not the best photo of this rug.  In person it's lighter and very plush. It was exactly what I was looking for in my bedroom!  The entire downstairs of my home is tile.  In winter, that tile is very cold to step out onto in the morning.  It also means you track any dust or crumbs into the bed if you don't scrub your feet before you get into bed.  GROSS!  I looked at options for a big rug to go under the entire bed.  But a rug that large is expensive.  I bought two runners to go on each side of the bed and they work really well.  Ironically I saw this same idea on some show on HGTV, so I knew I was on the right track. :)  They were on sale at overstock.com this week and free shipping.  I had to get them!

Then there is my bedding.  I posted several options a few weeks ago, and I was pretty sure I was going to go with the ruffled looking option.  I've been debating going with a deep eggplant color, like the original inspiration.  But after looking at my room, and my dark furniture, I was concerned the room would end up looking too dark.  So my thought was the lighter, ruffled looking version (that was a fraction of the cost!) was going to be the best option.  I was hesitant though because the last comforter I bought online, while beautiful, was not at all soft!  The other night I was on ebay looking for something else when I came across a Vera Wang duvet cover.  It was lovely, and had one bid that seemed ridiculously low.  I checked Macy's web site.  I know what this duvet cover is selling for.  And this one is less than the one on the Walmart web site.  So I bid, expecting to be outbid instantly.  Surprisingly I wasn't!  And I ended up winning!  This is the only piece of bedding I'm going with from this collection.  I can't afford to buy any pieces from Macy's (seriously, this duvet retails for over $300 with NO shams, bed skirt, or anything else!) but I found some great pieces that will coordinate beautifully and I am beyond thrilled.  Then there are the accessories I scored at Marshall's on Friday!!  So serious headway in the room this week.  All that is left is the media consul (which has to be built), the duvet itself (can we say hello Ikea?) and throw pillows.  Lots of pretty throw pillows...

So I'm sure you're wondering what the .5 is in the 3.5 number.  That would be my master bathroom!  The Builder and I discussed that because the two rooms have no door or diver, they should flow into one another.  I already have the art pieces, but the shower curtain, towels, and some accessories, don't really coordinate with the new room colors.  I found these eggplant colored towels at World Market today and they are perfect!
Eggplant Towels
Casbah Towels
Again, the photo color is slightly off.  They're darker in person, like the eggplant color in the curtains in my bedroom.  And then I found these coordinating printed towels and I knew it would tie in perfectly with the artwork and decor I already have in the bathroom, as well as tie the two rooms together color wise.  But again, I'm not finished .  I found some fabulous curtains, but they weren't in my budget this week and I can only hope they'll still be there in two weeks when I figure my budget can afford them.  And I'm torn on the rugs.  The same tile that is in my bedroom is also in my bathroom (and kitchen, dining room, family room, etc.) and you really have to have rugs down when you get out of the shower or bath - which are are on opposite sides of the bathroom.  So do I go with black, which is practical, grey, which would add some contrast, or pull the eggplant color into the rugs as well?  Decisions decisions.  Here's what I ultimately chose for the shower curtain, which I think works much better with all the black and white decor.  I love the sparkle!  Plus it ties in the grey and the black and white.  I think the contrast in texture with the velour towels and sequins in the shower curtains works too.  Or I just watch to many design shows, lol...  Since this wasn't a room I set out to really change and it's part of the master bedroom, I'm counting it as half a room!

My goal is to have the master bedroom and bathroom put together by the end of the month.  Stay tuned!

Quick Fix

Oh, look at that!!!  Apparently I backed up my HTML coding!  YEAH ME!  Now I get to spend my weekend on more important things, like finishing some projects so I can post them!!! :)

Under Construction

My Blog that is :(  Blogger has had some update is the best guess I have and I've lost my customized template.  So, you get this ugly mess until I can sit down this weekend and figure it out.  Super fun...

Master Bedroom Dilema

When last we spoke of my master bedroom, the new King sized bed had been installed, and can I just say, it is amazingly comfortable.**Total side note here:  if you are contemplating a new bed, I can highly, highly recommend the iComfort series by Sealy.  It isn't cheap, but it is worth every penny, and all my lower back pain was gone after sleeping a week in this bed!!

So as I mentioned, we upgraded from a Queen to a King sized bed, which means all new bedding.  As you may recall, the master bedroom was primarily done.  We had bedding, drapes, furniture, even the art work.  So you would think I'd just find a similar comforter and bedding and be done, right? 

You would think wrong...

Ikea Curtains - the wall color isn't really this dark!
That was the original goal.  I even posted about it before the bed arrived.  But I found a pair of drapes at Ikea that I absolutely love.  They go with everything in the room, but change the total look of the room.  So if we're changing the look, lets make some other changes, right?  So the bed has been moved, the television has been moved (and mounted to the wall, yeah!) and all the furniture has been re-arranged.   And now I'm looking for the right duvet cover.  THAT is proving to be my Achilles heal.  In my head, I know what I want.  My color palette has changed to mocha (think froth on coffee!) grey, black, white, and plum.  I know the mocha color sounds off, but it's in the drapes and it's the color of my room, so it ends up working really well.  So I want a grey duvet and plum accent pillows.  But the shade of grey can't be too dark or too light.  It has to be just right .  Because too dark and the room looks heavy.  Too light and it will show every spot known to mankind (I'm sort of sympathizing with Goldilocks at this point...).  And I want a plum arm chair for the window, so the duvet has to be grey.  I've been to all my favorite haunts to look for the right duvet cover, but I haven't found it...yet.  But I will persevere!  


Here are some of the options that I'm considering.  The Inspiration is a beautiful plum colored duvet that I found at Bed Bath & Beyond.  However the price is WAY out of my budget(side note, who spends over $500 on bedding?!) and I think it's...too plum for my room.  


I really think I'm leaning towards option 1. This one I found online, so I can't touch it or feel it, but this time if I don't like it, I'll just send it back!  It's also a quarter of the cost of the one from BB&B, so it's a double bonus!  But the other two options are pretty too.  I just need to figure out what's going to look best with the curtains.


The New Bed

It has arrived.  The delivery men and The Builder set it up.  I have to say, no remorse as the old bed was carted out the door and put on the curb.  Now I'm working on updating my design board on Pinterest...!

Master Bedroom....Again

Today, The Builder and I went out and spent an obscene amount of money purchasing a new bed.  Why are beds SO expensive?!

The back story - We've been married 15 years this coming September, and our current bed is...15 years old this August!  He bought it for me as a wedding gift (I had a cheap double mattress with no box spring while we were dating which he refused to even contemplate sleeping on once we got married.  He had a queen sized waterbed that was not an option...) a month before we got married, and it's been our bed ever since.  About three years ago, we started realizing the bed wasn't quite as comfortable as it was when we bought it.  We were getting ready for The Move from California to Texas, and I was concerned that we would end up sleeping on the floor for a year if we didn't move our bed (The Move ate up all our savings!!) with us.  So it went in the moving truck.

You may or may not know, we've now moved three times in three years.  That was not the plan.  Including the move from CA, that stupid bed has been moved four times.  And it ways a TON!  To add insult to injury, neither of us sleep well on it anymore.  I realized this past week I can't even make it through the night without waking up.  So we started looking at beds.  My goal was to not buy one until we get back from vacation next month.  With this being Memorial Day weekend, beds are all on sale.  Don't ask me why.  I have no clue.  So with sales ad's in hand, we started researching beds.  And somehow we ended up buying one and it's being delivered on Monday.  HOORAY!!!

Except.

We upgraded to a King size bed.  Do you know what that means?  Not only did I spend an obscene amount of money but now I have to upgrade ALL our bed linens.  Including my comforter set. 

I should be saying 'oops'.  But honestly, after almost a year with our comforter, we have lost all love for it because it is SO scratchy!  I bought it online so we didn't get to "feel" the set prior to purchasing it.  I've purchased other comforters over the years online without issue.  This one, while it looks great, simply doesn't work for us.  We only have it on the bed when company is coming over or I'm taking photo's for something.  Otherwise it's wadded folded up in the corner.  Because we're a family who loves to pile on the bed, watch TV, tickle fights, even cuddle!  Thus the reason for the King size bed, and now, the new bedding!

Ideally, I'll find something that will work perfectly with what I already have.  That's the goal...

A Tale of Two Rooms

Bathroom Decor
In the beginning there was a house.  It was a good house.  It had lovely tile, a large kitchen, and a open concept style that made it feel spacious.  All the rooms had good paint colors and it had an updated look even thought it was over 10 years old.

Every room that is, except the guest bathroom and the laundry room.  These two sad little rooms had not been updated.  They had their plain, off white walls and builders grade cabinets.  The bathroom had the original faucet fixture, even though the other two bathrooms had been updated and modernized.  The laundry room was small and dark, with an 80's fluorescent light box and a plain shelf for storage.  And while both rooms had the lovely tile, that was the only thing that been upgraded.

Then there was a family.  A fairly large family by today's standards.  They liked the house and the size was an improvement from where they had been living, and they quickly moved in.  They loved many of the features in the house.  They did not, however, love the guest bath or the laundry room.  And being a fairly large family, they knew both rooms would get used frequently.  So the bathroom upstairs sprang a leak, causing the ceiling in the laundry room to need a repair, they decided to do a "minor" update with a little paint too.  And maybe a new faucet.  And maybe a new light fixture.

Of course, it wasn't that simple...

What we budgeted for:
Paint - $34
Light Fixture for the Laundry Rm - $50
Bathroom Faucet - $30
Ceiling tape to repair the Laundry Rm. ceiling - $6
1 sheet of drywall to patch the broken ceiling - $10
Total = $131


What we also spent:
Mud to redo the bathroom wall - free (we already had it)
lumber for the mirror and frames - $18
new mirror to replace the mirror that was cut to the wrong size - $25
mis. hardware to put frames together - $12
Unfinished Laundry Room!
new soap dispenser - $9
toilet paper holder - $6
new counter top for laundry room - $40
frame work for laundry room $20
built in shelving for laundry room - $20
art work for bathroom - $8
bathroom sconces - $18
decorative items - $ 20
Sub Total - $196
Grand Total = $327

So now these sad little rooms will have an update.  And for $163.50 a room, even though it was more than we originally budgeted for, I still think we did a good job!

Confessions

Confession # 1 - My guest bathroom still isn't don't.  It's the bane of my existence now.  The faucet is in, the frames for the mirror and the art work are done, and the decorative shelf is done.  But The Builder had a glass mishap.  He cut the mirror the wrong size.  You know how the shoemakers kids always went barefoot?  Yep, the Glaziers wife can never get a mirror hung.  Mirrors are almost a bad word for me anymore...

Confessions # 2 - I'm crazy about glass.  I love the stuff.  I think it must have something to do with being a Glaziers daughter, sister, aunt, and wife (in case you aren't following, my dad, brother, nephew, and hubby are all Glaziers).  So when I go into home decor stores like Home Goods, I'm almost always instantly drawn to the menagerie of glass items.  Look how pretty they are!  Yes, I could have taken them all home and probably found a place...eventually...for them.  I'm such a fan of glass, I've even convince friends to join in my silent obsession (my best friend M reads this and she is the owner of a Clarity Trio set which she readily admits she never uses and bought on whim when at a candle party with me, oops!  Sorry M!) when I find really good deals that I don't need.  Anyway, tonight I didn't go for any of these lovely tall pieces.  In fact, I actually picked something low profile and simple in the glassware section tonight.  But more on that later


Sea Turtle
Confession # 3 - I'm still not 100% sure on how I'm styling the guest bathroom.  I keep changing my mind on what it should look like.  I've officially ruled out red.  I like the pale blue walls with the silver, white, and natural tones.  Unfortunately, I think the red pops of color, even in small doses, would be too much in this small space.  I found these beautiful (non-glass!) pieces tonight too, that I really love.  I'm really leaning towards the seahorse.  He's made from driftwood, and I think it's an absolutely beautiful piece.  I need to measure the base to make sure he'll fit on the shelf The Builder made last weekend (yes, he was really really busy with building projects for me, thus the reason we aren't actually done with the powder room).  I had no idea this was something I was looking for until saw it.  There's a matching sea turtle too (which reminds me of my best friend, who has one for each of her children tattooed on her back, which I love the meaning behind!) but I think it's too big for my bathroom.  Isn't it pretty though?!  But I really think he'll be staying at the store...

Confession # 4 - Well, I don't actually have one.  But here's a sneak peak at what I bought tonight.  It's going on top of my toilet, just like you see it here.  Simple.  Clean.  Perfect.


Surviving Saturday

It's a holiday weekend, and of course I have a ton of stuff to do.  Like make the cheesecake for Easter dinner tomorrow (this is my recipe blog).  Finish the spring cleaning on my kitchen (which is currently completely torn apart - The Builder felt the need to help speed things along...enough said).  Boil eggs for my kids to dye.  Oh, and laundry would be nice since I don't plan to work on it Easter Sunday!

But I have this powder room that is in a barely usable state, and it's driving me crazy!

Look at this sink fixture.  Let me assure you, it has NEVER been replaced.  When The Builder pulled it out this morning, the plumbers putty that they use to secure it was not adhering anymore.  It was cracked and icky.  This is a "mix it" faucet, installed by most builders because it's cheap and does the job.  The Builder calls it a "fix it" faucet because, in his words, "it sucks!"  You know, this is the type of faucet where you can never get just the right temperature on the water.  It's either to hot or to cold.  It's also just plain ugly, and the only one in the house on a sink (I have one on my master tub, but that's another issue...)

Then there's the sink itself.  I already share with you that I am not a fan of the clam shell sink. While I do appreciate that caulk does get old and allow water to leak through the edge, this is simply an ugly sink in my opinion.  To make matters worse, this one is really scratched up.  Someone came in with appliance paint at some point and sprayed just scratches.  Ahem.  If you're going to do something, take the time to do it right!!!  As I type speak, The Builder has removed the faucet fixture, the drain stopper, and taped off the freshly painted walls.  We are using appliance paint to repaint the sink, but we are repainting the entire sink.  That meant The Builder we had to sand out all the scratches and the uneven paint first.  Yes, it's a pain.  I would have loved to have just put down a quick coat and called it good.  But the goal is to NOT move again any time soon, and this is my home, even if I don't own it, so it's worth doing it right!


This is a close up of the bottom of the sink.  You can see the discoloration from the paint, all the scratches, and the sink stop that's also corroded and ugly.  Thankfully the new sink fixture came with a replacement piece too.  So when the paint is dry and the new fixtures are installed, this will really look good.

On a side note, if you decide to refinish a sink or an appliance, make sure you have good ventilation.  This paint has obnoxious fumes!  But it will be worth it when it's completed!

More to come soon...

Then There Was the Yard...

This post should be about my guest bathroom being finished.  I've written most of the post.  I know what it's supposed to say.  Except that would mean that I finished the bathroom this weekend.

And I didn't.  Well, at least not yet...

Instead, The Builder and I got up bright and early 8:45am and after a quick stop at Starbucks, headed to Home Depot.  The goal was to get the ceiling paint and the lumber for the projects he was going to make to complete the bathroom this weekend.  And we did get the paint (which is going up as I type) but we sort of got...sidetracked.  That's very easy for me us to do at Home Depot.

You see, this is the sad, sad state of my yard:

And this is actually better than it was.  When we first moved in, it was late summer.  Our landlord had a gardener come in and mow and chop down the weeds, but the lawn was half dead because the house had been vacant for two months.  There were a LOT of weeds.  But it looked...acceptable for the most part.  And so the yard went dormant for the winter and we sort of just let it go.  I mean, it's been mowed several times.  But it kept just looking shaggy and overgrown.  The weed whacker we bought when we moved in was stolen after a little over a month after we bought it, and as I said, the grass was dormant, so it wasn't a huge issue.  Only now the grass is very much growing again!  And so are all the weeds.  My house is the blight of the neighborhood, in my opinion, and that drives me crazy.  

Friday night, while stopping at the mall to pick up something, we ran in to Sears to see if they had any edgers on sale. The Builder found one at a price he felt was acceptable, so we bought it.  Those photo's you see are actually better than it was because he couldn't wait to try it out Friday night, lol.  Still, everything looks shaggy and unkempt to me.  The weeds growing under the palm trees make it almost appear that there isn't another planter box in the middle of the yard.  My neighbors both have neatly trimmed yards, which I think makes my yard look even worse.  I don't want to be that neighbor.

So this morning, in addition to the much needed ceiling paint, we picked up some weed and feed fertilizer, two rose bushes, a package of calla lilly bulbs, and some weed killer (to keep the weeds from growing in the middle of the side walk).  Here's The Builder fitting the landscaping cloth down and the first couple of bags of mulch:

Thankfully, we did already have the mulch, so our trip was a smidgen more cost effective than it could have been.  We bought 10 bags in preparation for this project.  And apparently we still need a few more.  Oops.

And this is after we're mostly done!!
It really does look so much better.  The middle photo is the view we see when we open the front door.  And now there will be a nicer view when we sit in the kitchen at eat at the bistro table (the bay window is in our kitchen).  I have a couple of minor things to do, including planting some Calla Lilly bulbs in the upper flower bed, and two rose bushes we bought to flank the front of the garage, but overall this is done!  We did a good weed and feed too, so in a few weeks, the yard should look more lush and green.

A successful Saturday project!

Chugging Along


texturing

OK, we made really good progress on the powder room today!!  The Builder got the texturing done (yeah) and it looks pretty good.  I'm not posting big photo's because, well, it's just texture. Not terribly exciting and not really something that photographs well.  Suffice it to say, it's done.  And that enabled him to get the painting done as well. No that the project went off without a hitch. Because it didn't.

After the texture was done, The Builder started cutting in for the painting.  I say started. He cut in the entire bathroom.  And THAT'S when we he realized....Houston, we have a problem.

When I was choosing paint colors, I wanted to make sure that I go the right color.  So I did something I rarely do, and I bought a sample size first to test on the wall.  Once I was sure I loved it, I took it back to Home Depot and told the guy it was exactly what I wanted, but in a satin paint.  While this bathroom doesn't have a shower, it's still a bathroom, and a satin is what is needed.  So I happily paid for my paint and went home. That was last weekend.  Due to the wallpaper issue, we hadn't had a chance to even open the can of paint until the texture was done.  And then it took getting all the cut in work done to realize that the guy had mixed up FLAT paint!!!  In case you aren't aware, they don't offer the sample sized in anything other than flat paint. So even though I told him satin, we were chatting, and he chose the wrong paint.  And really, it's just as much my fault because I didn't think to even look at the can to verify that it was indeed a satin paint. So today we took it back to Home Depot, where they very nicely swapped it out for the correct finish.  And here is what it looks like as of this evening:
Yes, I am really loving the color!!  We're not even close to being done in here yet.  The Builder has agreed to my idea of cutting down the existing mirror to fit it into a frame. We may end up buying molding and making a custom frame, because I'm afraid that the size I want may not be available in a ready made frame.  And I want a floating shelf under it to put some decorative items on it.

I also am going to change out that sink fixture, as I mentioned previously.  It really looks horrible now that the bathroom has been refreshed.  

I'm also considering updating the artwork.  I love the lighthouse picture that was in there, but the frame won't match at all. I could paint out the frame, which ultimately is what I would like to do.  However, then the picture won't look right.  It appears to be a matted picture, but it's not.  So the cream mat of the picture with a white frame doesn't excite me.

I am also seriously considering embroidering some personalize towels for this this room. I have an embroidery machine that I haven't used in forever.  It's time to put that baby back into use!  I think maybe I drool over the Pottery Barn catalogs a little too much sometimes, but since I already have the machine, it doesn't seem like a stretch to use it!  I can see pretty white towels with a letter E embroider on them...I have a thing about E's.

We have a church picnic we're going to tomorrow, so I'm not sure how much time we'll have to finish up the odd's and ends to make it a working bathroom again. Certainly the mirror won't be done, and we found out today we need some new parts for the toilet, joy, but with the paint done, I really feel like the big things are out of the way!