Pantry Updates & Storage Organization


Look at this pantry space!! This space is SO open now. I was super excited to wake up to this on Saturday morning. The Builder spent his evenings this past week taping, mudding, sanding, and texturing the walls of our new pantry and the wall behind it where the closet door once was. Our kitchen feels so much bigger now that this is opened up. I'm sure we'll lose some of that open feel when we build in the lower cabinet, but this really lets you see the space that we're going to have to work with.

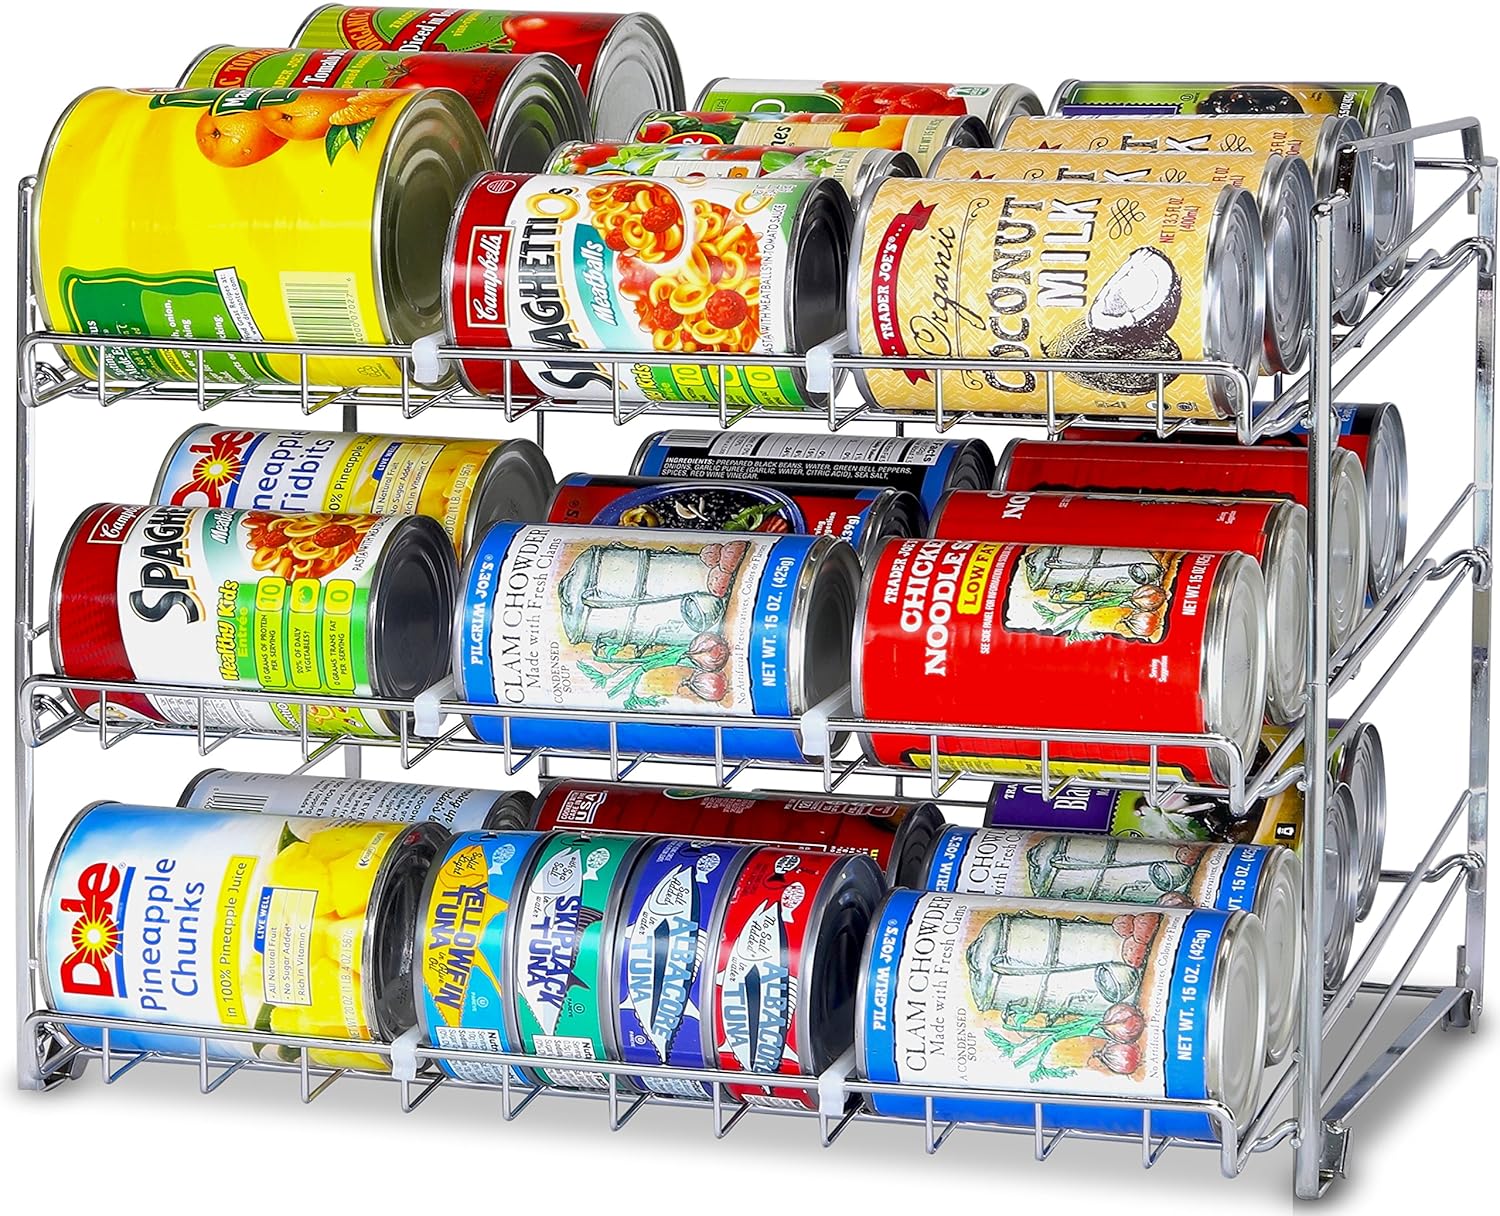
Speaking of space, we're going to have open shelving above the cabinet. I have to say, I've never really been a fan of open shelving. I don't like things to look cluttered and I can't imagine my boys family stacking things neatly. So I've been looking at ways to help the pantry stay better organized and I came across this from Amazon:


I'm not sure if one is enough or I'll need to get two, but I really like the way all the cans are easy to pull out. Our previous pantry, we stacked the cans on top of one another because there wasn't enough space, but many times, the cans fall over. Apparently, I was the only one capable of stacking them back neatly and I'd start finding cans on shelves where they didn't belong or knocked down on the floor. 

The other thing I've started stocking up on at Target are these baskets:


And then also at Amazon, I'm going to pick up these baskets for our onions and potatoes:
These will probably be on the lowest shelf so they'll be easy to grab. We used to keep the bags of onions and potatoes on the floor in the pantry. I can't tell you how many times we'd 'loose' them under packages of chips for school or behind the cookie sheets that were also stored there, then we'd smell find an unpleasant mess. I hate wasting food like that. 

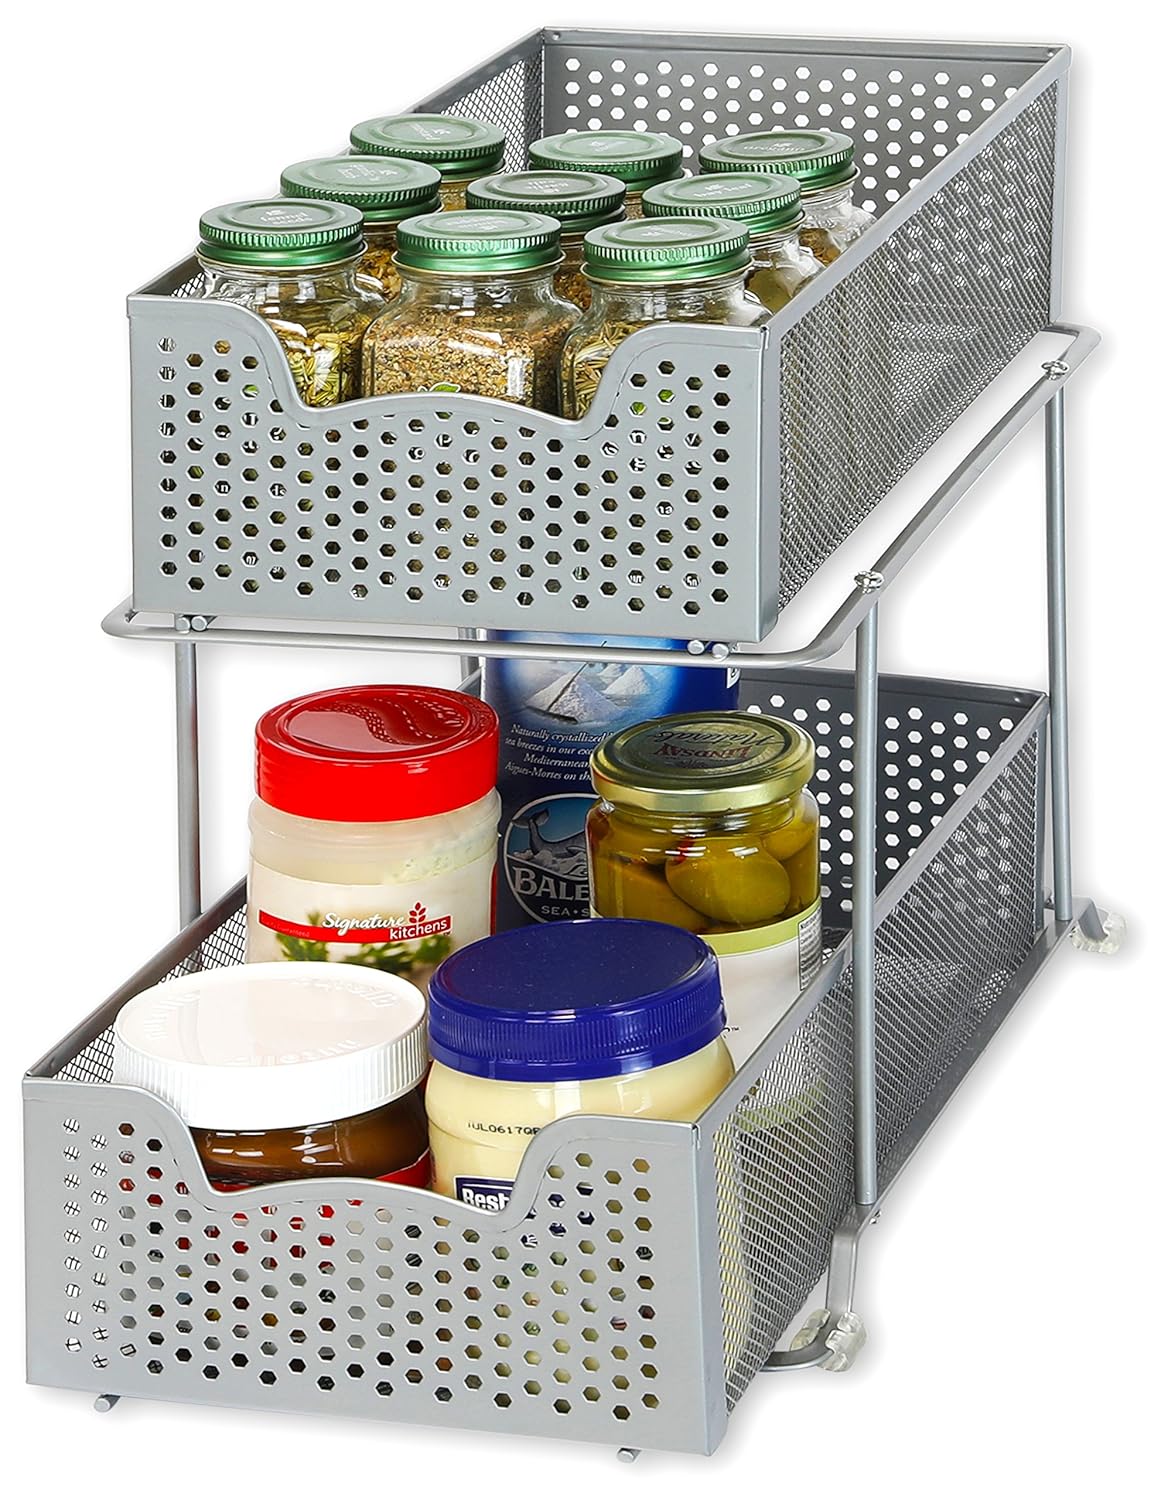
I also like the look of these:
I'm not thrilled about the color, but I like the functionality of these. Again, I want my open shelving to be VERY organized. Things that fall off the shelf easily will frustrate me. I like the idea of these holding all my bottles of vinegar (yes, I probably have close to a half a dozen different kinds of vinegar that I cook with...maybe more). And maybe a second one to hold all my Asian seasonings. 

Target has some baskets I've been picking up for a while now:
These come in a variety of sizes.  This small one I use to hold my seasoning packets. It's been great for keeping them in one easy to find spot on the shelf. I just bought a few medium sized baskets this weekend to hold things like boxes of things like cereal, pancake mix, cornstarch, and those odds and ends that no one can ever seem to find in the pantry. 

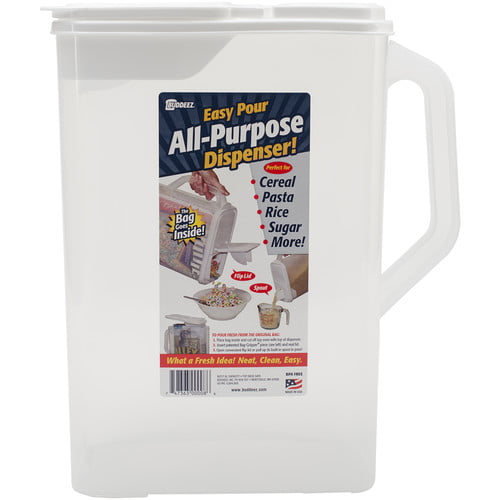
I also may pick up one more of these from Walmart:
These are fabulous for dropping a bag of sugar or flour in to store. The spout makes it easy to use while the plastic container keeps out bugs. I have several types of flour (self-rising, bread flour, cake flour, and all-purpose) so these really come in handy. They also do a fairly good job of keeping out moisture in our humid summers as well. 

And we have paint! We still need to touch up with another coat (this is still wet) but I am so excited! We headed out to Home Depot Saturday morning to get the materials for the cabinet and The Builder has been busy. Stay tuned!

Pantry Demolition Day

This spring has been very cold and wet. The cold is unusual. We typically break out shorts at the end of February and stay in them until Thanksgiving. But not this year! Of course, this is the spring we decided to get some outside stuff done before the summer heat kicks in. We managed to get the new fence installed, the ceiling up on our sunroom, and some patio chairs around our fire pit, but the rain has prevented much else from getting done. We didn't want to waste time though, so we started a new project.  

This was our coat closet. It was filled with jackets that are too small (literally, my 18 yr old son's jacket from when he was 10 was still in the closet!!), some odds and ends that we had stashed when we moved in that we didn't know what to do with, and the dog and cat food. So except for the pet food, it was completely wasted space. On the other side of the wall to the right is the pantry. I have yet to understand why home builders who build family-sized homes (we have a 4 bedroom, 2000 sq ft home) make kitchens that impractical! Our overall size is actually good in this kitchen, but the pantry was stupid small. We took the door off two years ago because things would spill out at us because it was over packed. In my defense, of my four kids, three are teenage boys.  They eat A LOT!!! And I love to cook. I like having a well stocked pantry. So I asked The Builder how he felt about closing off the wall to the coat closet and opening up the wall into the pantry to expand it out. He was completely on board!

You can see here that the drywall is going in where the closet door used to be. The two spaces are now open side by side, although the studs still need to come out. The left is the original pantry. I think if it hadn't been framed for a door, it might have felt more usable, even though there really wasn't any more space. But trying to get into the pantry through the narrow door was never good. The coat closet added about 36 inches to the overall width. The total width when we're done will be 84". The top will have open shelving but the bottom we're building a custom cabinet. It will have a butcher block top and three divided sections. 

One of them will be used to store the pet food that was in the coat closet.  We will use these recycling bins from Ikea:
One of them will be used to store the pet food that was in the coat closet.  We will use these recycling bins from Ikea. We bought one so we could properly size the shelves to put them on. This is the shorter one, but we actually bought the taller ones that will hold more food.  The 'door' that opens on the front of the recycling bin is perfect to be able to scoop out pet food. 

We'll also use some of the cabinet space to store my ever-growing collection of small kitchen appliances. Because you see, apparently I have a problem. I recently got a panini press to add to my collection.  Earlier this year I bought an Instantpot (LOVE this) and an air fryer (love this even MORE). We have a tabletop movie popcorn maker that my son got for Christmas, in addition to normal appliances, like a toaster. I also have an assortment of mixing bowls and other kitchen gadgets that aren't currently stored very well. My kitchen cabinets are awkward with a weird half shelf in them that doesn't let me store larger items. So this extra tall pantry cabinet is going to be a great addition to our kitchen.

You can see here we're filling in the wall with drywall. My goal is to put hooks on the wall so that we can still hang things like backpacks and purses here. I'd like to put in a storage bench as well. The Builder comes home with muddy boots from job sites and it might be nice to have a place to store them out of site (he currently drops them at the door). If not a bench, then perhaps a small table where can put a mail sorter and a key ring hook. My reality is that after next year, I'll only have one remaining child at home. So I want to keep this space practical


On the bright side of this demo, this is the first project that we've had at this house where when we opened a wall, there was NO water damage. I mean, there shouldn't be in a pantry and a coat closet. But with this house, we never actually know. We suspect most of the water damage is from Hurricane Ike. We know they put on a new roof after that. But this time, no water damage!
This demo did end up being more complicated than we expected. At one point in time, there was a security system in this house. The panel was still hanging in the coat closet but has been disconnected for some time. There was a power supply to the box that we thought we'd move to the outside wall since there was already a junction box in the pantry. Well surprise, that is a dedicated power line that is COMPLETELY SEPARATE from the rest of the power in the entire house. After we finally got it turned off at the box, The Builder went up to the attic to move the power line. Only to discover we'd have to remove the carpet in the closet of the boys' room to access the junction box in the ceiling to get to it! That is not a project we want to take on at this point so we're going to cap it at the wall and leave that as a project for another year day. 

This has all been over the last couple of weeks, but we've made a lot of progress this past week.  More to come!


Backyard Progress

For the last month, we've been working on the backyard. We've made some good progress, but not as much as I would have liked!  We completed a trashcan corral (I will spare you the photo's, it's a fenced off area inside our fenced in backyard and it contains...trash cans...) which I am thrilled about because we no longer have to store it in the garage. 

We also completed the last of the new fence.  This was the longest section, which spans the entire length of our house. Huge Kudos to my sixteen-year-old because worked with The Builder over three weekends digging new fence holes, pouring concrete, laying out the fence line, and getting it put in. And he did all the hard manual work, like digging fence holes and mixing and pouring the concrete. Since The Builder is only six months out from his last shoulder surgery, these are not things I we felt he should be doing.                                                                                                                                                     
Here we are on a non-rainy day (we've had a lot of rain this spring, not what we really want after Harvey...).  The fence really looks nice. We've added some Adirondack chairs that we purchased at Lowes. I really like the bright pop of blue back here.  We had a bonfire a night or two before this photo was taken and we quickly realized seating was a priority. We're running out of time for building the chairs on my project list, and that's OK. My family really likes these so this is a win-win!

Of course, the rest of the yard still needs work:


The view from the other side of the yard.  We were going to do a chevron brick walkway, but it will take more bricks that what we have and would more time consuming than we can do right now. So when the rain eventually stops, we're going to pull them out, till the area from behind the chairs back to the fend, and put in grass and a simple brick pathway. 
The other project we've been working on is using the weathered boards from the old fence to put a ceiling in the sunroom.
We're almost out of salvageable boards from the weathered sections of the fence, so the last little bit that's left in the upper left corner (not in the photograph) is going to be done with replacement board we used to patch the fence. Not the end of the world, but I'm hoping a vinegar bath will help them gray up like the rest of the boards.

So we still need to put about a dozen or so boards on the ceiling, refresh the paint in the sunroom, till up the backyard for the grass, and finish the brick pathway back to the dog run (this area is a swampy mess when it rains and a brick pathway would be a huge improvement!). Oh. And our other project. The pantry that we gutted when it started raining a few weekends ago. Stay tuned for that post!


Back to the Outdoors

Two months is a LONG time not to post. 2018 has not started out as planned.  My furnace was condemned (literally!) and had to be replaced New Year's Eve as we were expecting a hard freeze and temperatures in the 20's - which literally never happens in Houston.  Ever!  Except for the year my furnace dies, of course.

Then I needed emergency dental work that didn't work that has led to more dental work.  I could have bought a new car for what I've paid in dental and orthodontia bills over the past three years...

And February is almost over.  Sigh. My living room was SO cute for Christmas. And I was happy with my fireplace for Valentine's Day (I am much much smaller scale for other holiday decorating). But I'm not quite ready to put up what I have for St. Patrick's Day or Easter.

What I am ready for is to look into my backyard and not see a mud pit.

Our backyard has been pitiful from the begining.
This is the only picture I took of it when we were house shopping because there was literally nothing there.  A few trees that completely shaded the backyard and left nothing but a pile of dirt. Four years ago, a big storm came through and knocked down the largest tree (barely missing the house!) which was great for letting light back into the yard...and not so great for the weeds that started growing.

I wish I could tell you we've done something in the last four years with that backyard.  But aside from picking up the dog poop...we have not.

Last year we finally decided to make this sun room a livable space for us. The Builder built a brand new table for the space and we re-screen and tried to dog proof it (ahem, we're re-screening again for this summer, but just two this time instead of every frame!).

Late Summer


And this...is what I never show anyone.  This is my sad, sad backyard.  This is mid summer, so there's actually some weeds greenery and the tree is full. But this turns into muddy mess come spring and any summer rain storm. This winter it was a baren waistland. We didn't even want to use the fire pit (thus the logs you see from a tree we removed).

Which is now the goal! My oldest son is graduating in June and has already enlisted in the Navy (proud future Navy mom here!!) My brother and his family will be out and I'd like a nice backyard where the kids can play and we can relax in the evening. My sun room is so relaxing now, but the view out the windows is just terrible.

The whole back fence has to be replaced. Our neighbor to the left replaced her side last spring and we went in with our neighbor on the right to replace that side. But the two behind us are renters and so I don't really have any hope that they'd be interested in sharing the cost of rebuilding that fence. Once the fence is done, we're going to gravel around the fire pit, put in a brick path with reclaimed bricks back to the dog run, and put down sod in about half the yard. I don't have small kids anymore so there's no need to grass in the entire yard. Believe it or not there are actually already sprinklers here, we just need to make a few repairs to some broken lines and replace the sprinkler heads to get it running.

So here is The Plan:

  1. Replace the entire back fence - I wish I could say this is the most time consuming part...but it may not be. The goal is tear the fence down in sections, replace the rotted fence posts with new posts (we'll be digging new holes, which is labor intensive, but not chipping out concrete to use the old fence holes like we had to do on the side fences - bonus!). I have three teenage boys and I've promised them cold hard cash for their cooperation with this project. Ideally, we'd like to have this done in a weekend....but it may take two, depending on the weater and what we can actually get done.
  2. Lay the brick path from the sun room back to the dog run in - The Builder started with a lovely chevron brick pattern, but this may be hard to continue all the way down since we only have so much reclaimed brick. Either way, we need to dig a new trench for the path, lay down sand, and then complete the pathway. It will basically run the lengthe of the house. We'll be able to walk out to the dog run in any weather and not have to wonder where or what we're stepping in...
  3. Fill in gravel -  some of the muddiest places in this yard are around the fire pit (just to the right of the logs in the snow photo!) and in the dog run. Which means if I need to bring the dogs into the sun room, the are a mudy disgusting mess! We'll put a layer of weed paper down, then sand, and then the gravel which should definitely reduce, if not eliminate, the mud issue. We'd like to use crushed granite for it's durability. I am pricing out a few places to see what the final estimate will be. We're willing to spend more to get a more durable product for this one. 
  4. Install the sod - once the gravel is in, we're going to rototill the remaining yard, level it out, fertilize it, and lay down sod. This sounds simple, but my dogs have tore up this yard.  They've dug holes, created running tracks, and just made a wreck of it. We've marked out where the grass will go so we can figure out how much sod we'll need.  We're leaving a dirt area at the end of the house so the dogs will have a place to do their thing, as well as a 'path' around the edge of the yard for them to do their laps. My dogs live here and I can't have a space that isn't suitable for them, but we will be training them to stay off the grass.
Which all leads to the fun and pretty stuff!!!  If you follow me on Pinterest Pinterest - MrsMike you may have already seen this pin on my Backyard Red-do board:

I told The Builder that while I don't want lights over/around my fire pit (we plan to have tiki torches - more on that DIY project in another post!) I would love to have them strung across the grass area.  Four simple posts and some cable wire should do the trick. It's not listed on The Plan because this is not something that has to be done this summer...but it's something I definitely WANT to do! It would be lovely for backyard entertaining!

Of course there are many more things on my Pinterest board that I'd like to get done eventually, but I'm trying to schedule things that can reasonably be done in the next four months. 


We also want to build some cozy seating around the fire pit and some small side tables to set food and drinks down. I love these chairs from Ana White

We figure four chairs and two benches should comfortably seat our guests. This is another project on the want list due to time constraints.

And the time constraints are the biggest issue we face. We figure six weeks to get The Plan completed, providing the weather cooperates (highly unlikely) and The Builder doesn't have any required overtime at his job. In a perfect world, that puts into the second week of April, and just four weekends until my family arrives. This is why the pretty lights and the chairs and benches may need to wait until summer or even next year (when my second son is graduating from high school!). We also have some indoor projects that have to be done, like kitchen cabinets to refresh (our update in 2016 for the counters and backsplash still look amazing, but the cheap cabinets are showing wear again) and some touch up paint to complete. 

My daughter (the 2016 graduate!) also wants to put in a container garden. I don't see that being completed that in time for June, but it could be a fun summer project since she grows most of her plants from seeds and can easily transplant them. I'd really love to have a nice herb garden and salsa garden! We've actually discussed where the perect spot in the backyard to build a raised container garden will be. So that's on the one day list. 

Let the Backyard Redo commence!

Living Room Updated

Merry Christmas! This post is a little late, but I wanted to get it in before the new year. 

Our new sofa actually arrived the first week of November, far ahead of the December arrival date they originally estimated. But once we got the sofa in, we realized how empty the living room really looked. The old sofa didn't allow for end tables, a coffee table, or any type of media console. So the room looked big and empty. 

We decided to do the media console first since we needed to move the furniture around and the TV was no longer going up on the wall. We found plans on Rogue Engineer for a corner media center. Only I don't have any corners that it would work on. Thankfully The Builder was able to modify the plans to meet our needs, including extending the length. 

I originally wanted to build it all in walnut. We've got a fabulous local lumber yard where I can get just about anything I can dream of, including exotic woods. But solid walnut would have run us well over $600, which wasn't in the budget. Ultimately we did the frame out of pine, but the top from walnut veneer and used a 2x10 piece of walnut for the trim.  The veneer and one walnut board still cost around $100. The remaining pine was about $135. I still feel that for a solid piece of furniture, the price is excellent.  I need to get a better picture of the cross braces, which turned out beautiful. The Builder mitered the cross section together and it turned out perfect.

One thing we learned after I did the desk for my sons' room is that wood conditioner is really a necessity when you plan to stain. It comes out much more smooth and even, with no weird blotchy patches (even when you're being super careful!). The grain on this walnut is absolutely stunning and the photo doesn't do it justice.

So the media center being completed at least allowed us to the furniture around and set up the room. But it still left a dance floor in the middle of the room (my kids made sure to prove this point, lol). Also, with the linen colored sofa, I didn't want anyone eating or drinking on the sofa. We really needed a place to set food down and eat at while we're watching football TV.  It was a given that this would be another build for The Builder. We had recently priced coffee tables made from MDF and not only were we disappointed in the materials, but the MDF didn't seem to have any cost saving purposes. And again, we plan to load our coffee table with snacks to watch football TV and MDF is not family friendly.  We'd just finished the media console when Shanty 2 Chic  came out with a YouTube video for a new coffee table. Ironically, they scaled it down to be a smaller coffee table, but we needed something longer. So again, The Builder took the plans from their website and customized them to our needs. They call this the DIY 8 Board Farmhouse Coffee Table but we ended up using about 10 since we made it longer and ultimately a little wider. But again, I LOVE this coffee table.  It's solid and really compliments the media console. 
This is also made from pine as the budget didn't allow for more walnut, but surprisingly, they coordinate together beautifully. For now, I don't have any plans to add baskets or storage on the shelf. I don't like a lot of clutter and my kids will pile baskets sky high with junk. I love the clean lines, so this is how I plan to keep it. Altogether, we spent about $70 on the lumber. Another great investment for a solid piece of furniture. 

So let's talk about the elephant in the room. The wonky end tables on either side of the sofa. The one on the right was built to match the high arms on the old sofa. This is after The Builder cut it down. The table on the left is a LACK table from Ikea that we were sort of using as a coffee table over the summer. I say kind of because it was a pain to walk around, didn't match the room, and held next to nothing. I bought the lamps last year when Home Goods opened near me. They match our new living room PERFECTLY as if I had bought them to go with this furniture. So we've tucked the LACK table between the armchair and sofa temporarily so the lamps can be used for task lighting. 

Ultimately, we have one more build for this room, and that's the end tables. We plan to go with the Lybrook Side Tables from Rogue Engineer to coordinate with the media console and coffee table.  These side tables have the same X braces that I like for the rustic charm. We've got enough of the walnut veneer left to do both tops from so they'll really coordinate with the other pieces. I don't want large side tables because I know my kids will pile stuff on them. I like that each table should cost about $20.

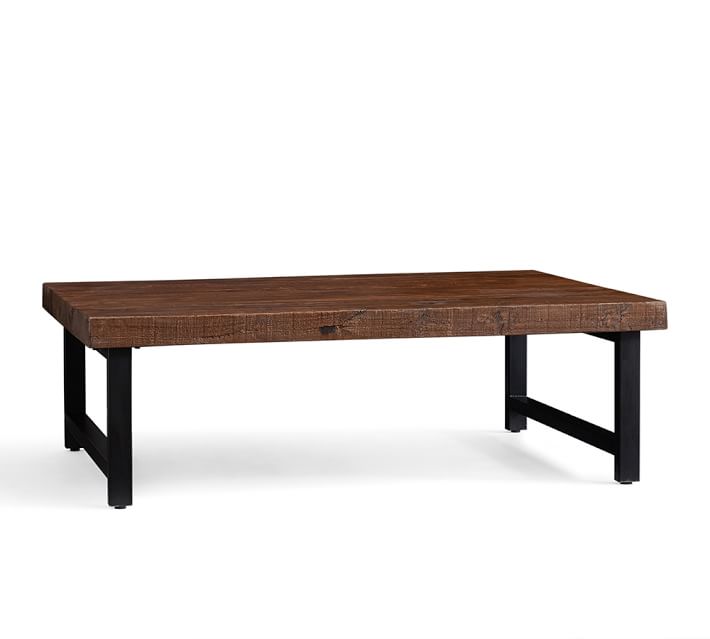
If you've been adding up the numbers along the way, we're roughly at $345 for ALL four pieces. My favorite inspiration store, Pottery Barn, has some similarly styled pieces (although this time, the inspiration started with the plans for the media console and I only took a peek at Pottery Barn's website to see what overpriced items they might compare to!). 
So this is not a duplicate. There are no cross braces. There isn't a bottom shelf. But it's reclaimed pine and solid wood.  On sale, it can be yours - for $824. Seriously.  And this isn't something I would actually buy. It's almost too plain and I don't like that it's missing the shelf. I'm not sure if they make coordinating end tables to go with this but the price of this alone is outside of my budget. They actually have some others that I like better, but the cost is even higher. 

So I feel very fortunate that The Builder was able to build something I that I really love.

I'm not sure when we'll get the side tables started, but they're on the top of the list for our spring projects. Our spring list of things to do is quickly getting long. Our oldest son is graduating in June and we have family coming out again. This go around we don't have any major projects, like master bathroom's or kitchens, but we do have some cosmetic things to get done.  And these end tables!


Living Room Inspiration

Last weekend I took some photo's of my living room with my fall decor up.  And I like my fall decor.  I really like my fall decor.

I don't like my living room.

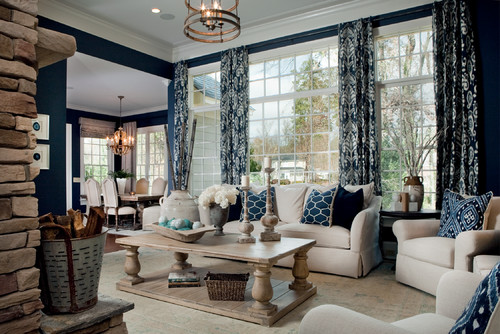
In my mind I see something like this


Well.  Sort of.  I don't actually want navy blue walls or a neutral colored sofa (I have 5 cats, 4 kids, and 3 dogs😆). My windows flank my fireplace. In real life, my living room looks like...hmm. Have I not taken a photo since we painted the mantle?!
So.  This is a photo of the living room in all its naked glory. Because apparently, I don't know how to keep an accurate photo log of changes I've made to my house. But this shows you the bones of the room that I have to work with. The fireplace flanked by windows, the window that is not centered on the wall (The Builder's pet peeve!) and our vaulted ceiling. 


So...this is the correct layout but not the right paint color.  But no white mantle. We painted it prior to my daughter's graduation party in 2016. Also, the aqua accents are long gone (The Builder's idea - we've agreed he doesn't get to pick out colors anymore!! 
So. At least this is the current paint! Let's move past the no windows in this photo (WHY?!) so you can get a better idea of the mantle now. Yes, this is exactly how it looks. Complete with the missing decor in the middle. Because I have yet to find what I want to go in that spot. Super annoying. (Ignore the peddle box covering the fireplace, it's how we're keeping kittens out of it while we train them)

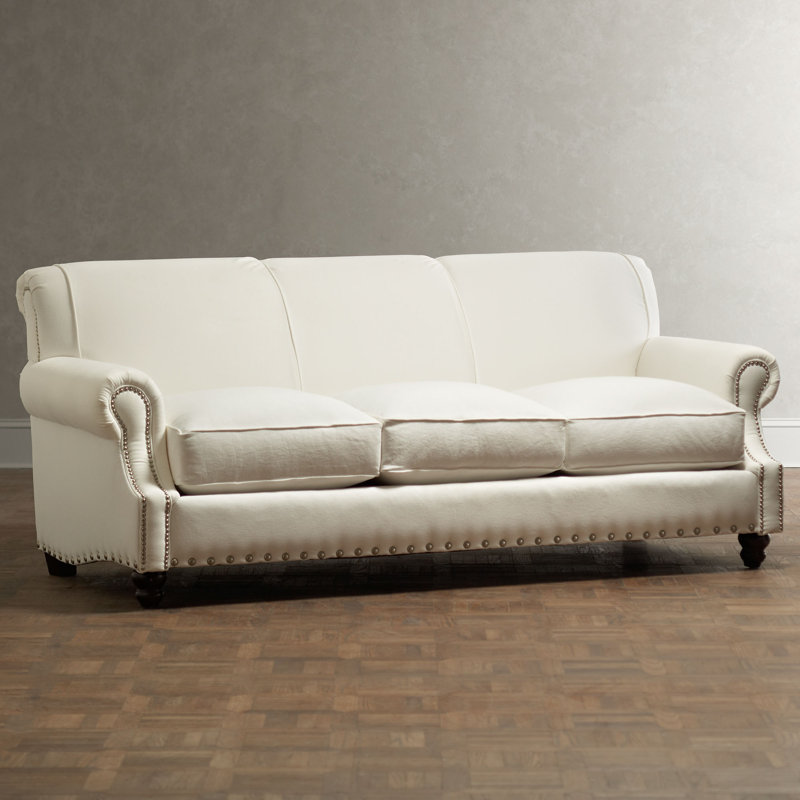
The other thing that is a problem, and maybe the main problem, is the sofa. It's huge (again, 5 cat's, 4 kids, 3 dogs...) which was a bonus when we bought it. And it was dark colored, so it hid stains very well for years. It looked amazing in our house in CA. The scale was perfect. However, it hasn't worked in any house we've lived in since. Now it just looks tired and sad. We're on the hunt for a new sofa and chair to better suit the layout of the room.  So I like this:
default_name
Just not that color!!  Ok.  Well actually I DO like that color. Just not in my house. So I'm thinking something more like this
default_name
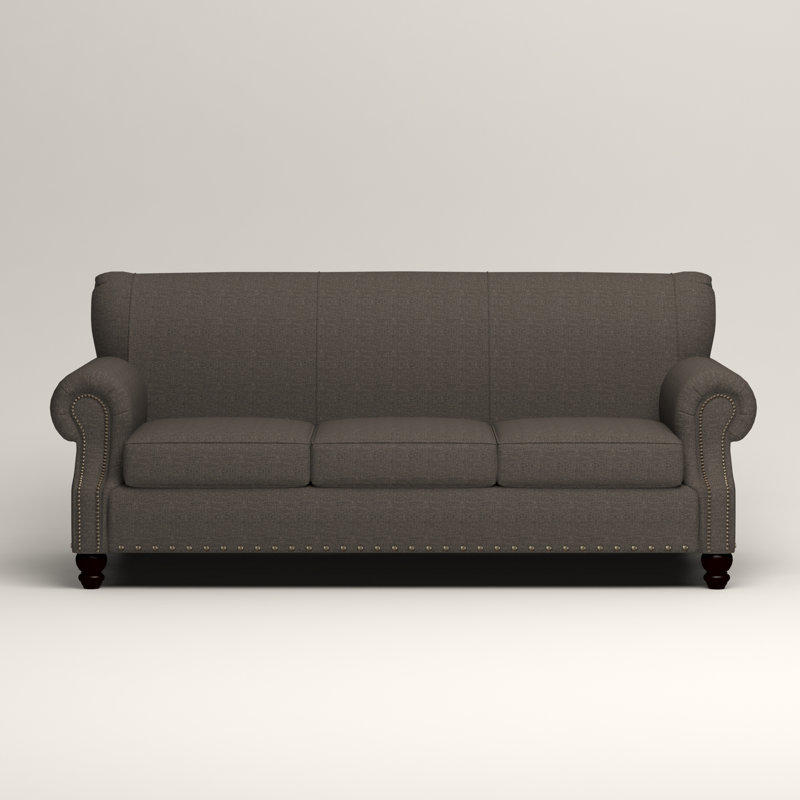
Can you tell it's a lovely, rich navy blue? I really like this.  We ordered a fabric sample and it looks great in the room with the existing drapes, the wall color, etc.  But I keep waffling on the blue. Will I get tired of it?  I don't want to feel bad in two years if I get tired of the color! There's a grey that's lovely too
default_name
The photo doesn't do it justice, the fabric swatch is much better in person. I highly recommend anyone who is considering ordering furniture online to get fabric swatches if you can. This color feels...safe. Again, it coordinates well with the existing paint and the drapes and just about any color I can think of if we get tired of blue. I think my hang up on the navy is Christmas. Blue with red and white accents is great for Memorial Day and 4th of July. Christmas though...I'm not sure how I would work it into my Christmas decor. 

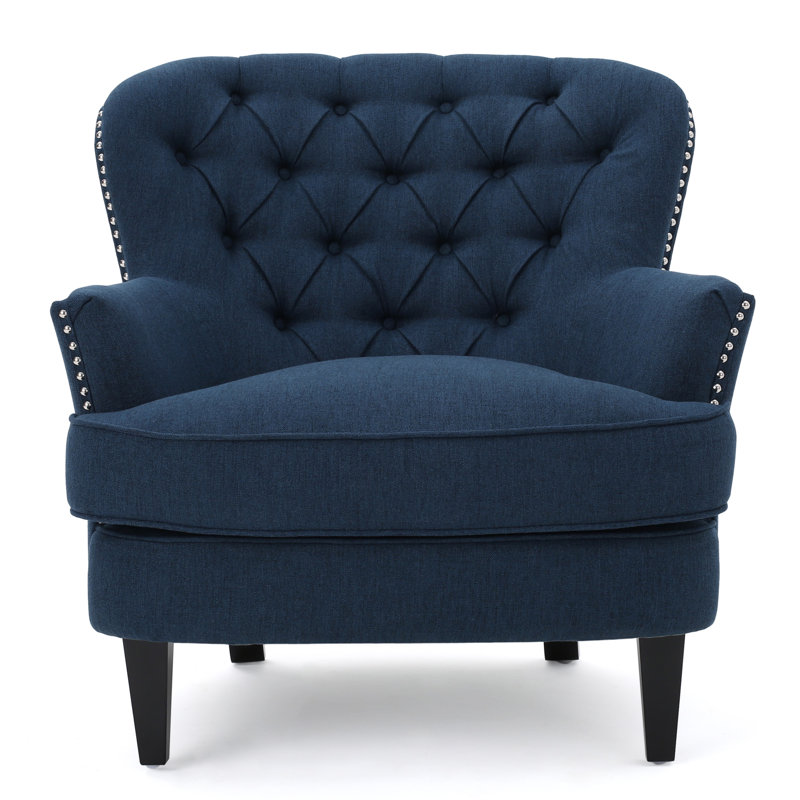
We like this chair to go with it:
default_name
But I don't think it works with the grey sofa at all. They have it in a linen color, and that would look fabulous. But my family and light colors scare me!!

The Builder also pointed out that new furniture will allow us to better use the space in this room, which is actually quite large but is eaten up by our giant sofa. We've been looking at a coffee table build and a new entertainment center build. I've been drooling over some Pottery Barn catalogs for inspiration, which is always fun.

I am going to try to take some better new photo's this week of my complete living room as it is now. That's the plan at least!


After Harvey

This summer I was basically MIA. I've been going to school full time in addition to my daily job. This is my last semester and I had some major papers to write and submit. Decorating, DIY, and crafting were the last things on my mind, but ones I was anxious to get back to.

And then Hurricane Harvey happened.

For those who don't know, I'm in the Houston area. If I cross the street, literally, I'm back in Houston city limits. I am incredibly blessed that we did not flood because just one cross street over, everything flooded and is a total loss. My kids all have friends who flooded out. I have co-workers who lost everything. And now that the water has receded and we're in clean up mode, it looks like a tornado blew through with the massive amounts of debris on every street. 

As you can imagine, it's hard to get back to 'normal'. I see posts on social media. The whole world keeps on moving, even though we had this devastating flooding. That's reality. But it's so surreal. I see critical posts on certain relief agencies, opinions on churches who couldn't open their doors during the flooding, opinions on how politicians are handling things, and the list goes on. Opinions that mean literally nothing to the families who have lost their homes, their loved ones, the life that they knew. What I see in my community is neighbor helping neighbor. Total strangers delivering supplies to anyone who says they're in need. I see everyone helping with mud outs, gathering cleaning supplies. Even creditors. Wayfair was AMAZING when I reached out to them about a missed payment. 

Saturday, despite 90-degree weather, despite my kids being horrified that I would drag out fall this early, I did exactly that. I took down all my summer decor and refreshed my home with fall decor. I needed something fresh after Harvey. My kids are still home from school today, but they'll return on Wednesday, and I'll take photo's of my fall decor and post what projects I want to get done for this season.

#houstonstrong

Sunroom Table

When we started talking about re-doing our screened in sun room, I had a couple of ideas. I really liked the look of some of the modular furniture you find at the Orange and Blue box stores. Again though, the cost. So I looked at some DIY options and liked this one from Shanty 2 Chic:
Size wise, I think it would fit well in the space and would make for a very cozy spot to drink coffee in the morning or even curl up with a book. But, I really want a dining room table to eat at. And I didn't think that this would work well.

Ultimately, I went with something else that they built, but the found the plans on Ana-White's web site:

Of course, we made a few modifications.  The original table was 88" in length after cutting your boards. Having a family of 6, we decided to make it longer at 96" for more seating. Ultimately, by the time we trimmed the boards evenly, we ended up with 94", and I'm very pleased with that. 

The plan also have you make the table out of pine. Can I just say, we're not fans of pine. It is our least favorite wood to work with. Because we live in Houston where it gets very humid, and this is an outdoor table, we decided to make our table top out of cedar. Surprisingly, we had to get the lumber at the Blue box store because they didn't carry cedar in 2x4's at the Orange box store. 

Originally we planned to have the table built and stained by Memorial Day, since we had a BBQ planned, but this cedar took a LOT more effort to sand down smoothly. For cost purposes, we did build the base out of pine.  We love how the table turned out:


This, of course, is not the finished product. We're going to stain the table with a color called Kona from Varathane/Rustoleum to match the chairs. I didn't like the skirt on the original table, which was optional, so we didn't include it in our build. This size is really perfect for this space and it fits right between the two fans (essential for comfort!)

You may also have noticed the lattice. I mentioned in another post that my dogs blew out the screening. Well, no sooner did we put this up, and next to the door that leads out to the backyard, my 80 lb labrador blew it out again. Twice. Re-screening this room is no small task and this lattice helps keep him off the screens. 

The rug is an outdoor rug from World Market
I bought two of them, since they're only 4x6. I love the colors with the accessories I've already bought. This is a super practical rug since it's polypropylene (aka, plastic) and can be hosed down in the event it gets dirty. 

We actually spent this past weekend staining the table, so I'll get those posted soon. 

We have a few more things to do as well. I want a bar cart to be able to store my outdoor dishes, so that's still on the building list. I need to purchase the drapes from the inspiration board (3 sets for the entire room). That means we need to run galvanized pipe for our curtain rod as well. 

Stay tuned!

"That" Room

We all have THAT room. That room in our house that we close the door on and pretend it doesn't exist. I think for many people, it's the garage. And my garage is pretty bad too. But the room that was the worst in our house is our screened in sun room. 

Here it is when we first moved in:
Literally, this is a photo of the first time I ever viewed the house and was taking photo's to show The Builder, who couldn't go with me that day.

We've never really made good use of this space though. Over the years, we've used it to keep the dogs out of rain, work on projects out of the elements, and we did briefly clean it out last year when we had our daughters' graduation party. Otherwise, this space has been completely wasted.

Until this year. 

This winter, my dogs completely trashed this space. The ledge around the windows got chewed off, all the screens got ripped out, and it was dirty! And I've had enough. I love to sit outside and enjoy a nice cup of coffee in the early morning hours, have dinner on the patio. and eat dinner mosquito free. As an added bonus, my oldest son will be a senior this fall, and if we re-do this space now, it's one less thing we need to prep for next spring (when all our family will come out to celebrate with us). 

So the past couple of weeks, we've been pushing to get it ready for summer before The Builder has his shoulder repaired and is out for the rest of the summer. 

I know I say this a lot on my blog, but seriously, have you priced patio furniture lately?! Even sets at the Orange and Blue box stores are stupid expensive. Maybe if I won the lottery, I'd consider it... Who am I kidding?  I'm way too cheap to spend that type of money on patio furniture. And that's not a bad thing.

So my inspiration started with some dishes I found at Pottery Barn. My work does these wellness incentives, where you can earn gift cards for good health habits. At Christmas time, I used my credits to get a Lowe's gift card to get The Builder a new table saw. This time, I got a gift card to Pottery Barn.  Because I would never, in a million years, spend that much on outdoor dining plates.  But my final cost was $8 out of pocket.  And that is doable!  So here's my inspiration board:


I started with the plates, which I really loved. I got the plates with coral and with the crabs, coral and sea horses. No fish for me! I looked at the tables for inspiration, and I found several that were OK, but none that I really loved. Thankfully, I was able to go back to my Pinterest board and find some great DIY options on my building board. 

I'm super excited to get this all executed and in place!

Canopy Bed

So I did find a photo I took of an update to our master bedroom after we changed paint colors:
I suspect I didn't post this photo because...it's terrible!  I must have had water spots on the lens of my camera. The photo is an odd angle. The purple pillow looks VERY bright and shiny. The paint is washed out by the flash on the camera. So I see why I didn't post it.  The others in the folder this is stored in aren't much better. 

So let's take a step back for a moment.  Once upon a time, I was a little girl in the 70's. And what I wanted more than anything else was a Holly Hobby canopy bed. My mom bought me a bedspread and decorated my room, but alas, no canopy bed.  

And in the days of internet wonderfullness, I even managed to find the actual print that was on my bed as a child.


I think this clearly explains my complete aversion to pink in my adult life. This is the fabric that my bed set was made from. I had red-orange shag carpet that matched her hair. My walls were pink and my furniture was painted green. And of course, there were matching drapes. 

I can't even contemplate how this fabric would have looked on a canopy bed...

Ok, let's fast forward to TODAY after my trip to Ikea to swap out my drapes:
<sigh> I love it. Although the quilt is washed out in this photo. The colors are soft. But in real life, they're not quite this muted.


And we have discovered that our old bed frame, which started it's life as a queen size bed frame, and was expanded to accommodate our king size mattress, didn't actually fit our king mattress. There was always a slight hump in the middle of the bed. It wasn't bad and really, after four years, we really didn't notice it. Until we put the mattress in this bed. And oh my goodness, we are in bed heaven!

You can also see in this photo the infamous 'wall that was purple'. It's the only wall in the bedroom that has the standard ceiling height. It was a deep, beautiful purple. And as I mentioned, we loved it. But we love the feel of this even better.


New drapes. Pardon the fact that I haven't hemmed them yet!

So eventually, I'll need new lamps. I found some at Hobby Lobby I really like, but I need to wait for them to go on sale. Until then, these work fine.

We moved my desk into the living room. The new bed is just big enough that it seemed like we suddenly had too much furniture in our bedroom. So here's a parting shot of Hazel, who's has claimed my desk as her new sleeping spot:

Quick Updates

I was working fast and furious last month on finish three term papers for school. Working full-time and going to school full-time can be a challenge, but I know it will be worth it when I finish (which will be no later than this August but could be sooner!!)

So there are several projects that have been on my list, but due to lack of time, I hadn't even started. One of them is our master bedroom. I know. We just re-did it three years ago when we bought the house. And for the most part, I still really like it. But you know how when you live in a room long enough, you come to realize things need to change? That's how I've been feeling for about the past six months. 

The last time I posted, our bedroom looked like this
Ahem. So it mostly looks nothing like this now. Apparently, when I did things like paint the closet wall to be a deep purple, change the paint color, and move the bedroom around, I didn't take any photo's of it. I'm not sure how that's possible...but apparently, it's true!

So let's talk about what is still the same - the rugs, curtains, bed, and furniture. Everything else has changed over the last few years.  

Let's start with the duvet on my bed. I bought a nice duvet from Ikea, that I still love.  It is SO warm and toasty in the winter and has a nice weight to it when you sleep. However. We almost never have a winter here in TX. And when we do, if it lasts a week, it's a really long winter. And it's not that we don't get cold weather (uh, ok, barely) but this is a really warm duvet. The photo above shows the cover I bought for it and I still love it. But the duvet has been packed away and is only brought out for when the temperatures are truly cold. In its place, I bought a lovely white quilt. It felt crisp and bright, wasn't overly hot, and I genuinely love it. Except for one thing. Why on earth did I buy white?!  I have a husband, kids, and DOGS. Keeping it clean and white requires washing it almost every day. What was I thinking?!!!  I was lulled by all the lovely and tranquil pictures in blog land. 

Moving on. The wall color.  I'm laughing. I hated this color when we moved in the house. In fact, we painted the entire house after we moved in. EXCEPT our bedroom. Yeah, I don't know why. Maybe we ran out of time? So after we bought the house (we rented it first) we finally painted it a beautiful color called French Silver by Behr.
I realized looking at this swatch that it almost has a lavender undertone to it, but it's still a gray. And I love it!! The paint color is definitely not being changed. In fact, we painted back the deep purple accent wall over the weekend. The great thing about paint is that when you're tired of it, you can just paint over it (after two coats of primer and then two coats of paint...) and so now our room is all one color.

Which, of course, has led me to want to change out the white quilt. I love it. I do. But the constant need to wash it is driving me crazy. So I was web surfing the other night and came across this:

OK, ignore the ugly way they staged it. Seriously, that room is not inspiring. However, in the catalog, it was much prettier. So I ordered it. It arrived today, and it's softer, with a few more neutral tones than you can see in this photo. But I think it's going to be perfect. It definitely goes with the wall color (and the area rugs next to our bed) and since I have now bought a total of four different bed covers since the initial cover for the duvet, and really, I just want to be done at this point

The other update we're making is the bed. A few years ago, we bought an iComfort bed from Seely and now I'm spoiled for life. No other bed is as comfortable. However, we have the same bed frame that we bought when we first got married 20 years ago. I did buy the wrought iron headboard from Ikea about 10 years ago, but it's actually for a queen size bed, which we had at the time, and it doesn't actually fit our now king size bed. It's not obvious that it's the wrong size because it's nice and tall. But late last year, our bedframe broke. It's now propped up on wooden blocks to keep it from crashing to the floor. And I could go out and buy another plain bed frame and keep using what we have...but we decided to go a different route.

The Builder's birthday was a week ago, and we stayed in an amazing room in a historical mansion in Galveston. The mansion was built in 1860 and survived the 1900 Galveston hurricane, the worst natural disaster in US history. It was amazing, and the owners have been restoring it since they bought it four years ago.  One thing we really fell in love with was the huge, four poster bed. Now it may have been a reproduction (although they had amazing antiques in the house) but we loved the size of the bed. The room was cozy and intimate. And we both agreed it was a feeling that was lacking in our bedroom. I had every intention of having The Builder make us a new bed, but it would be many months before that could happen because of a medical issue he's dealing with.

I know I say this every time I start a new project, but seriously, have you priced beds lately?! I don't know why I continue to be horrified.  I started with this beautiful bed from pottery barn, which had a similar feel to what we slept in:
I like it. But I don't love it. I particularly do not like the $1755 sale price (normally it's $2700. For real). And the spindle posters aren't quite what I'm looking for, they're too fussy. So that one wasn't even a consideration.

So this weekend I was cleaning out my email box and there was a sales add for Birch Lane. They're another division of Wayfair, and somehow I got on their mailing list. Usually I just hit delete, but I decided to take a look. They were having a 20% off sale with free shipping and I am always on the lookout for a good bargain.

So I when I came across this I looked a little closer.

Not only was this one on sale for about $500, but with free shipping and 20% off, this was definitely worth considering. The bed I really wanted to build, the posts were about $100 each. Add the rest of the materials, The Builder's time, and the delay in being able to build made buying this a no brainer. Even better, the free shipping actually has it here TODAY!

So of course, this will have to be assembled. Thankfully I have two teenage boys who will be able to help me put this together under The Builder's supervision (he can't lift more than 10 lbs. right now, and the website states this weighs about 210 lbs!) OK, I doubt it will be done today. In fact we probably won't get it put together until the weekend. But I am so excited!! The added bonus is that it appears to match our dresser, which we bought years ago, almost perfectly. Since I'm not replacing any furniture, this is an added bonus.

I see new curtains in my future as well...