Then There Was the Yard...

This post should be about my guest bathroom being finished.  I've written most of the post.  I know what it's supposed to say.  Except that would mean that I finished the bathroom this weekend.

And I didn't.  Well, at least not yet...

Instead, The Builder and I got up bright and early 8:45am and after a quick stop at Starbucks, headed to Home Depot.  The goal was to get the ceiling paint and the lumber for the projects he was going to make to complete the bathroom this weekend.  And we did get the paint (which is going up as I type) but we sort of got...sidetracked.  That's very easy for me us to do at Home Depot.

You see, this is the sad, sad state of my yard:

And this is actually better than it was.  When we first moved in, it was late summer.  Our landlord had a gardener come in and mow and chop down the weeds, but the lawn was half dead because the house had been vacant for two months.  There were a LOT of weeds.  But it looked...acceptable for the most part.  And so the yard went dormant for the winter and we sort of just let it go.  I mean, it's been mowed several times.  But it kept just looking shaggy and overgrown.  The weed whacker we bought when we moved in was stolen after a little over a month after we bought it, and as I said, the grass was dormant, so it wasn't a huge issue.  Only now the grass is very much growing again!  And so are all the weeds.  My house is the blight of the neighborhood, in my opinion, and that drives me crazy.  

Friday night, while stopping at the mall to pick up something, we ran in to Sears to see if they had any edgers on sale. The Builder found one at a price he felt was acceptable, so we bought it.  Those photo's you see are actually better than it was because he couldn't wait to try it out Friday night, lol.  Still, everything looks shaggy and unkempt to me.  The weeds growing under the palm trees make it almost appear that there isn't another planter box in the middle of the yard.  My neighbors both have neatly trimmed yards, which I think makes my yard look even worse.  I don't want to be that neighbor.

So this morning, in addition to the much needed ceiling paint, we picked up some weed and feed fertilizer, two rose bushes, a package of calla lilly bulbs, and some weed killer (to keep the weeds from growing in the middle of the side walk).  Here's The Builder fitting the landscaping cloth down and the first couple of bags of mulch:

Thankfully, we did already have the mulch, so our trip was a smidgen more cost effective than it could have been.  We bought 10 bags in preparation for this project.  And apparently we still need a few more.  Oops.

And this is after we're mostly done!!
It really does look so much better.  The middle photo is the view we see when we open the front door.  And now there will be a nicer view when we sit in the kitchen at eat at the bistro table (the bay window is in our kitchen).  I have a couple of minor things to do, including planting some Calla Lilly bulbs in the upper flower bed, and two rose bushes we bought to flank the front of the garage, but overall this is done!  We did a good weed and feed too, so in a few weeks, the yard should look more lush and green.

A successful Saturday project!

Chugging Along


texturing

OK, we made really good progress on the powder room today!!  The Builder got the texturing done (yeah) and it looks pretty good.  I'm not posting big photo's because, well, it's just texture. Not terribly exciting and not really something that photographs well.  Suffice it to say, it's done.  And that enabled him to get the painting done as well. No that the project went off without a hitch. Because it didn't.

After the texture was done, The Builder started cutting in for the painting.  I say started. He cut in the entire bathroom.  And THAT'S when we he realized....Houston, we have a problem.

When I was choosing paint colors, I wanted to make sure that I go the right color.  So I did something I rarely do, and I bought a sample size first to test on the wall.  Once I was sure I loved it, I took it back to Home Depot and told the guy it was exactly what I wanted, but in a satin paint.  While this bathroom doesn't have a shower, it's still a bathroom, and a satin is what is needed.  So I happily paid for my paint and went home. That was last weekend.  Due to the wallpaper issue, we hadn't had a chance to even open the can of paint until the texture was done.  And then it took getting all the cut in work done to realize that the guy had mixed up FLAT paint!!!  In case you aren't aware, they don't offer the sample sized in anything other than flat paint. So even though I told him satin, we were chatting, and he chose the wrong paint.  And really, it's just as much my fault because I didn't think to even look at the can to verify that it was indeed a satin paint. So today we took it back to Home Depot, where they very nicely swapped it out for the correct finish.  And here is what it looks like as of this evening:
Yes, I am really loving the color!!  We're not even close to being done in here yet.  The Builder has agreed to my idea of cutting down the existing mirror to fit it into a frame. We may end up buying molding and making a custom frame, because I'm afraid that the size I want may not be available in a ready made frame.  And I want a floating shelf under it to put some decorative items on it.

I also am going to change out that sink fixture, as I mentioned previously.  It really looks horrible now that the bathroom has been refreshed.  

I'm also considering updating the artwork.  I love the lighthouse picture that was in there, but the frame won't match at all. I could paint out the frame, which ultimately is what I would like to do.  However, then the picture won't look right.  It appears to be a matted picture, but it's not.  So the cream mat of the picture with a white frame doesn't excite me.

I am also seriously considering embroidering some personalize towels for this this room. I have an embroidery machine that I haven't used in forever.  It's time to put that baby back into use!  I think maybe I drool over the Pottery Barn catalogs a little too much sometimes, but since I already have the machine, it doesn't seem like a stretch to use it!  I can see pretty white towels with a letter E embroider on them...I have a thing about E's.

We have a church picnic we're going to tomorrow, so I'm not sure how much time we'll have to finish up the odd's and ends to make it a working bathroom again. Certainly the mirror won't be done, and we found out today we need some new parts for the toilet, joy, but with the paint done, I really feel like the big things are out of the way!  


Surprised Aren't Always Good...

As I mentioned earlier, The Builder and my two oldest boys were off at Boy Scout survival camp this past weekend, and I was going to use this 'free' time as my chance to re-do my downstairs guest bathroom. AKA - the powder room.  Now this is a SMALL room.  If this was my house, there would be a number of things I would change, starting with the vanity, changing out the mirror, and swapping the light fixture.  Not to mention having the door swing out so that you can come all the way into the bathroom and shot the door without fear that the doorknob will hit you someplace uncomfortable...as it does now.  Yes, that's as far as you can open the door before it hits the toilet.  Who does that?!  I would dearly love to have the door swing out, only then it's blocking the walk way to the laundry room if the door isn't kept closed all the time.  There is no winning situation on this door.  I think a pocket door would have been the most practical and maybe we'll talk to our landlords one day about making the change.  But for now, this is what we live with

You may have noticed that there is no toilet paper holder.  There was when we first moved in.  It was white and plastic and it was attached to the wall with command adhesive strips.  Yes, I kid you not, that's what they used to anchor it to the wall!  While this guest powder room doesn't get a lot of use - I really save it for guests because I have little boys who "miss" and even though they've been taught to clean up after the miss, knowing and doing is sometimes two different things and I want a bathroom that I know is clean and safe for guests at all times - it gets enough use that the toilet paper holder fell off the wall around Christmas time.  It has a lot to do with the horrible texture in the bathroom that the command adhesive strips couldn't adhere to. This whole house has a really rough texture on the walls.  But again, that's another post. Suffice it to say I've been very uninspired with this room due to the size.
This is the builders grade cabinet, stock mirror and original sink. I point this out because this is the only room in the entire house that I thought had never had an update done to it.  That sink is a mess.  Someone tried to paint out the scratches with appliance paint that were in the bottom of the sink.  The faucet is a calcium pock marked mess, and the scallop molded sink is hideous.  Thank you 1980 something for creating horrible sinks!  Again, I'm reluctant to make any significant changes because the house isn't mine. I've got great landlords, and they seem to welcome any improvements I'm willing to pay for and do the work for, but I'm not at that part yet.  I'm at the part where I'm willing to repaint and update the faucet only and learn to live with it for now.

Which brings me to my next...issue.

I thought it would be SO easy just to slap a coat of paint on.  I found a lovely color of Behr that would add just a little color but keep the room light so as not to make a small room seem smaller.  Off Shore Mist is the paint name, and it's one with the primer in it as well.  I figure this would be my best bet since I'm not sure on the quality of the paint in this room (there was a lot of leftover Walmart brand paint - which they don't make anymore - in the garage when we moved in, that they said we could touch up with if we needed, bleck) as there are rooms that have some streaky coats from cheap paint that is too thin that no one bothered to go back and touch up.  So here's a small sample of what it looks like:

I like it!  Soft and subtle, and my pops of red from all of my light house accessories will look really nice.  I'm going for a light and airy feeling since there is no natural light in this bathroom.  I'm even changing out the light bulbs to daylight  CFL's which give a much nice natural light feel.

So all was good and well after my little test corner.  I taped off my counters and around the door to prepare for painting.  Then I unscrewed the plates on the light switch and electrical outlets because I hate when people paint around them. It was then that I noticed a little remnant of wall paper behind those covers. So apparently I was wrong. This bathroom had had an update to do away with the silver and white something wallpaper that had been installed at one point.  So I figured I'd just peel those little scraps of wallpaper off because I didn't want to leave them behind. And low and behold, the WHOLE WALL stripped off!! Instead of stripping the wallpaper off, they put a rough texture into the paint and simply painted over the whole thing.  OMG!!! Which left me with this hot mess:

Seriously?!

So I had to wait for The Builder to come home so that he could mud the wall and pick of orange peel texture before I could even think about starting to paint.  He was mildly annoyed with me only because he said I should have never peeled off the wallpaper when I saw those tiny little scraps behind the outlet covers.  So he re-muded  the wall that evening for me (because I'm loved and he knew that this would drive me crazy every time I look at it - which it still is!!) and even knocked down all of the rough texture, which I am eternally grateful for.  As you can see, we are not going to strip the whole powder room.  If we ever bought the house, and yes, I would love to buy this house, it's something that we would consider then.  But one step at a time.  Now we have to get the texture on, and then finally I can get back to the painting that I want to do!  I found a beautiful small bathroom on another blog that I read that was the color palette inspiration for my bathroom, so I know what direction I'm going with this room. I'm still working on talking the builder into taking down that mirror and cutting it to fit a frame that we can hang on the wall, but that hasn't been 100% approved yet.  And I want a new faucet.  I don't think I can live with that hideous faucet once the room is repainted and pretty again. And yes, I did buy a new toilet paper holder that will not require command adhesive strips to attach it to the wall!!

More to come...

Kitchen Update

You may remember this photo that I posted back a month or so ago when I got the bistro set for the kitchen.  I posted then that this was not a finished project, but it was one more step to being a finished project.

A couple of weeks ago The Builder finally made me a curtain rod for the bay window.  I kept meaning to post them, but I think most people know how it can be when you have a family and time gets away from you.

the connector piece
The Builder made the curtain rod from electrical conduit that I bought at my local Home Depot (seriously, I love this stupid store and I should buy stock so I can at least re-coup some of my investment!). Because of the size of the window, we ended up with three 6 ft. lengths. They were out of the 8 ft. and I wanted this project done, so it was worth it to me.  In the end this worked our really well, because we were able to bend two pieces to match perfectly that curve, and then cut the third piece to the specific size for the middle piece.  I used connectors found in the same dept. to connect the 3 pieces together.  This was all galvanized conduit. I temporarily considered leaving it as is because all the fixtures in the house have a nickel finish.  But the galvanized conduit really isn't a nickel finish, so I decided to buy a can of black spray paint to get the wrought iron look that I had wanted all along.  I was able to purchase brackets to hold the curtain rod at Home Depot as well and I even snagged the last two they had in black, hooray!  They were actually the most expensive portion of this project, at $4 a pair.  I realistically needed 3 brackets, but since we had four, we put them up for the stability.  The silver screw you see in the photo?  Yeah, I took a sharpie and colored it black.  I learned about coloring things black with a Sharpie from my kids. Enough said on that!!

The curtains I kept going back and forth on.  I wanted black curtains with a red floral print.  The kitchen is supposed to have a French Country feel to it.  In my head, I know what those curtains are supposed to look like. However, I haven't been able to find them anywhere, and not for a lack of trying.  I seriously contemplated making them (side note - through all four of my pregnancies, the minute I was pregnant I had an overwhelming desire to sew up new curtains for the entire house. It was a bizarre side effect of pregnancy, and one that I haven't had ever again since we had our fourth child).  I haven't given up on finding the curtains I see in my head, and I wouldn't hesitate to sew up a set if I found the right fabric (although my husband might start having heart palpitations at the thought since we are very done have kids!).  But I had a set of red, fully lined curtains from the office at our old house and they are very nice curtains, so I went with them.  The valance over the kitchen window is red as well, and although the two fabrics are completely different because they're the same color and not together, it isn't noticeable.

Here are some pictures of the overall kitchen:

Slow and Steady Wins the Race

Alright, I've made some headway with my project over the last two weeks, and will post the photo's this evening when my house is quiet (2 of my kid-lets are doing a survival with The Builder and Boy Scouts this weekend).

I'm also headed down tonight, unbeknownst to The Builder, and buying paint for the powder room, and most likely, the laundry room (same color).  My powder room is pathetic.  There is no guest quality to it at all and it does not match the rest of the house.  I'd seriously gone back to considering beadboard wallpaper, since I have been admiring it on all the other blogs that I read, but my walls are pretty texturized (yep, ick) and I don't think it would go on well. I certainly don't want to scrape off half the texture to put it up.  I just don't think that would make my landlord happy!  So a paint update it is. 

I'm thinking I need to work on the kids bathroom upstairs as well.  Paint?  Art work?  Not sure.  But the shower curtain all by it's lonesome is not really a decorated space.  In the last bathroom I let the bright color speak for the space.  This bathroom has a lot of natural light in the afternoon, and I'm afraid that such a bright color is just too bright.  Plus, I don't want to have to paint over that bright green.  So I think artwork and some decorative items are called for.

More later!

Catching up

No post in three weeks. UGH!

Week 1 - just normal family activity.  While there was a lot I wanted to get accomplished, I don't intend to kill myself in the process, thank you very much.

Week 2 - I had high hopes for this weekend! My husband and two oldest boys were off at camp, so I planned to get a lot done in their absence.  But then my baby was sick with a fever and a bad cold, and he just wanted me to lay with him.  And since it was a weekend, there was no way I was going to not spend time with him! :)

Week 3 - what's that saying about the best laid plans...?  So I had a fantastic "to-do" list for this past weekend.  I was going to knock out 2-3 projects, price a 3rd, and finish up some miscellaneous stuff.  But Saturday my hubby The Builder got called away to work (you know, something that pays the bills and for my projects!).  And then he ended up tweaking a muscle in his back.  Nothing serious, but painful enough to keep him on the sofa all day Sunday.  So no projects completed.  And all my "to-do's" needed some brute strength for assistance, lol.

Soooo, here's what's in the works:

First, I need to finish the ceiling in my laundry room.  We had a leak upstairs in the bathroom and it ruined the ceiling my laundry room.  Not fun, but relatively easy to re-do and I got to update the horrible florescent light box that was the light (rental house, so normally I don't get any options to update light fixtures, although this was the only ugly one in the house, so still not a huge complaint).  

Now the laundry room itself is a problem for me.  It's a very small box.  No windows for natural light.  It barely fits my HE machines with their pedestals.  While I really like the pedestals because they save me from bending over a billion times while doing laundry, I don't actually find them to be practical.  What on earth do you put in them?!

Heidi's Laundry Room.
So I was reading one of my many favorite blogs, Home By Heidi when I came across her post about her laundry room.  She had similar space issues (I think I actually have a slightly smaller space by about a foot) but look at what she did with her machines:

WOW!  I know logically that my machines stack.  I do.  But I guess I never contemplated what it would do for the space!  Now her final space has beautiful built in cabinets, which will not be an option for me in a rental home.  But what I do plan to add is a counter to fold laundry, as well as the space under the counter to store the baskets that the kids bring down and I use for sorting while I'm doing laundry.  To that extent, I'm contemplating another design by Ana White for her Laundry Basket Dresser.  Here's a quick peak at what it looks like:
I won't be using this exact design, my hubby The Builder will need to make some modifications because I have hampers that I use to sort laundry (there are 6 of us, we have a LOT of laundry!).  But then again this may work better for folding and sorting, with each family member having a spot for their clean things when they're folded.  I'll have to give that some more thought.


The Ceiling 
Of course, this now falls in line behind all the other projects that have been put on the back burner.  And really, I can't do anything until I get the ceiling finished.  But as you can see here, I'm in desperate need of space!  Both the washer and dryer doors hit another door, and then there's the cat box in between - NOT a good spot if laundry falls.  Plus the shelf that's there now doesn't have a space to hang up clothes on a hanger.  As you can see in these sad photo's of my laundry room.  Poor Holly Golightly, I'm sure she would not approve of being stuck in this room!  I'm thinking a fresh coat of paint may be in order too.  I really wish I could change the color to add some oomph, but that's one of the drawbacks of a rental property.  I'd love to do some bead board!!  But I'll leave that be.

Yes, cat litter is stored on top of the machine
I lock the dead bolt when I'm doing
laundry so no one accidently opens the
door while I'm doing laundry!
In case you forgot, I still need a media center for my living room, a floating shelf for each boy, picture frames painted, a curtain rod made for my bay window, and subway art for my master bath.  And I'm thinking about recovering my dining room chair seats. Because I'm crazy it seems....

That's it, the whole space from side to side...

But now that I know there's hope, and I have room to store my pedestals elsewhere, I'm thinking that some serious changes are in the works!  Maybe not this coming weekend, since my hubby The Builder still needs to take it easy until his back is all better, but this is definitely my spring project and should be done by the end of the month!  It is the saddest room in the house, although followed closely by the room directly in front of it, the powder room.  But that's another post for another time.  One major project at a time!

The Breakfast Nook, take 2

OK, so here is my my breakfast nook you may remember from this post.  It's nice.  It's functional.  It is totally lacking in character!  I've finally located the other curtain valance for the window over the sink - yep, the one no one has seen because I'm embaressed to admit I've had one sill panel on the rod for almost as long as we've lived here - and I'm ready to get The Builder started on an easy project that won't tax his back, which is feeling much better, and I'd like it to stay that way so he can tackle that laundry room this month

So I found this tutorial over at Under The Table and Dreaming and I knew it was exactly what I needed for my bay window.  If you've ever priced curtain rods for a bay window, they're insanely expensive.  But thankfully there are clever people out there who figure these things out, and I'm an avid blog reader who is always looking for new ideas, so it was a perfect fit!

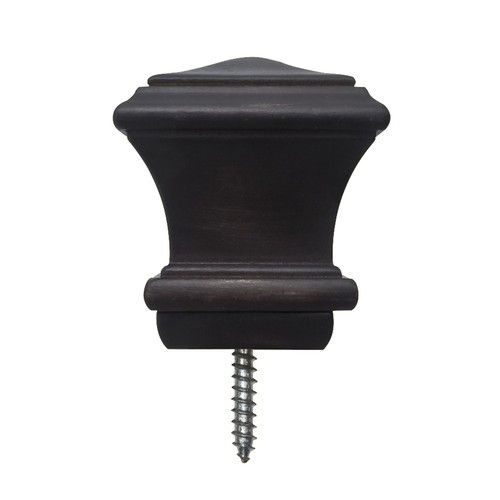
Finial from Lowes
I'm not sure if I'm going to buy pre-made finials for the ends of the rods like I found here at Lowe's, or if I want to make a set life she did in her blog.  But I still have time to think about that.  So my project list includes electrical conduit, matte finish spray paint, and curtain rod holders.  My total budget estimate is:
  • $1.69 - 1/2" x 10 Ft. Electrical Metallic Tube EMT Conduit (what it would cost if I had to buy it - but The Builder can get a few pieces from the electricians on his job for free AND have them crimp it based on the template - how much do I love The Builder?!)
  • $4.97 - Metal Curtain Rod Bracket (x 3)
  • $5 - Krylon paint (which I already own, so no cost to me)
  • $10 pair finial's from Lowes
So for $15 I could have my window ready for curtains!!  Are you wondering how much bay window curtains actually run?  Amazon has a nice set for $54...I think I'll pas, even with my Prime membership... :)

Another Weekend Project

I know, it's Tuesday, but here I am contemplating a weekend project.  That's because it's a craft project, and a Valentine's Day one at that.  You may have realized already that Valentine's Day is a week from today but that hasn't stopped me from wanting a few more things to decorate my house with for the holiday.  And I have to confess:  I've never really decorated for any holiday other than Christmas.  Oh, I have a few token decorations for my dining room, because I like table runners.  And just one decoration in a room for a holiday looks silly to me.  But aside from a few miscellaneous things?  Nope, no real holiday decoration.

For some reason, this year is different.  Don't ask me why.  Maybe it's all the incredibly talented bloggers that I avidly follow, that have inspired me.  All I know is, I have to make this project before the weekend is up!!

Didn't she do an amazing job?!  I'm always SO impressed with the creativity of other, and even more important, how willing bloggers are to share their amazing ideas!  So make sure to check out My Sister's Suitcase for her tutorial on this awesome project.

Weekend Crafting

These apothecary jars sit in the corner of my kitchen.  You may remember seeing them at Christmas time with my black nutcrackers.  They're a fun way to update my kitchen for whatever holiday it is, without having to re-vamp the entire look of the kitchen for the holiday.  I found the pink, red, and white candy corn a couple of years ago, and so I just reuse it each year (and my kids are very aware that it is no longer edible candy!).  I don't remember what I had in the large apothecary jar when we still lived in CA, the last year I decorated my kitchen - the last house we lived in, the kitchen was way to small to have my jars out, so I'm enjoying having them out again!  I was at Michael's this week, and they had some red and pink hearts that I think were meant to go on a valentine's tree.  I really don't have a place to put a tree but I thought they would make great fillers for my apothecary jar.  Now I just need to find the lid to that jar.  It's still in a packing box somewhere - which is not terribly surprising when you consider I still haven't opened all the boxes from when we moved from CA.  And not because I don't really "need" my things.  It's been an issue of space, since we downsized from 2800 sq ft. to 1800 sq ft...but it's all good!

This is the wreath I made for my front door.  I'm sure you've seen this many times on other blogs.  I followed the tutorial on Remodelaholic and I really like how it turned out!  My husband wasn't sure about the bright colors ("It's for Valentine's Day - shouldn't it be, oh I don't know, pink and red?!") but I wanted something a little outside the box.  Which is actually surprising because red is usually one of my favorite colors to decorate with.  I don't know, this color combo just called my name, and so I went with it!  And it could work for Easter, but I won't do that.  I'm enjoying changing things out for each holiday.

I have one more item I worked on this weekend, but it needs a coat of lacquer so I'm going to hold off until later this week when it's actually done!

The Breakfast Nook

A couple of weeks ago, we finally made it down to Garden Ridge to get the bistro set I've been wanting since we moved in.  My kitchen is goo sized, and it has this nice bay window looking into the front yard (another project, since it was nothing but weeds for a lawn when we moved in) and I could see myself sitting there with my coffee and iPad in the morning (I love getting my paper on my iPad, much better than newspaper spread all over - but I digress..).  Now that I have the bistro set, I'm ready to finish up the kitchen.  So here is the starting point:

So, really, not  a bad starting point.  You can see my black wrought iron roosters that frame each side of the bay window.  And the light fixture works for me (which is good since it's a rental house and changing the fixtures isn't very cost effective!).  I just added the pitcher of flowers on the table.  I definitely need to get more stems, as they look fairly anorexic right now, but I love the pop of red from the poppies, and it's a color I intend to continue on as the accent in the kitchen.

If you are sitting at the bistro table looking away from the bay window, you've got a ring side seat for my L shaped kitchen.  Of which there is absolutely nothing to see right now.  Bland counter tops, black and stainless appliances (actually, I like that a lot!), white cabinets, and a nice window in front of the sink that has potential, but is currently...bland. And please ignore the weird halo in the center of the photo's.  I cleaned my lens before I took and I clearly missed a spot or something!  And the walls don't have this much yellow in them.  Think about the color of foam on top of a mocha at Starbucks.  That's about the color of my kitchen. But it doesn't photograph well, so it looks more beige-ish.  

OK, things I plan to change.  First, curtain panels in the bay window.  While the white wooden blinds are nice, they lend to the overall bland feel of the kitchen.  Maybe if they were plantation shutters, I'd feel differently.  Maybe.  Probably not!  And I don't want a heavy drapery. That's actually a small space with the bistro set there and I don't want it to make that side of the room off balanced.  So just some simple panels.  I'm thinking one on each end and one in between the each window.  

Habitat Cherry
Piastrelle Vapor
I'd also like to re-upholster the seats.  Microfiber is practical, but the tan color doesn't work for me.  I'm still contemplating fabric choices.  I'm going with a French Country feel for the kitchen, to keep it from looking to modern (essentially the kitchen is black and white with some stainless steel accents - and modern is not the feel I want for my kitchen).  I sort of like this print, Habitat Cherry.  While the colors might work, I'm afraid it doesn't have quite the French Country feel I'm looking for.  Although at $7.69 a yard, it's certainly cost effective!  I think the second one, Piastrelle Vapor, might work too, although I'm worried about the white background.  It's $11.19 a yard for this one, and I only need one yard for each chair, so still affordable in my book.  And I really, really love So Silhouette Tuxedo.  I'm just afraid it would be straying back to the modern look I'm trying to avoid.  Still, I have to say that it's my favorite of the three choices.  There are a couple of other options I might consider, but I think I'm going to start with swatches so I can see what it's actually going to look like in my room.  Technically, none of them have the actual French Country look, so I'm still looking for other options (that won't cost $30-$40  a yard!)

And a rug?  Maybe?  I'm not sure I want to have to worry about vacuuming a rug in the kitchen.

As always, more to come!


So Silhouette


MIA...

Not really!  One thing I don't often mention is that I have an actual job that I am required to be at Monday - Friday (and I really like my job, so this isn't a bad thing).  Between So I'm here in spirit during the week.

I got a lot done during the long holiday weekend two weeks ago, but I didn't get around to posting it.  My fireplace is finally looking put together.  I decided the mantel needed some further updating.  What I really need is my hubby builder to get hot on the media unit so I can get rid of all the junk on my mantel!  I really like the change from the hurricane lamp, which was finished in a brushed bronze, the etched glass vase.  I think the addition of the new accessories helps too.  What do you think so far?

My other project was the lanterns.  I did end up buying them because I seriously doubt I would have been able to make anything that was even as close to being as perfect.  And the price was right!!  I'm having a hard time getting them to photograph correctly.  They keep coming out a grey color, which couldn't be further from the color.  They're a pale aqua, with a hint of a gold undercoat.  And while gold isn't really a color that matches my living room, it's so light, you almost miss it, so I'm good with that.  I like how the soft color in them frames the artwork.  I've only got a few accessories on the now white shelf, so that still looks more than a little bare.  I love the owl!  I love unexpected accessories, and I think an owl next to a beach (what the print looks like to me) is unexpected, lol....


Inspiration Shade
Then there's the lamp.  This is a lamp that I got at a great clearance price at Wally-World last summer for my living room.  Am I the only person who feels the need to spruce up the place when the in-laws are scheduled for a visit?!  But I digress...At the time, it was a great fit to my formal living room.  Now, it's way too dark.  After seeing some of the great re-finishes from fellow bloggers and Pinterest, I knew that this lamp could be re-done to better match my new color palette.  I started with a basic grey primer, which is what I had on hand.I did two coats only because I needed it to be kid friendly, but one coat seemed like it would have worked.  Then it was time to make some paint choices.  Did I want color?  Did I want a shiny finish or a matte finish?  And what about the rather funky shape of the shade?  Should I used a patterned fabric or stick with solid?  I started with my inspiration piece, this lamp here:  Now the size is MUCH smaller, so this particular lamp never would have worked in my room.  But I love the lamp shade.  I decided a ruffle of some sort might be much easier to add rather than completely remaking the existing shade.  But since it's a shade, I knew I had to have a finished edge to avoid little pieces of string everywhere. This was a lot more work, but I think it was really worth it in the end.  I finally settled on a hammered metal finish, and I really like the base.  Now to finish that ridiculous shade....


I found this great shelf idea from Shanty 2 Chic, who is one of my favorite DIY blogger's!  I've been contemplating shelves like this in several of my rooms.  But the short ones, even on sale, tend to start at $20 and up. Not horrible, but in some rooms, I need a much longer shelf (and as it was pointed out, the actual shelf at Pottery Barn is $85!!). Now I can have my hubby builder customize them to the size I need! The plan's come from Anna White's web site (yep, same one that I got the amazing nightstand plans from - such a talented woman!!) so I knew they'd work well.  I bought my daughter a great canvas print for her room, and I knew I wanted to put it on a ledge shelf.  Looking at Anna's site, I see that some people even attached molding to give a more formal look as well (LOVE that idea!).

I was busy updating the picture frames as well.  My wooden frames just didn't work well with this lighter color palette, so they had to be updated.  I painted them all white the first go around, which was...OK.  But I wanted better than OK!  So these will be updated to aqua and silver very soon!

Stay tuned for more updates!

Weekend Updates

This weekend, I'm going to go out and start looking for some pieces to accessorize my living room.  I have some great inspirational ideas from the new Pier 1 catalog I got in the mail.  I really wish their prices were more family friendly, but since they're not, I'm going to re-create!  Here are some of the pieces I'm using for inspiration:

Ruffle Pillow

Turquoise & Green Ceramic Vases

Allover Leaves

Aqua Ceramic Vases
I think the best thing about these pieces, is that I already have pillows that I bought in the fall.  They're  VERY similar to the Allover Leaves pillow!  It looks like the inspiration pillow has some beaded detail my pillows don't have, but I think I could easily update that by hand stitching some on while I watch football this weekend (Go TEXANS!!!!).  I'm going to check out Pier 1 Saturday morning to get a better idea.  I like the ruffle pillow as well, but there are a plethora of instructions on the web to create one so the cost of this at $30 a pillow is a bit excessive.  I'm thinking dupioni would be really nice for the ruffle...

Then there's the Turquoise and Green vases. Love the colors.  LOVE THEM.  I think they might be too dark for my room though.  I'm trying to go with a lighter color palette to balance out the room, since my solid chocolate brown sofa is really too large for the overall scale (and getting rid of it is simply not an option).  I'm going to see if I can find some metallic papers in a lighter tone and maybe mod podge them on to a glass vase.  I'll probably pick up a plain glass one at the Dollar Tree this weekend if I can find the right paper to test it out, then I can search some discount and thrift stores for some ones if I like it.

Ah, that leaves us with the Aqua Ceramic Vases.  I'm not remotely interested in the egg shaped one.  But the tall one with what looks like a Dahlia?  Oh so pretty!!!  I could see it paired with a pretty frame and maybe a candle in mercury glass.  

Now there are a couple of pieces I may invest in.  New sconces are the top of my list. I have a beautiful set that I spent too much on from Party Lite that I got several years ago, with a matching hurricane lamp.  But my changing to a lighter color palette, they don't coordinate well with my pillows.  However, I think I'll be able to move them into my master bedroom and make them work, so I don't mind buying new pieces for the family room.  While I'm open to re-doing something that may be a bargain, I'm leaning strongly towards just purchasing these pieces:

Jeweled Lantern

Blue Crackle MOP Mirror

Blue Sea Glass Lamp
The Blue Sea Glass lamp is on sale right now.  $40 for what I think is the perfect lamp is a great deal (I say think because I need to check the size in person - picture can be misleading!).  I like clean and simple lines in a lamp and the color is perfect for me.  The Jeweled lanterns have more of the aqua tones in them in the catalog, so I want to look at these too. The 13" lanterns are only $15 each, and I don't think I could find anything that I would like better for less, so I may need to purchase two of them.  Also, I've got a coupon for $10 off a $50 purchase, so I could get all three pieces for $60.  That's cost effective in my book!

The mirror.  Ahh the mirror.  It is NOT cost effective.  $130 on sale.  For a mirror.  Ugh.  I have a couple of options here though.  I could have my husband cut me a mirror to the size I want (how much do I love having a Glazier for a husband who can get his hands on mirror for free!?!!).  Then I can either buy a frame and finish it myself (lots of options for finishing it!) or find a mirror at a thrift store and update to what will work for my room.  So that will be part of  my weekend shopping as well!

Master Bedroom Take 2

Here are some more quick updates.  I'm not 100% happy with the chest of drawers yet.  It looks very...bare.  And while I tend to think less is more, in this case, it just isn't.  I added my favorite vase back in, and my 3-wick candle, but it's not right.  I do really like how the artwork looks.  Anyone who knows me knows I have a thing with "E"s.  The floral print represents me, the guitar is my husband.  He really loved these pieces when I brought them home.  I've never put up guitar artwork in our master bedroom before.  I'd never really thought about it before, but when I found this one, it matched the color scheme in our bedroom so well, I knew I had to make it work.  But that chest of drawers. UGH!  I need to give that some more thought.
Our master bath.  I wasn't sure what direction to take with the master bath.  There is no door separating the bedroom from the bathroom, and the colors carry through.  I like that.  However my bedroom furniture is all black, and as you can see, the vanity's are white.  I wanted to put a little more continuity between the two rooms.  I found these tiles at Garden Ridge.  The E was clearance!!  $1.99 for the E.  The other tiles were $3.99 each.  I debated back and forth about putting them a little lower on the wall.  However, that's my jewelry box in the center, and I didn't want the lid, which flips up, hitting the tiles constantly.  So I opted to place them just above where it opens to.  I picked an "M" out for my husband, and again, he really liked it.   While I have always had a thing about E's (we have them scattered about the house like the hidden Mickey's at Disneyland!!) the M has never been a big deal to him.  But he really like this, so I'm happy that he's happy!
Can you stand one more picture of my beautiful nightstands?!  Just for humor's sake, I took photo's of what the sides of our bed looked like while he was finishing up the nightstands last weekend.  The photo to the far left is my side of the bed (yep, I sleep on the right, but just realized I put the photo on the left...sorry).  Notice my leaning box, very evident with the lamp that looks like it's about to fall off.  And where I charge my iPad at night (the phone rests on the box at night to be charge too).  The inside of my box is where I store my magazines.  I'm going to pick up some baskets soon, so they'll be stored on that bottom shelf of the nightstand, easily accessible!   The other picture is my husband's side of the bed.  Yikes!!!  There is quite the assortment of miscellaneous junk.  Now I won't lie:  the box that you see is now tucked next to my TV (which you'll notice I'm not posting any photo's of - that wall is completely undecorated and has 'stuff' that shouldn't be there, taking up space...like Christmas wrapping paper, ugh!) so there's still a little more to do in here.  But my amazing hubby is now going to build a console table for our TV, which will allow me to house my small collection of DVD's (currently stacked on our makeshift TV stand) and our TV components neatly and more importantly, out of sight!!  But the console and that wall with be another post altogether!

The Reveal!

My master bedroom.  I'm SO pleased with how it's turning out!!  These were quite a bit of work, and not a project for beginners, but I love how the nightstands turned out.  Of course, it didn't actually start out that way.  Do you see the photo of the sad, weathered looking nightstand?  That's what the ebony stain looked like.  Old weathered wood.  That's great if you have a rustic themed bedroom.  But I don't. And I didn't want that look. I knew I wanted the wood grain to show, but I wanted it to match my dresser, which is black.  With the wood grain showing.  So closed my eyes, bought some black spray paint, and hoped for the best.  And it worked!  You can see the step by step process in these photo's.  My husband is AMAZING and worked all weekend to help me get these finished up.  I say we.  He measured, cut, and built.  I sanded.  And I found the pattern.  So that should count, right?!
Now here are some shots from start to finish:

  • The wood and the tools
  • The unfinished product
  • The wrong finish
  • Perfection!